LivelyCart 3 PRO
Setup Guide
Setup Guide
INSTALLATION
Files & Directories in Download Package
In the downloaded Zip file, you will find below files & folders:
- Source – a folder containing all the required files you need to deploy on to the server.
- cred.txt - a file containing admin email & password which you can change later.
- livelycart_3.sql - a file containing database structure & initial data to get started.
- Setup-Guide.pdf – an Instruction manual for setup store (This Document).
- Quick-Start-Guide.pdf - Basic Store introduction.
- Technical-Guide.pdf – Technical information may help for further customizations.
- Upgrade-Guides – Contains the instructions & SQL files for updating from the previous versions.
- Create a Database using your choice of software, for the demonstration purposes I used phpmyadmin if you are doing it on Shared Hosting database creation method may vary. You may also need to create & assign user to it.
- Now you need to copy all the source folder files to your web server where you want it to access / host.
Installation Wizards Steps
- If you done above steps carefully, for example If you placed this in root of your domain, then you should access following page to http://yourdomain.com/install.php.
- If everything is good you show see the below page.
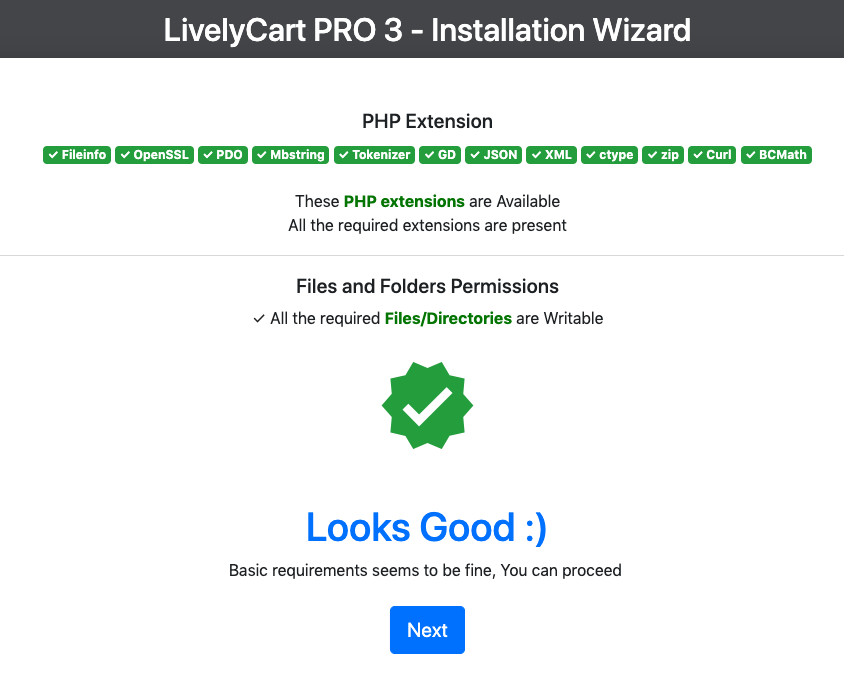
Click Next to setup Database connection information.
If it shows any errors please fix the same. If not then click on Next button would take you to Database Connection Information Form, fill the required information regarding the database connection.

It will update .env.php file with database connection information. If database connection succeed it will create database structure & feed any mock data required for the application.
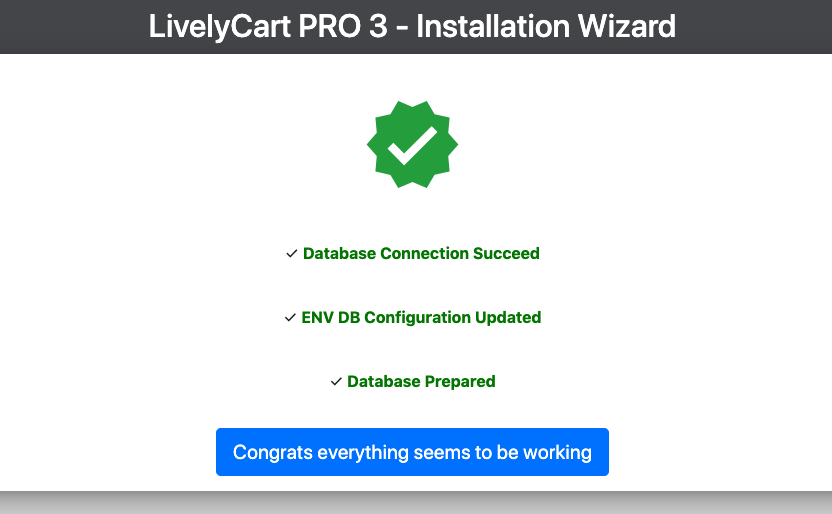
If it goes well you should see above page, now you need to click on Congrats every… button. It will take you to following screen
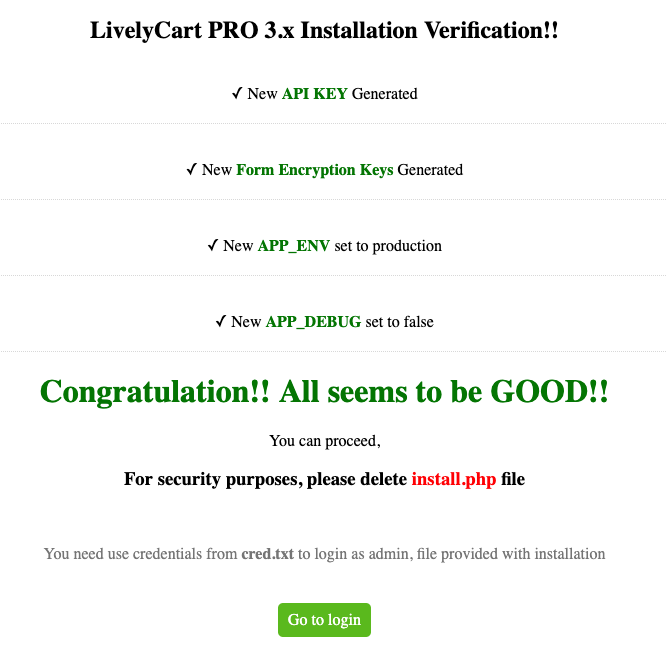
It seems all right just use credentials from creds.txt & login.
Don’t forgot to delete install.php & __install folder ones everything is ready.
Login
If you done above steps carefully and for example If you placed this in root of your domain, then you should access following page by pointing your browsers address bar to http://yourdomain.com.
Now you need to configure a store as you required. For that you need to go to http://yourdomain.com/user/login or click on login menu item from top navigation bar.
Now you will come to login page of the site. For the First time you need to use following credentials to get logged in.
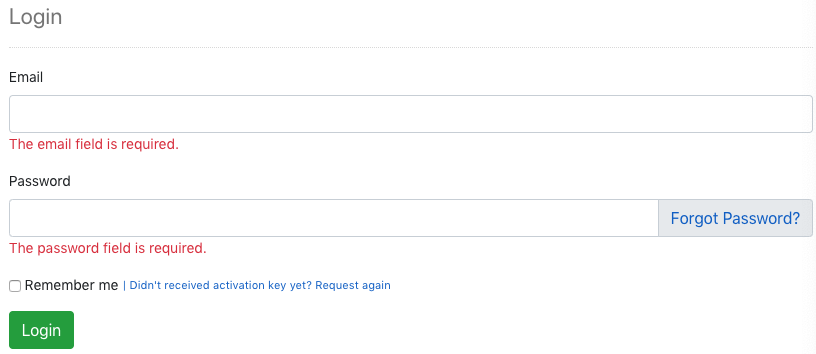
Email: [email protected]
Password: firstadmin123
Once you get successfully logged in, please change your email address & Password.
Now you should see Dashboard with various statistics. Menu at sidebar allows you to manage your store as per the needs.
First of all, you need to Configure you can do that using sidebar menu item called General settings.
GENERAL SETTINGS
You can setup & update the all product related content as per your needs from this By clicking on General Settings menu from the sidebar, you will be able to configure following items also shown in the screenshot.
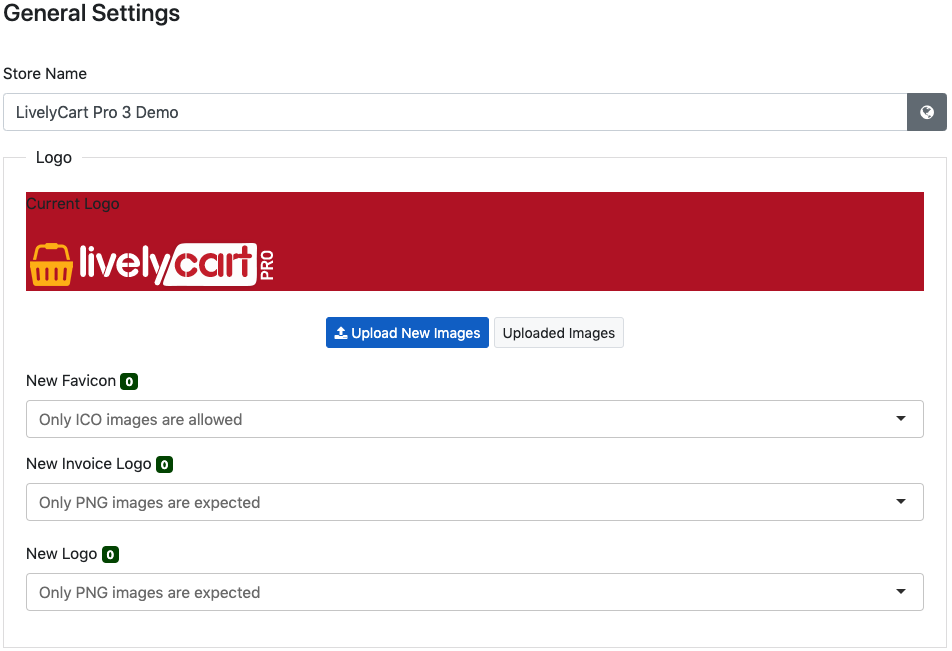
- Store Name – It will be used throughout the store as your Store name.
- Logo
- New Favicon - You can upload your new favicon using button called Upload New Images once you upload new images you can select it from New Favicon.
Please note: Only ICO files are allowed for favicon images. - New Invoice Logo - You can upload your new invoice logo using button called Upload New Images once you upload new images you can select it from New Invoice Logo.
Please note: Only PNG files are allowed for logo images. - Current logo – Displays your current logo.
- New Logo – you can upload your new logo using button called Upload New Images once you upload new images you can select it from New Logo dropdown.
Please note: Only PNG files are allowed for logo images.
- New Favicon - You can upload your new favicon using button called Upload New Images once you upload new images you can select it from New Favicon.
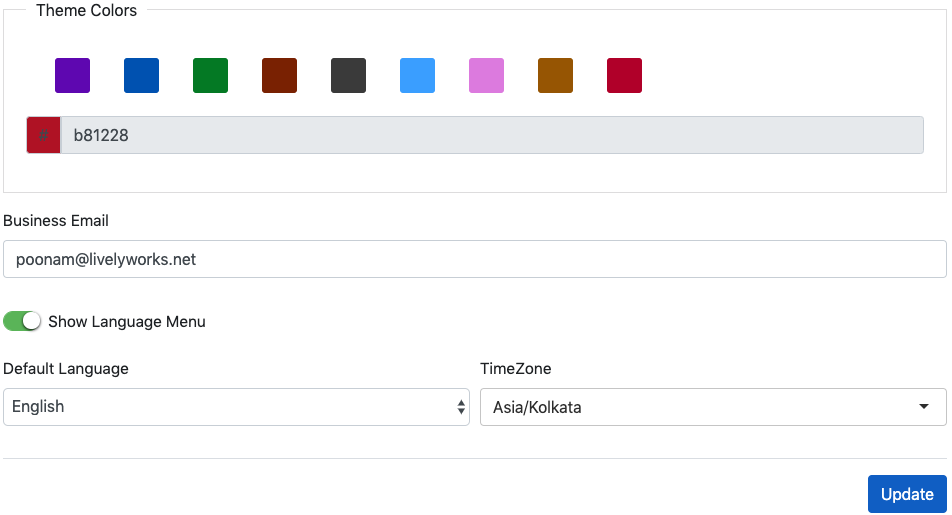
- Theme Colors - You can change header background color using the theme colors to suite your logo or to your choice. You can see the preview of this at current logo. This theme color also applicable to the manage side header.
- Business Email – This email will be used for various purposes like from in send order emails & you will be able to receive emails at this address.
- Show Language Menu – You can show hide language change menu at top menu & right corner.
- Default Language – You can choose default language from the available list. User will be able to change the language from the available list as per the preference if the Language menu available.
- TimeZone – You need to select your own time zone as needed.
On click on Update button your settings will be saved. Screenshot of General settings given above.
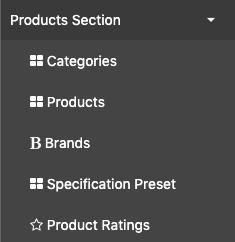
PRODUCTS SECTION
You can setup & update the all product related content as per your needs from this section like Categories, Brands, Specification Preset, Product ratings & Products also.
Under this, you will find separate sections to manage the above product related needs to manage products in LivelyCart Pro as per your choice. All these sections distributed under various headings, we will see those sections one by one.
Manage Categories
Using this link at Products Section, you will go to section where you can manage categories. Clicking on each category will take you to its children Categories.
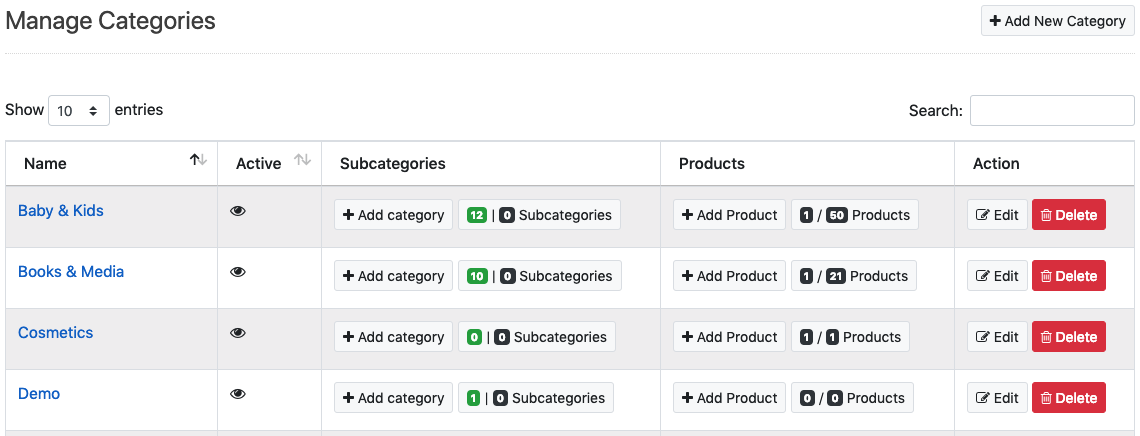
Add New Category
You can add new sub category using ![]() button.
button.
On each row of category have some button & works as given below.
 will open Add new category dialog with Parent Category preselected of Row Category. It simply means you can add sub category in to it.
- Click on
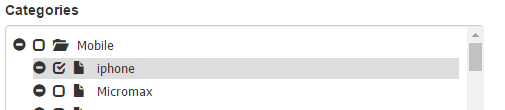
 will take you the tabs of children categories & products and Categories tab as selected. The count in Green Shows Active & red color shows Inactive subcategories under this category.
 - Click on
 will take you to page where you will be able to add product under this category.
 - Click on
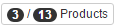 will take you the children of this product categories & products tab with Products tab selected. First count in black (e.g. 3) is showing direct child products in the category & other count is showing all the nested products count under category.
 - You can edit or delete the category using
- While deleting the category system will ask you for the password to delete it.
Please Note: All the categories & products will be deleted which as well are under deleting category. Products under the multiple categories & those categories are not under deleting category will not delete.
Add New Category
To add new category, you need to click on ![]() at top right will open dialog for add new category with following options.
at top right will open dialog for add new category with following options.
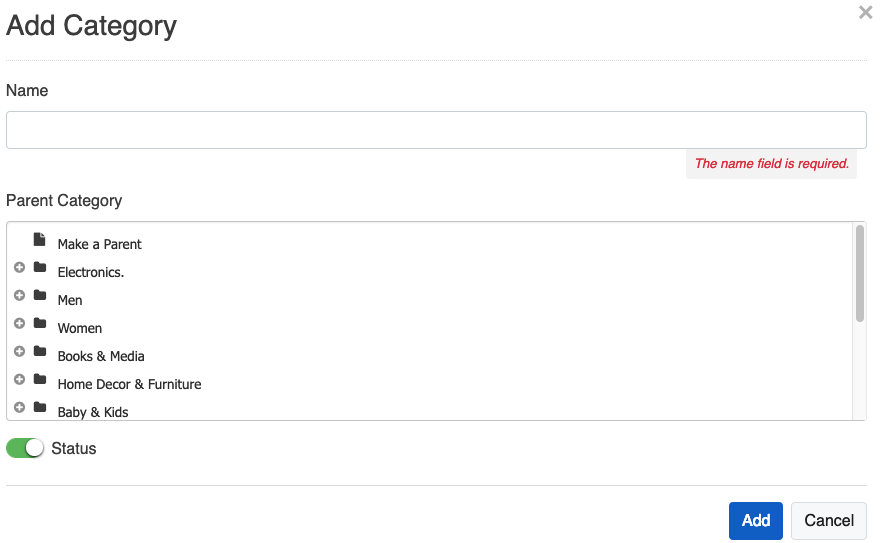
- Name – It will be category name.
- Parent Category – You can select parent for this category if you want it to nest in another category.
- Status – You can enable or disable category using Status button. If the category status is disabled, all the products & categories under this category will be disabled and won’t available for purchase.
- Add - Click on the Add button will save this category.
Manage Products
Click on Products menu under Product section will show you the list of the products.
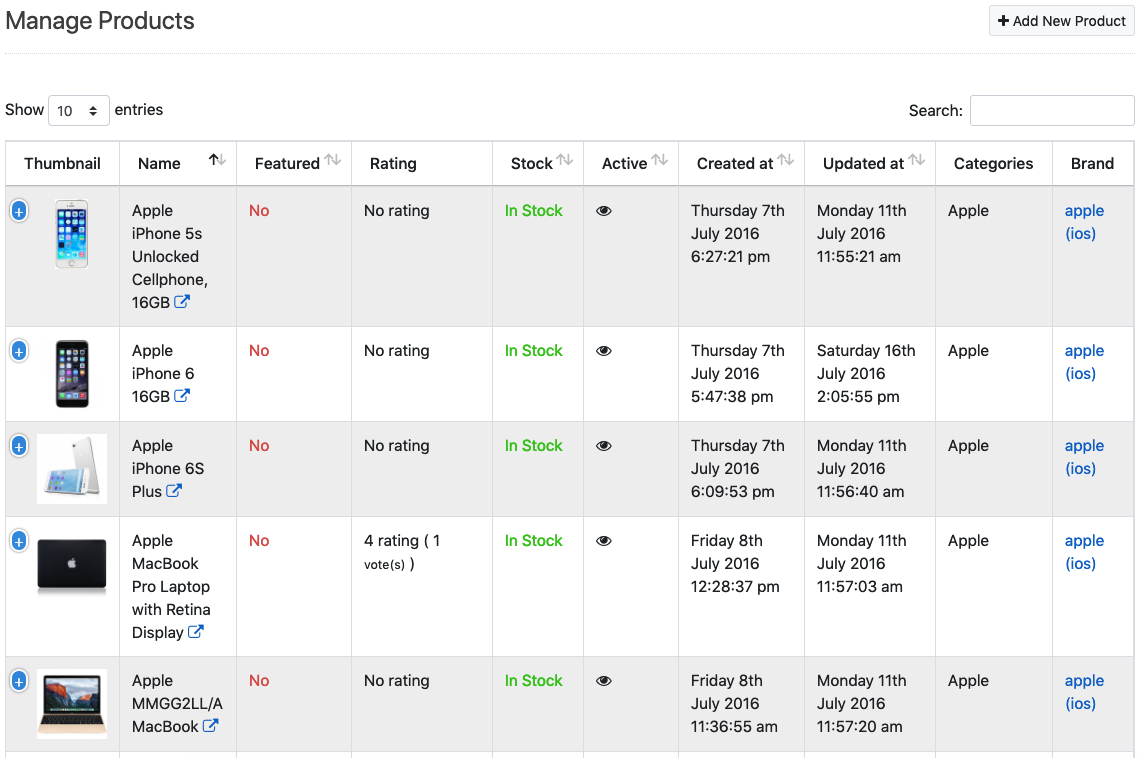
Each rows have some buttons & works as below:
 Click on the product name will open product details in new page.
 by using these buttons, you can Edit or Delete products.
Add New Product
Once you reach on add new product page by click button ![]()
Following page will open with form for adding product details as follows:
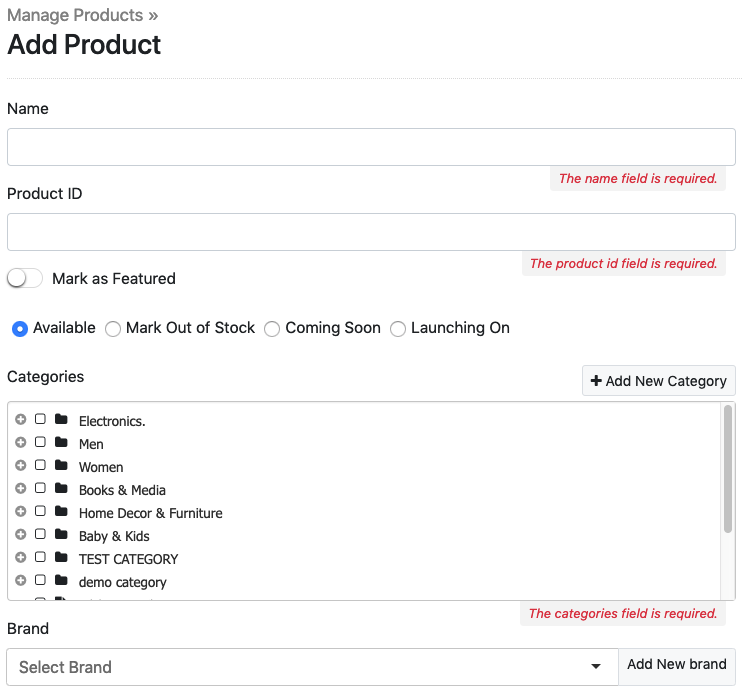
- Name – Product Name
- Product ID - A unique alphanumeric product identifier.
- Mark as Featured – If enabled product will be listed in Featured products
- Mark Out of Stock – If select this product gets marked as Out of Stock & will not show in the list or will show with the Out of Stock label & Customer won’t able to purchase this.
- Coming Soon - If select this product gets marked as Coming Soon & will show with the Coming Soon label & Customer won’t able to purchase this.
- Launching On - If select this product gets marked as Launching On(With date) & will show with the Launching On(with date) label & Customer won’t able to purchase this up to the launching date.
- Available - If select this product gets available & customer can purchase it. While adding new product its default status will be the Available.
- Categories – You can select multiple categories for this product using checkboxes.
- Brand – Select Brand for the product, if not available you can add using
 button.
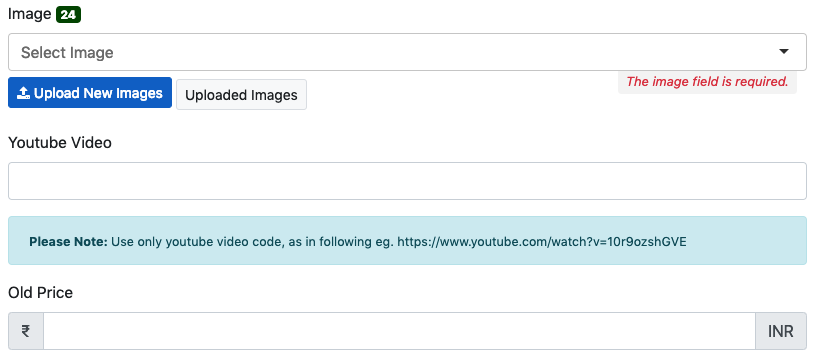
 - Image – You can select thumbnail image for your product. If not available, you can upload new one using
 or can manage the list of uploaded images using
  .
. - YouTube Video – You can add video code here. Which will be used to show YouTube video on product details page.
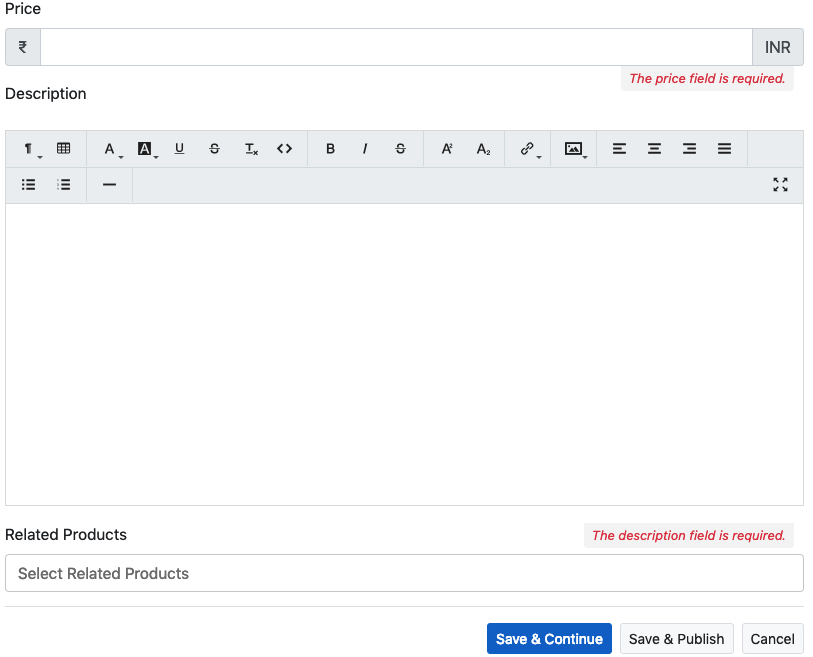
- Old Price – You can give old price which will not effective but will shows this price as strike out.
- Price – You need to give product price.
- Description – You can add your Product details here.
- Related Products – You can select multiple related products.
Once you done with this information you can click on![]() this will save product as Inactive status, so the product won’t available for public & you will be redirected to edit page of this product from where you can edit this product, options & images etc.
this will save product as Inactive status, so the product won’t available for public & you will be redirected to edit page of this product from where you can edit this product, options & images etc.
Once you done with the product Options images you need make this product active, so it can available publicly using top right button
![]()
OR
If you clicked on ![]() button it will save product to database as Active status, so the project will available for public instantly.
button it will save product to database as Active status, so the project will available for public instantly.
An Additional Information like Product options, Images Specifications, Ratings, FAQs Awaiting User & SEO Meta.
Once you get redirect you can edit these using menu in sidebar for Options, Images, Specifications, Ratings, FAQs, Awaiting Users & SEO Meta.
Images
You can manage additional images for the product using Images tab. Further these images will be displayed using slider on product details page.
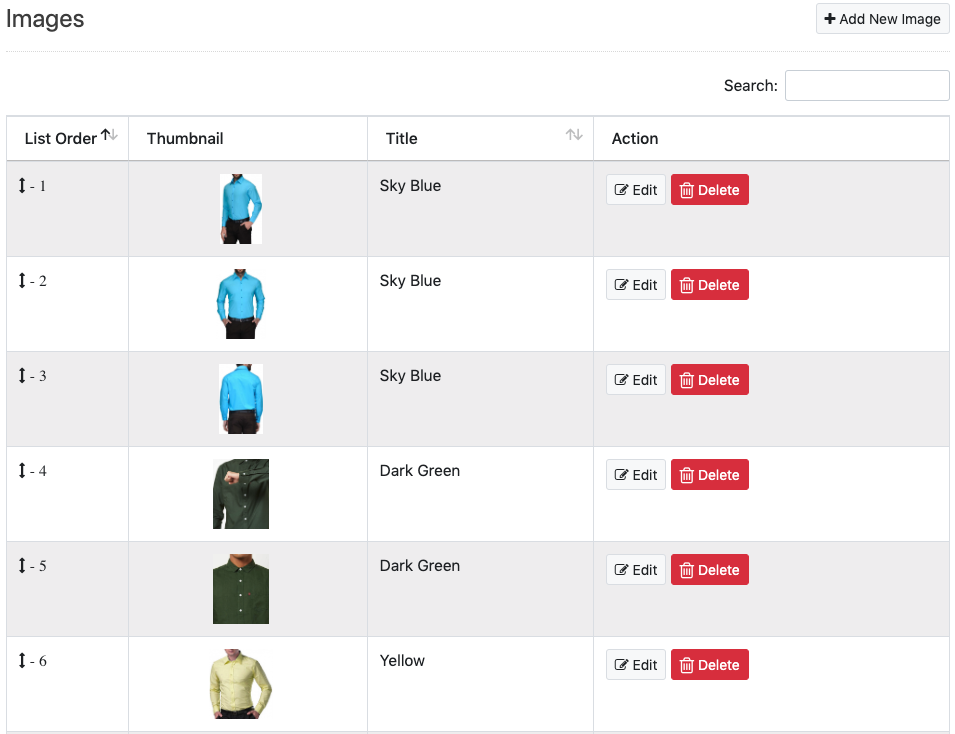
Add New Image
You can add new Image using butt![]() on at top right. Clicking on it will open following dialog with form fields.
on at top right. Clicking on it will open following dialog with form fields.
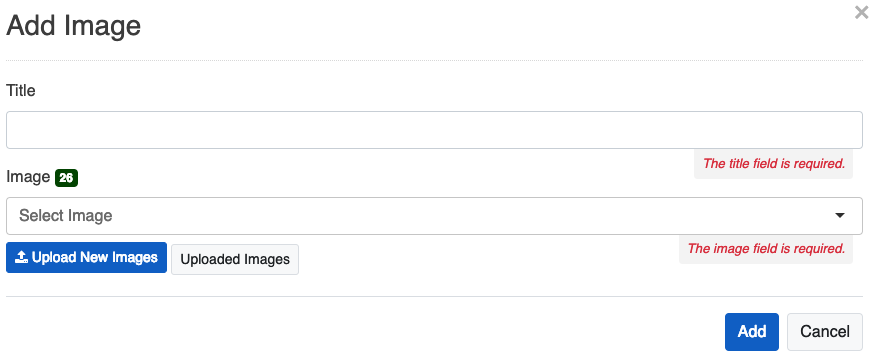
- Title – Add a title to image.
- Image – You can choose from the uploaded image or can upload new image using Upload New Images button, you can also manage those images using button called uploaded images.
Each added image will show in the list & each one having buttons for Title Edit & Delete image.
Options
You can have multiple product options including Paid options. These options create Dropdown menu for product to choose option from it. You need to go to Options tab to add product options. Each option have some buttons & works as described below.
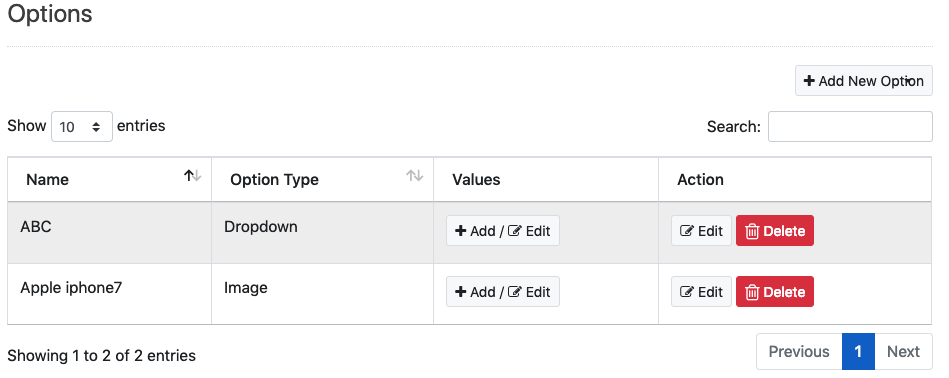
- Click on
 you can add/edit option values.
 - Click on
 button will allow you to edit product option name.
 - Click on
 will delete the product option.
Add New Option
You can easily Add New Product Option, by clicking on ![]() button will show the following three options as Dropdown Options, Image Option & Radio Options.
button will show the following three options as Dropdown Options, Image Option & Radio Options.
- Dropdown Options / Radio Options -
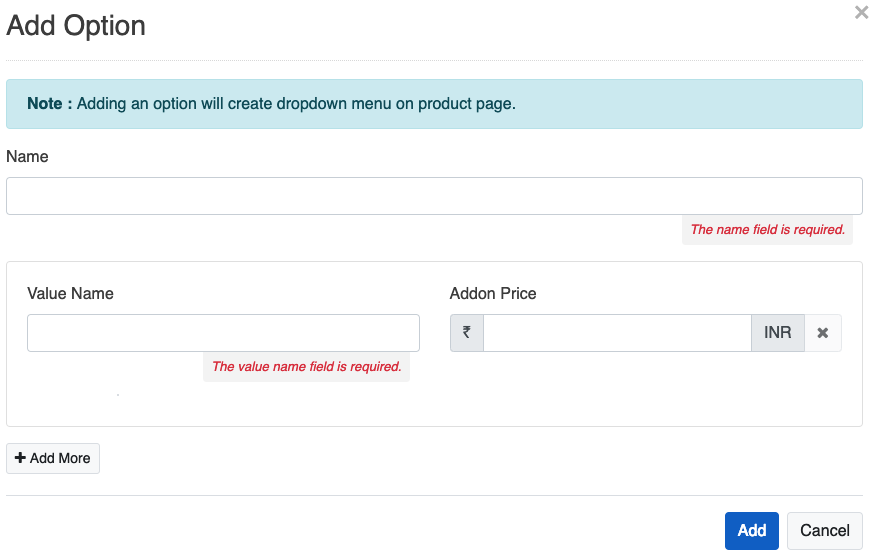
- Name - It will be option dropdown/radio label.
- Value Name – You can set the Value Name from here for Dropdown/Radio option.
- Addon Price - You can also set Add-on Price for this option value.
- Using
 button you can add N numbers of value options for dropdown.
 - Add - Click on the Add button will save the options.
- Image Options –
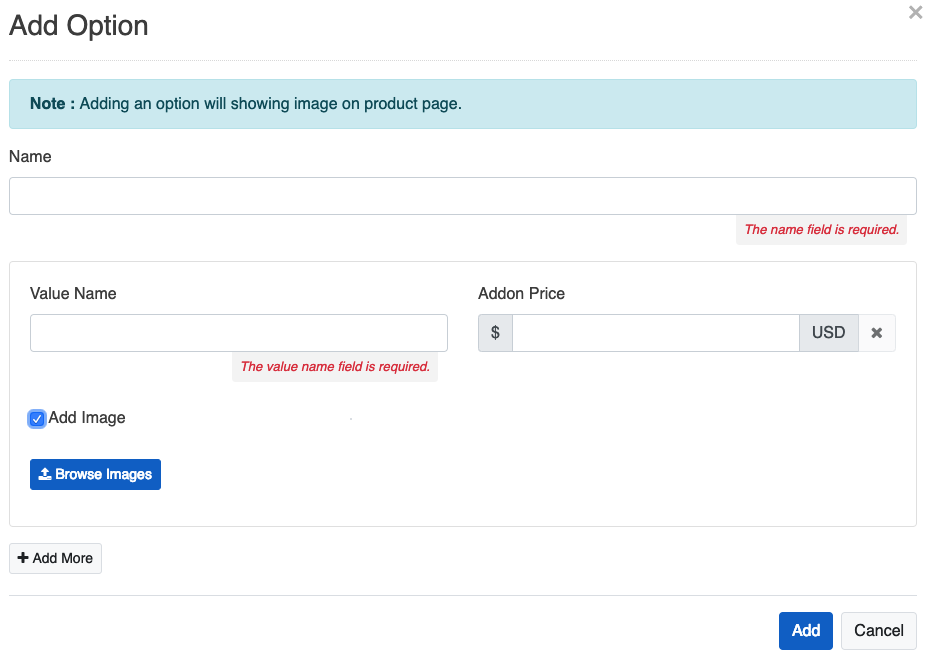
- Name - It will be option image label.
- Value Name – You can set the Value Name from here for image option.
- Addon Price - You can also set Add-on Price for this option value.
- Using
 button you can add N numbers of value options for images.
 - Add - Click on the Add button will save the options.
Specifications
You can manage product specifications using Specifications menu at sidebar these specifications will displayed on product details page in Key-Value format.
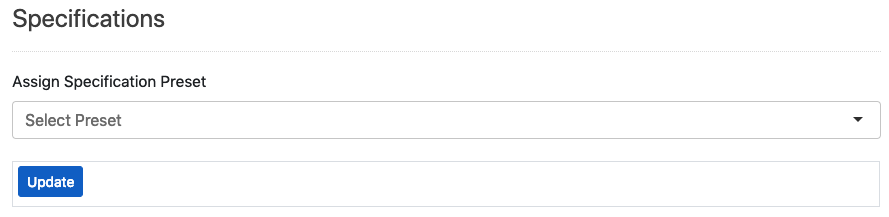
- Assign Specification Preset – You can select specification preset from here for your product & can set the multiple specification value for every all option of the selected preset.
- Add New Specification Values – Using this you can add the multiple specification value.
- Added specifications shows like follows.
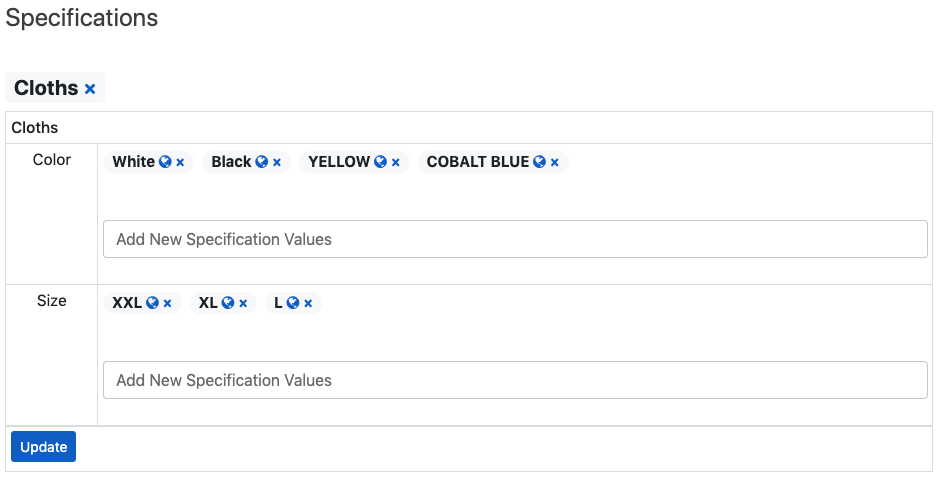
- Update - Click on the Update button will save the specification.
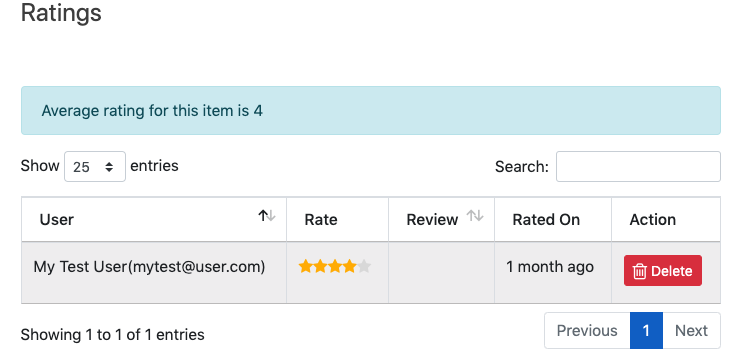
Ratings
You can manage product ratings using Ratings, it will be displayed on product details page in Key-Value format.
FAQs
You can manage product FAQs using FAQs, it will displayed on product details page with the answers.
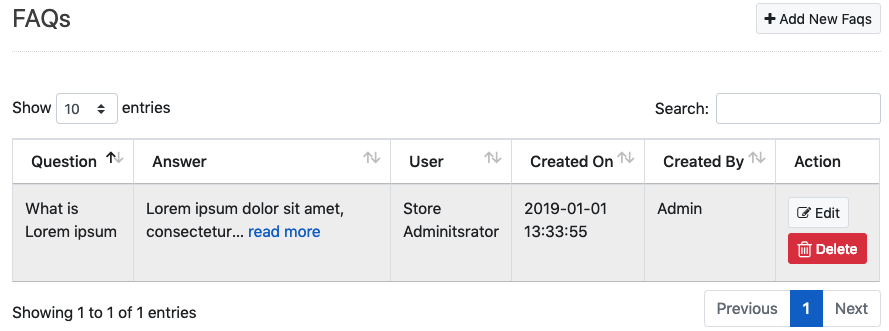
Add new FAQs
To add new FAQs, you need to click on ![]() button which will open dialog as below. This FAQs will be the product level.
button which will open dialog as below. This FAQs will be the product level.
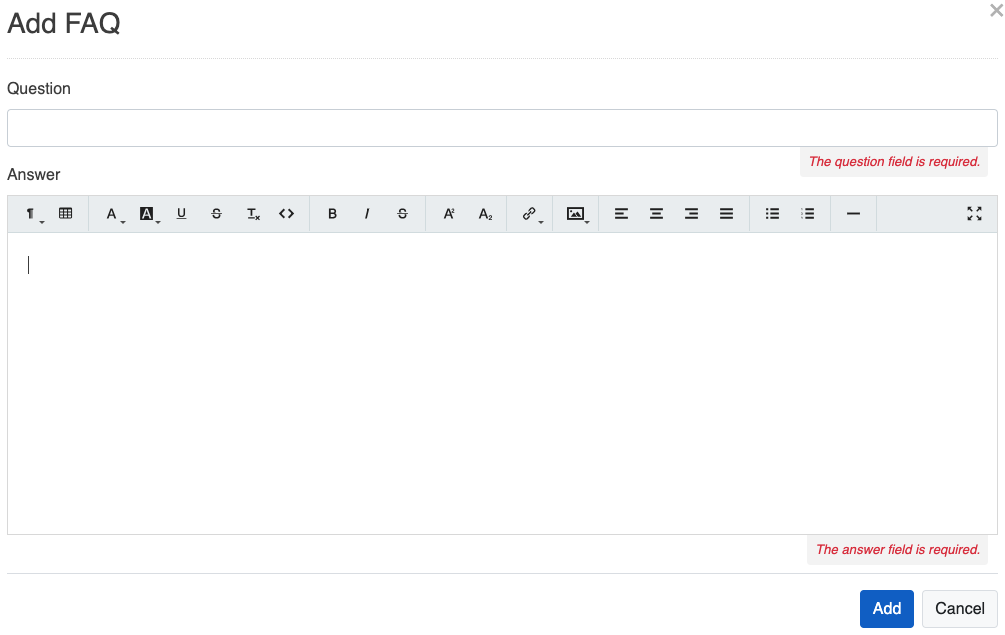
- Question – You can add the question from here to show in FAQs.
- Answer – You can add the answer of the question from here to show in FAQs.
- Add – By click on this button you can add the new FAQ.
Waiting List
You can manage the awaiting users using Manage awaiting Users.
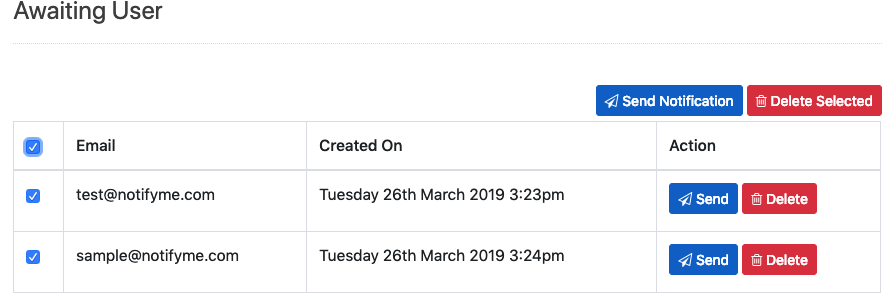
- Send Notification – Using this button you can send the email notification to the multiple selected users at the one click.
- Delete Selected - Using this button you can delete the multiple selected users at the one click.
- Send – By click on this button you can send the email to only one awaiting user to which this button is belongs.
- Delete - By click on this button you can delete the awaiting user to which this button is belongs.
SEO Meta
You can manage the SEO Meta for the product using this menu. This helps you in search the products by keywords.
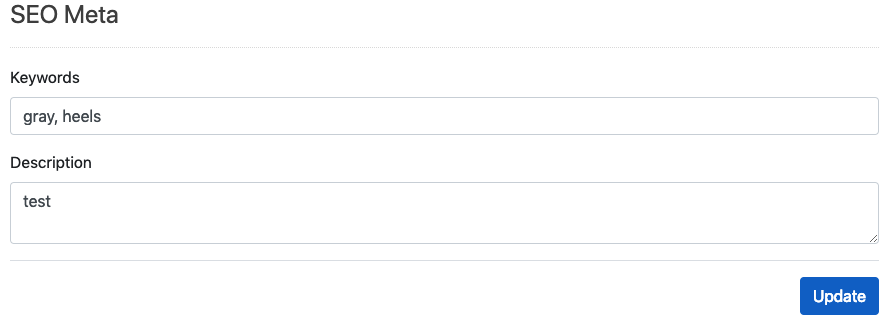
- Keywords – Using this you can add the keywords for the SEO Meta.
- Description – Using this you can add the description for the SEO Meta.
Manage Brands
You can Manage Brands using link at sidebar under Product Section which will open Manage Brands section. All the Active Brands will be displayed in the Shop by Brands or in Brands menu as per your settings in basic configurations.
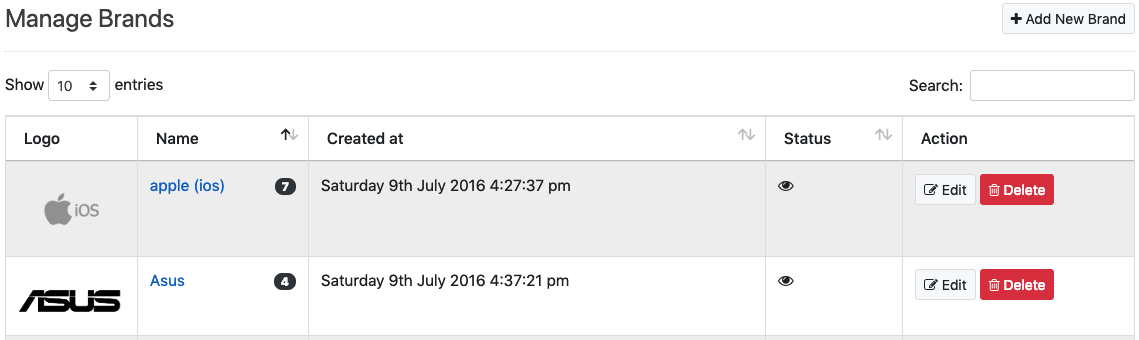
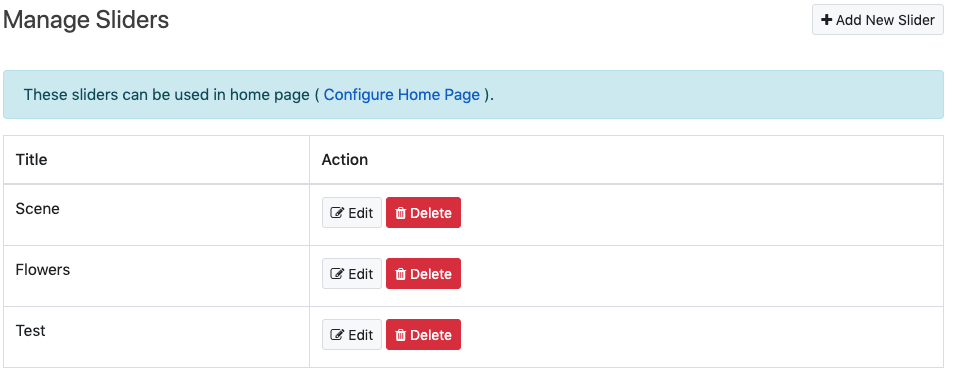
List show Logo, Name including count of available products in that particular brand, Status & action buttons for Edit/Delete brand.
Please Note: All the products will be deleted which as well are belongs to deleting Brand.
Add New Brand
You can add new brand using ![]() button at top right, it will open dialog with form with required fields.
button at top right, it will open dialog with form with required fields.
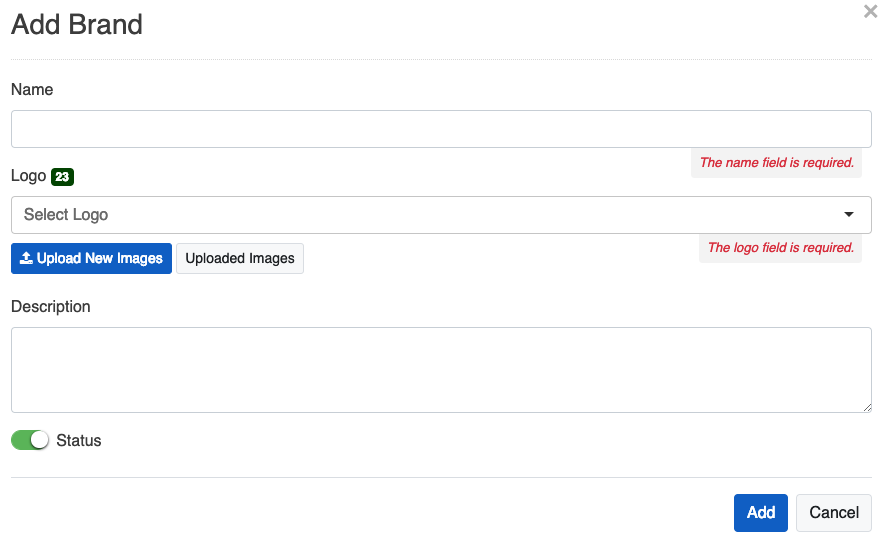
- Name – Brand Name.
- Logo – Need to select uploaded image for the brand or can upload new image using Upload New Image button.
- Description – additional description about the product.
- Status – you can Enable or Disable the Brand status, Disabling Brand status will Hide all the products under this brand & won’t available for purchase.
- Add - Click on the Add button will save this brand which can be select while adding or editing the product details.
Manage Specification Preset
By clicking Specification Preset menu item under Product Section menu opens the Manage Specification Preset.
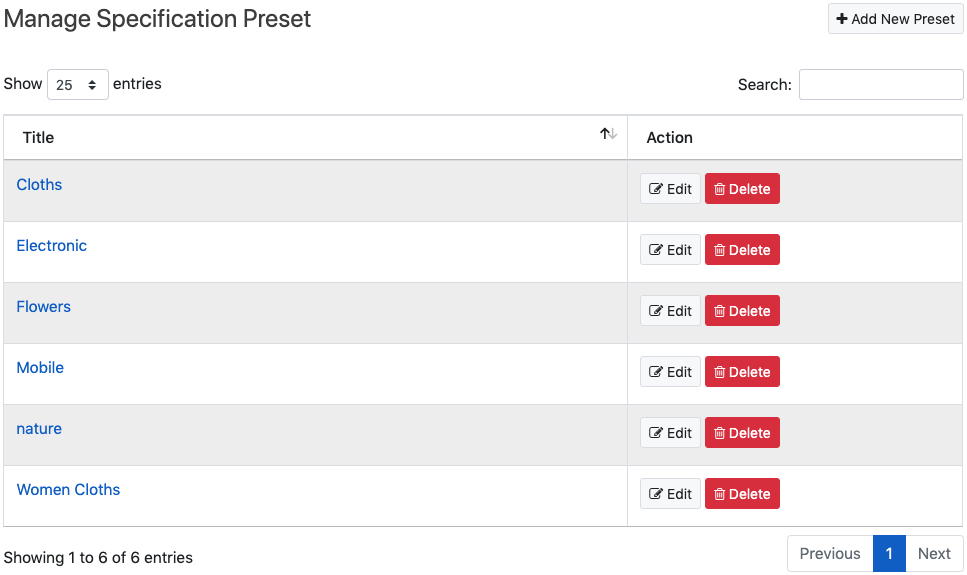
Add New Specification Preset
You can add new Specification preset. By clicking on ![]() button at top right corner will open a dialog to add new shipping type. With following fields.
button at top right corner will open a dialog to add new shipping type. With following fields.
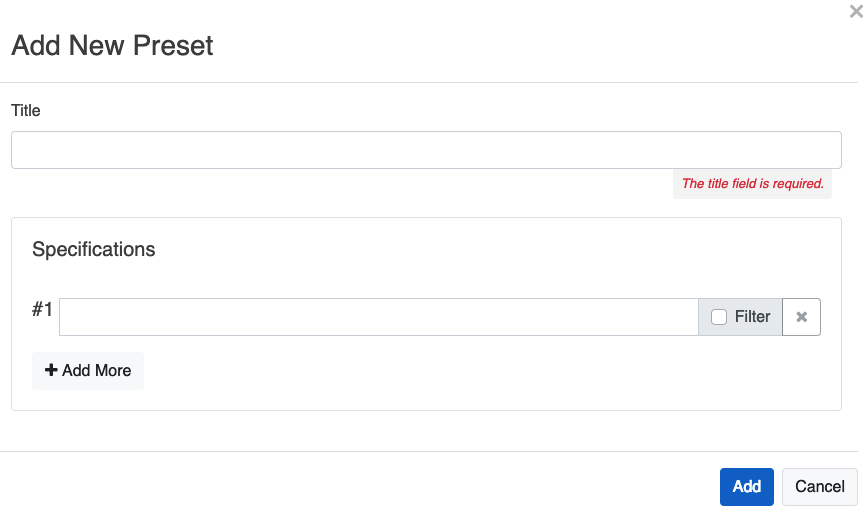
- Title – You can add the title of specification preset from here.
- Specifications – You can add N number of specifications preset under this using Add More button.
Filter – You can check the filter for using this specification preset for the filter the products.
- Using
 button you can add N numbers of image slide for the slider.
- Add - Click on Add button will save this specification preset.
- Your added types will show as list you can edit/delete that specific type using
 buttons.
Product Ratings
By clicking Product Ratings menu item under Products Section from sidebar you can view the all product ratings.

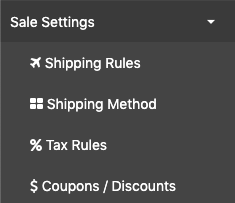
SALE SETTINGS
You can manage & update the all products sale related settings as per the your needs from this section like Shipping Rules, Shipping Methods, Tax Rules, Discount & Coupons.
Under this, you will find separate sections to manage the above products sale related needs to manage products sale in LivelyCart Pro as per your choice. All these settings are distributed under various headings, we will see those sections one by one.
Manage Shipping Rules
By clicking Shipping Rules menu item under Sale Settings. There are 2 tabs under this Tab 1 is for adding shipping rules for specific another is for all those countries which are not listed in Tab 1.
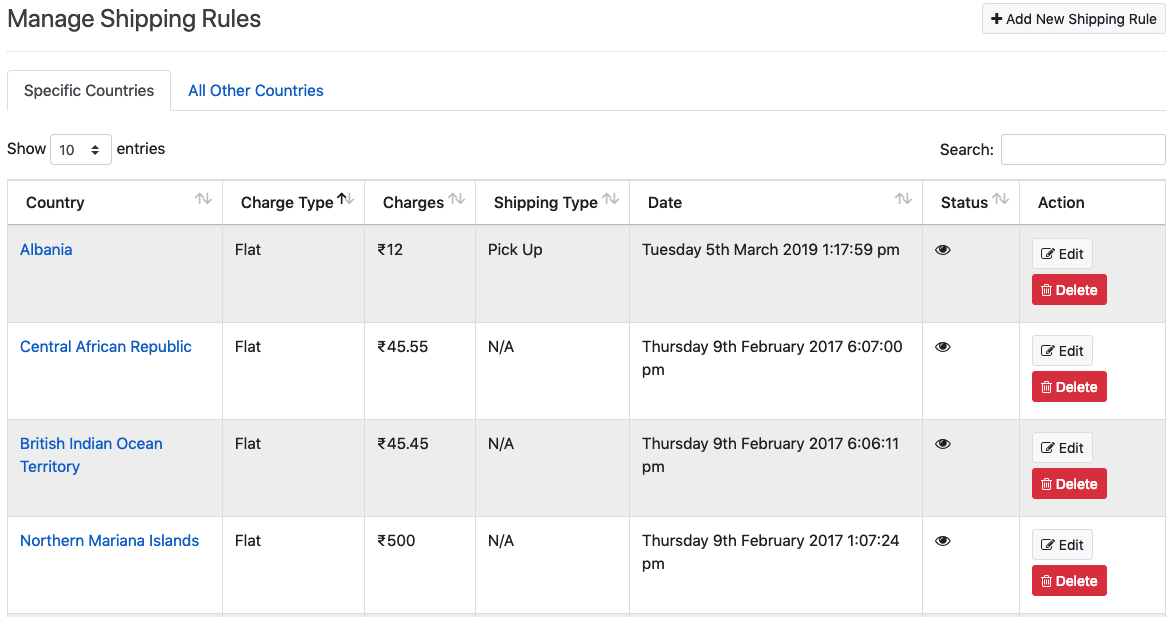
Add New Shipping Rule
- To Add new rule, you need to click on
 button.
 - Dialog with following options will open.
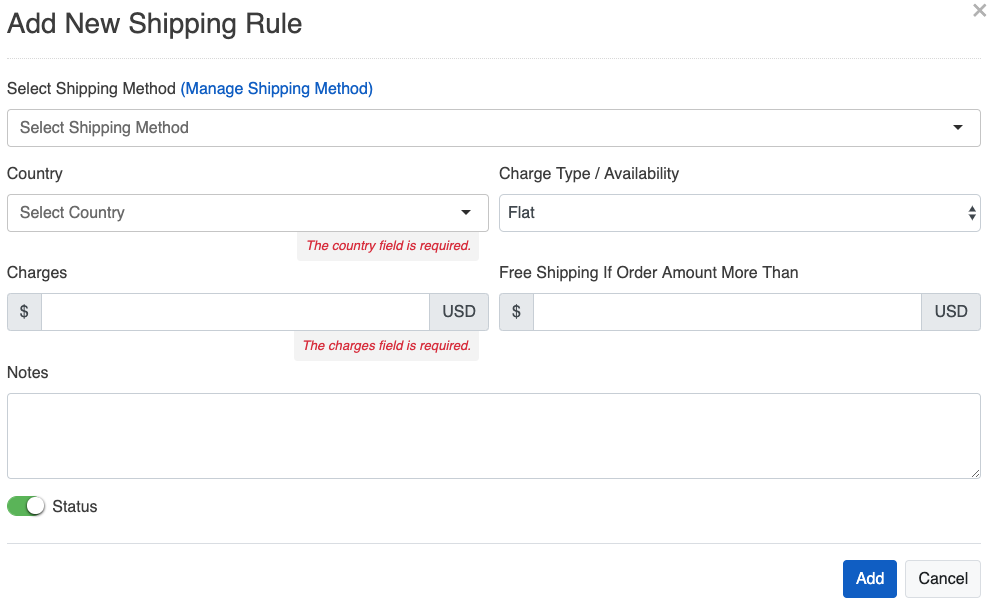
- Select Shipping Method – You can select the predefined shipping method from here.
- Country - You need to select Country for which you want to create rule.
- Charge Type/Availability - Then you need to choose option for Charge Type/Availability.
- Flat – You can charge one flat amount for Shipping, you can also set certain amount to Offer Free shipping after that.
- Percentage – You can charge percentage-based shipping charges on Order Amount, you can also cap this amount using Maximum Shipping Amount Charges.
- Free Shipping- You can offer free shipping for any particular country.
- Not Shippable – You can also create rules if you cannot ship item to specific country.
- Charges – You can add charges for the new shipping rule in this field.
- Free Shipping if Order Amount more than – You can add amount of the order in this field, if the order amount is more than the inserted amount then for that particular order shipping will be free.
- Notes - You can also add some additional notes for it.
- Status - You can set status of this rule as Active or Inactive.
- Add - Click on Add button will save this rule.
- Your added rules will show as list you can edit/delete that specific rule using
 buttons.
All other Countries Tab
It’s very simple countries which are not listed in Specific Countries tab will follow this rule. Option are the same as New Rule.
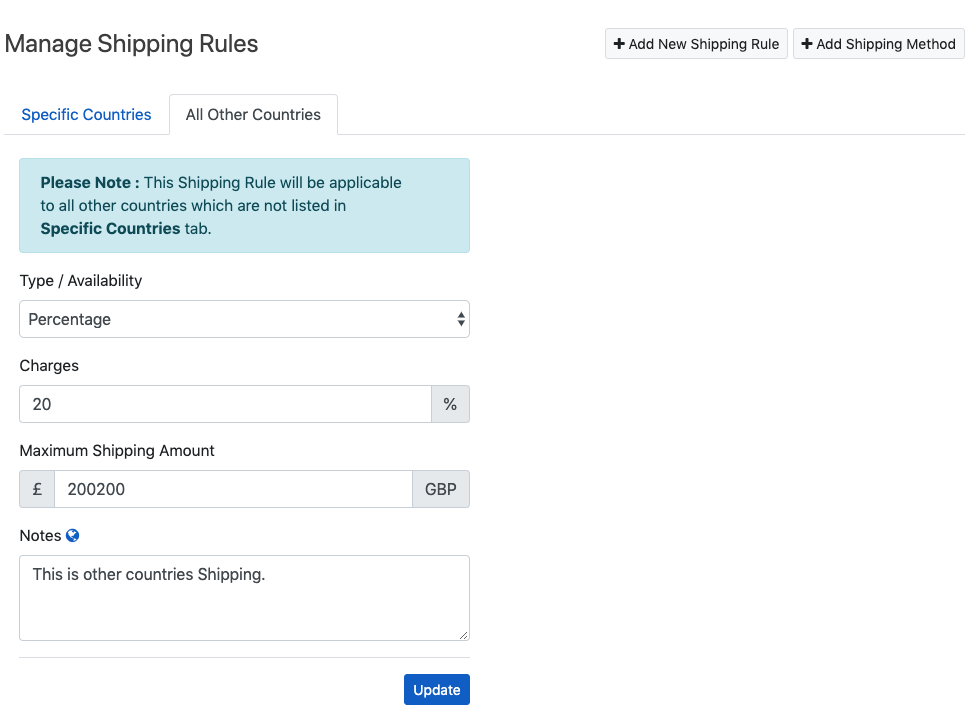
- Type/Availability - Then you need to choose option for Type/Availability.
- Flat – You can charge one flat amount for Shipping, you can also set certain amount to Offer Free shipping after that.
- Percentage – You can charge percentage-based shipping charges on Order Amount, you can also cap this amount using Maximum Shipping Amount Charges.
- Free Shipping - You can offer free shipping for any particular country.
- Not Shippable – You can also create rules if you cannot ship item to specific country.
- Charges – You can add charges for the new shipping rule in this field.
- Maximum Shipping Amount – You can set the maximum shipping amount for the All Other Countries.
- Notes – You can add the any notes from here.
- Update - On click on Update button your settings will be saved.
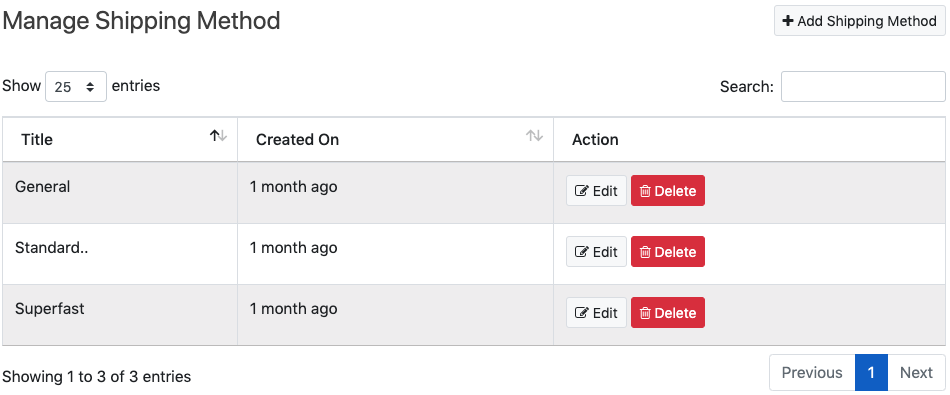
Manage Shipping Methods
By clicking Shipping Method menu item under Sale Settings menu from the sidebar.
Add New Shipping Method
You can add new Shipping Method. By clicking on ![]() button at top right corner will open a dialog to add new shipping method. With following fields.
button at top right corner will open a dialog to add new shipping method. With following fields.
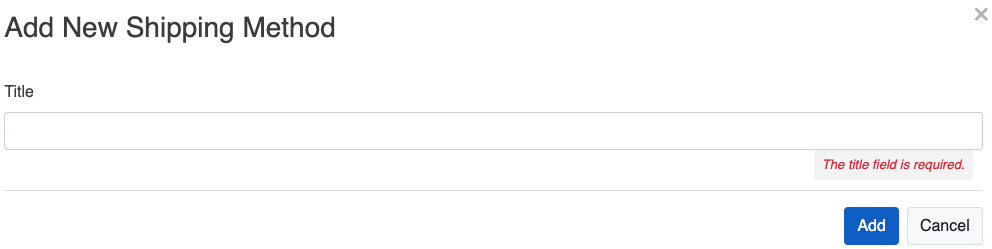
- Title – You can add the title of shipping method from here.
- Add - Click on Add button will save this shipping method.
- Your added method will show as list you can edit/delete that specific method using
 buttons.
Manage Taxes
By going to Tax item under Sale Settings, will open list of taxes with details like Label Country, status etc.

Add New Tax
You can add Tax for country, each country can have multiple taxes. By clicking on ![]() button at top right corner will open a dialog to add new tax rule. With following fields.
button at top right corner will open a dialog to add new tax rule. With following fields.
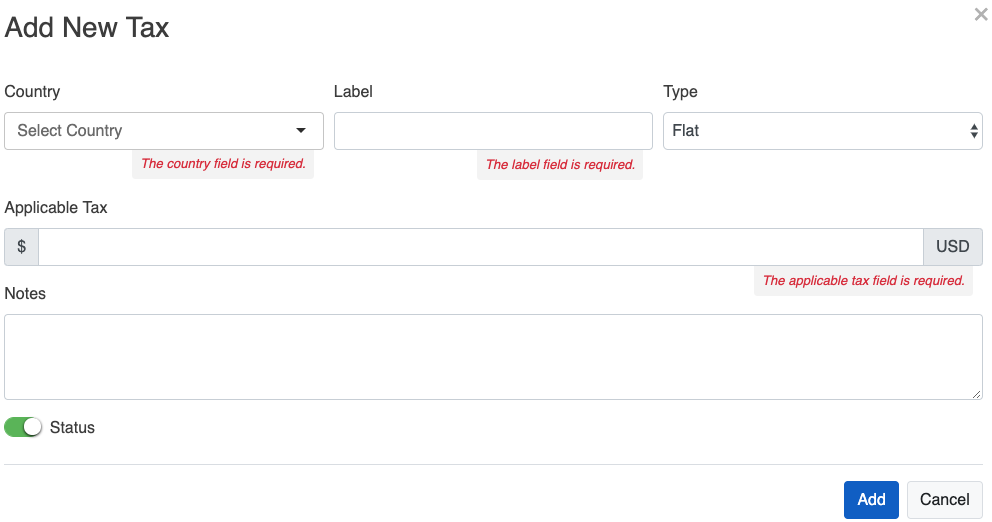
- Country – You need to select country for which you need to add tax.
- Label – Label you want for that tax e.g. GST etc.
- Type / Availability – You need to choose from below options
- Flat – This option offers single flat amount as Tax
- Percentage – This option will offer you for the percentage-based tax.
- No Tax – There may a situation for country where no Tax is needed, you can opt this option.
- Applicable Tax – Based on the above option you can add flat or percentage-based tax here.
- Notes – Any notes you may want to add.
- Status - You can set status of this tax as Active or Inactive.
- Add - Click on Add button will save this rule.
List of Tax Rules
From the list of Tax rules, you can edit/delete using buttons: ![]()
Tax Settings

- Tax – You can select & set Tax from here:
- Apply Tax – You can select when to apply tax before / after discount.
- Calculate Tax as per – You can also calculate tax as per shipping / billing address.
- Submit - Click on Submit button will save this setting.
Manage Coupons/ Discounts
Using Coupons/Discounts link under manage shop menu, will show you the Coupon/Discounts Manage section with 3 Tabs under it as follows:
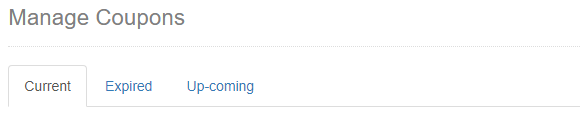
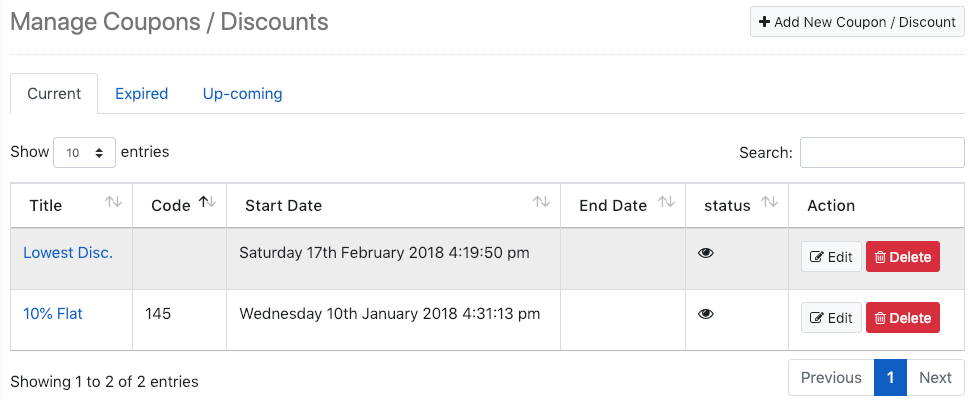
- Current – Under this tab you will have currently applicable list of coupons.
- Expired - Under this tab you will have the all expired coupons.
- Up-coming – Future applicable coupons will list here.
Add New Coupon
Using ![]() button at top right, you can add new coupon/discount. Following fields are available to fill.
button at top right, you can add new coupon/discount. Following fields are available to fill.
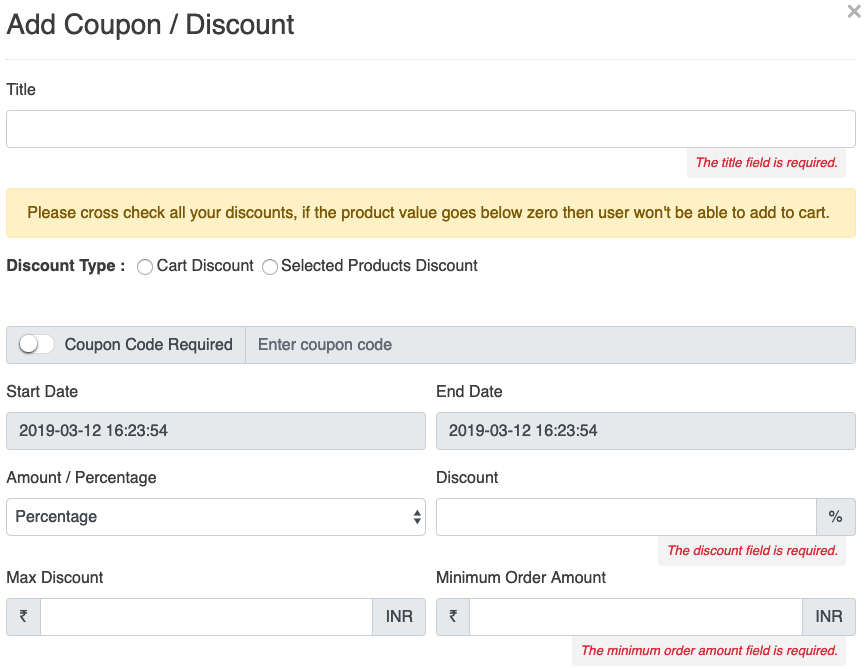

- Title – Title for your coupon.
- Discount Type – To add new discount/coupon you can select the discount type.
- Cart Discount – To apply discount/coupon on complete cart you can select Cart Discount.
- Selected Product Discount - To apply discount/coupon on selected products you can select the Selected Product Discount.
- Coupon Code Required – On enable this an alpha-numeric code for your coupon which will use by customers to apply it.
- Limit Orders Usage Per User – On enable this you can set the limit orders usage per user for using this coupon/discount. User can view this field if the switch for Coupon Code Required is enable.
- Start Date – From which date time you want to start applicability of this coupon.
- End Date – When you want to end applicability of this coupon.
- Amount/Percentage – options as given below
- Amount – You can offer flat amount discount using this option, if you choose this option then you also need to set maximum discount in percentage of order amount, so this discount amount cannot be greater that order amount.
- Percentage – You can also offer percentage-based discount if you choose this option then you option to set Maximum discount amount you want to offer.
- Discount – discount you want to offer based on the above selected options amount or percentage.
- Max Discount - You can set max discount to apply based on the above selected options amount or percentage.
- Minimum Order Amount – You can set minimum order amount for coupon to be applied.
- Description – If want to any additional information related to coupons.
- Publicly Available/ Publicly Not Available – You can enable/disable switch to make it Publicly Available/ Publicly Not Available.
Please Note: (In earlier version this switch is known by the ‘Status’ & from this version it will be known as ‘Publicly Available/ Publicly Not Available’.)
- Add - Click on Add button will save this coupon.
TEMPLATE & CONTENT
You should need to configure templates & contents as per your needs like Slider, Footer, Configure home page, Email Templates & many more.
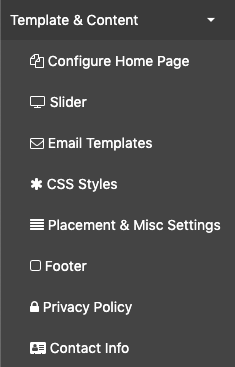
Under this, you will find various templates & contents settings which needs to run LivelyCart Pro as per your choice. All these settings are distributed under various headings, we will see those settings one by one.
Configure Home Page
You can configure your Home Page using this page with the following settings.
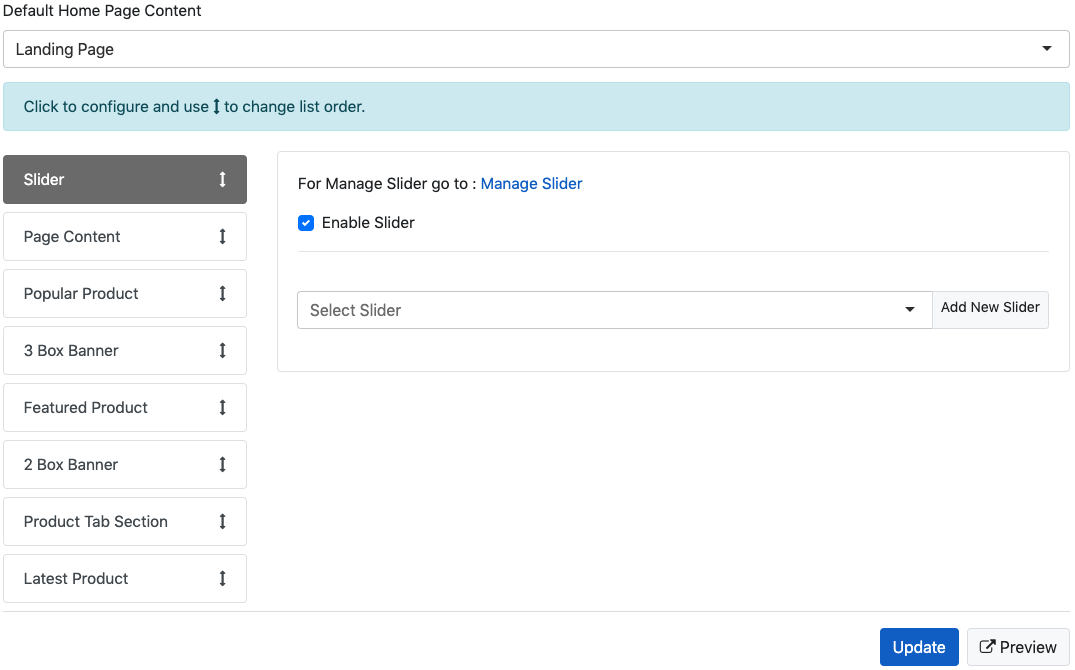
- Default Home Page Content – What the content you want to show for home/landing page. You have choices from Below:
- Home Page – A specified page from Pages, you can customize it using editor in Manage Pages link.
- All Products – It is all products page which you can set as Home.
- Featured Products – It is featured products page which can be set as Home.
- Brands – If you want to set Brands Page as Home page.
- Landing Page - This is special page which can used as Home Page. Separate settings are available for this page as Landing Page Settings. Landing page contains the following content :
- Slider – You can select the slider from here as per your choice.
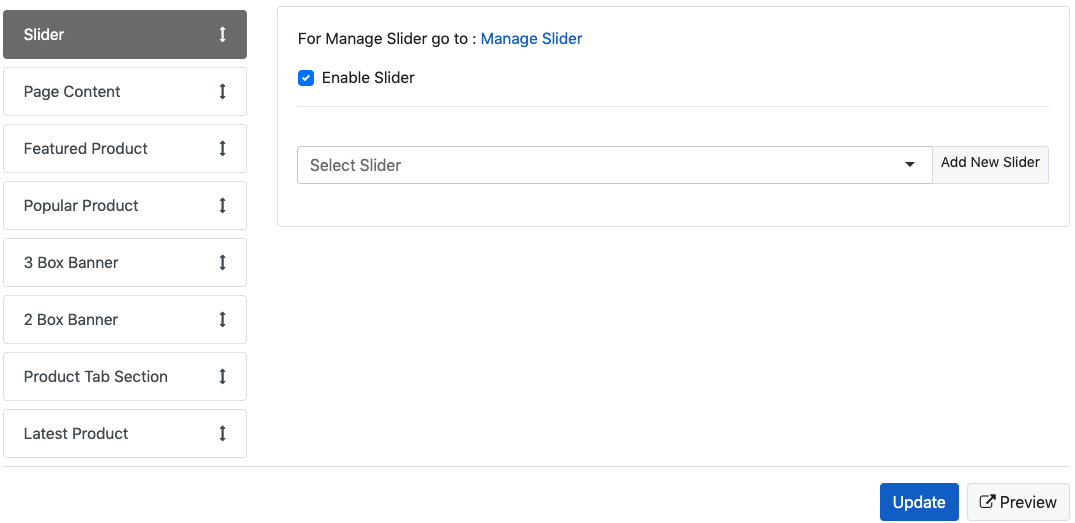
- Enable Slider – To enable slider on public side you can check this.
- Select Slider – You can select the slider as per your choice from here to show on the home landing page.
- Update - On click on Update button your landing page settings will be saved.
- Preview – You can view the preview of the update by click on this button.
- Page Content – You can manage the landing page contents from the here.
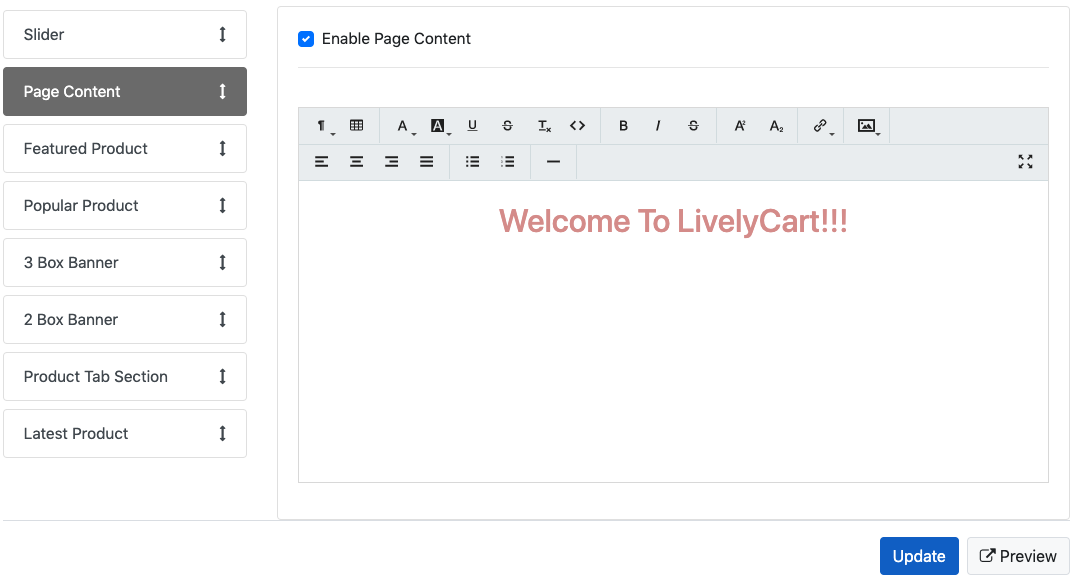
- Enable Page Content – To enable page content on public side you can check this.
- Page Content – You can manage the page content for home landing page using the following editor as per your choice.
- Update - On click on Update button your landing page settings will be saved.
- Preview – You can view the preview of the update by click on this button.
- Featured Product – You can set the number of the featured products from here to show on the landing page. By default it will show the 10 products.
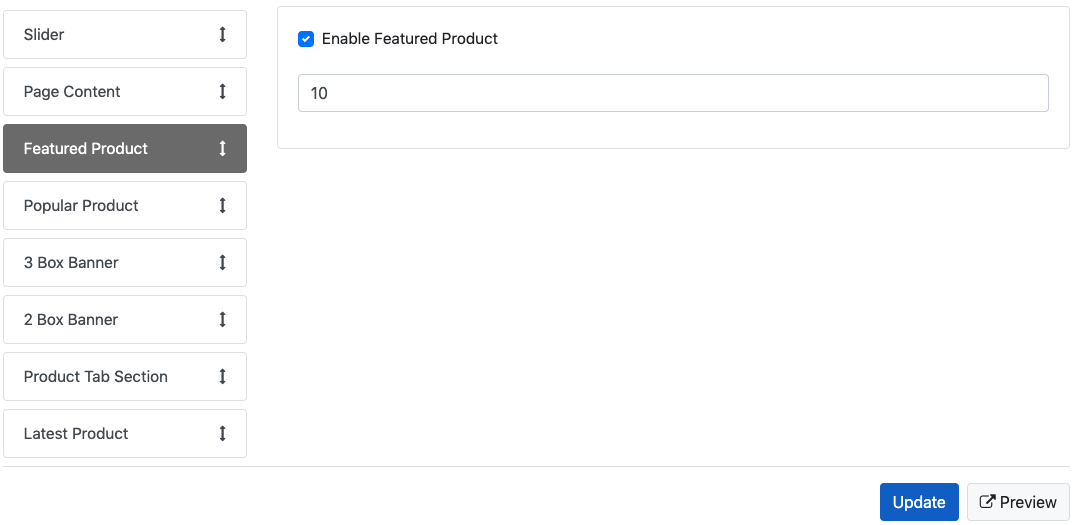
- Enable Featured Product – To enable featured product on public side you can check this.
- Update - On click on Update button your landing page settings will be saved.
- Preview – You can view the preview of the update by click on this button.
- 3 Box Banner - You can manage the banner 3 box from here to show on the landing page.
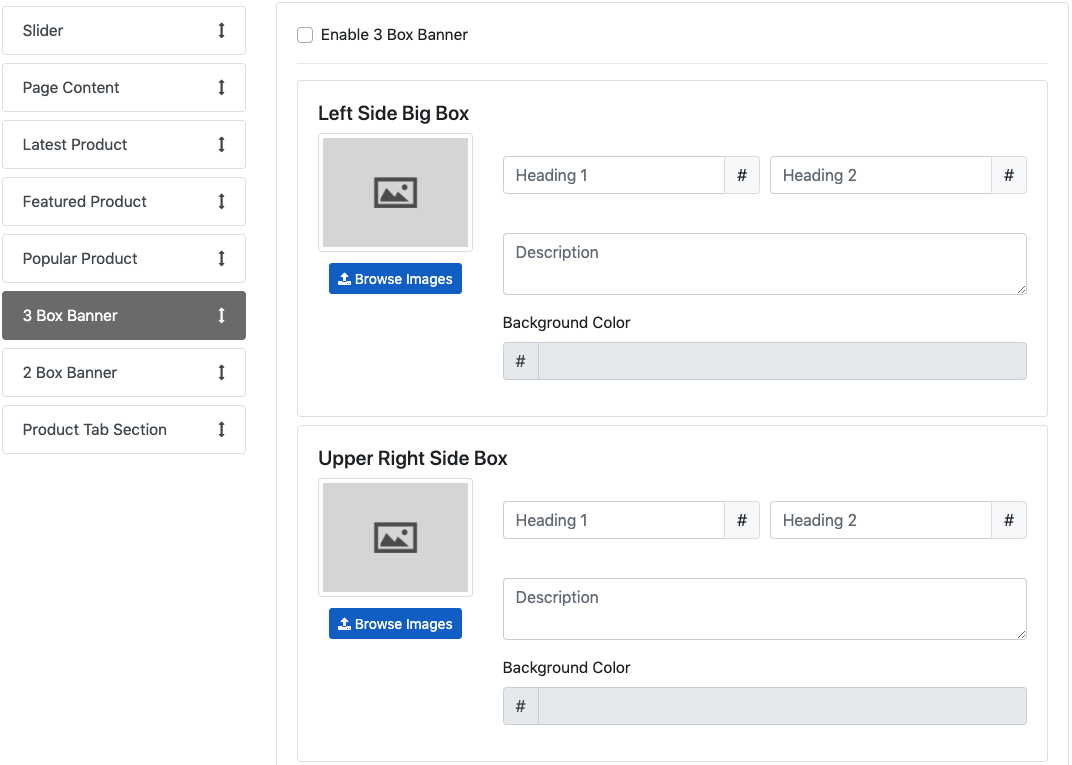
- Enable 3 Box Banner – To enable 3 box banner on public side you can check this.
- Left Side Big Box – You can manage the left side big box out of 3 box banner using the following fields
- Browse Images – You can browse the image for the left side big box using this.
- Heading 1 – You can add the first heading for the left side big box from here. Also you can apply the heading text color as per your choice using heading 1 color by click on
 .
. - Heading 2 – You can add the second heading for the left side big box from here. Also you can apply the heading text color as per your choice using heading 2 color by click on
 .
. - Description – You can add the description for the left side big box from here.
- Background color – Using this you can add the background color for the left side big box.
- Upper Right Side Box – You can manage the upper right side big box out of 3 box banner using the fields available in left side big box.
- Bottom Right Side Box – You can manage the bottom right side big box out of 3 box banner using the fields available in left side big box.
- Update - On click on Update button your settings for the 3 box banner will be saved.
- Preview – You can view the preview by click on this button.
- Popular Product - You can set the number of the popular products from here to show on the landing page.
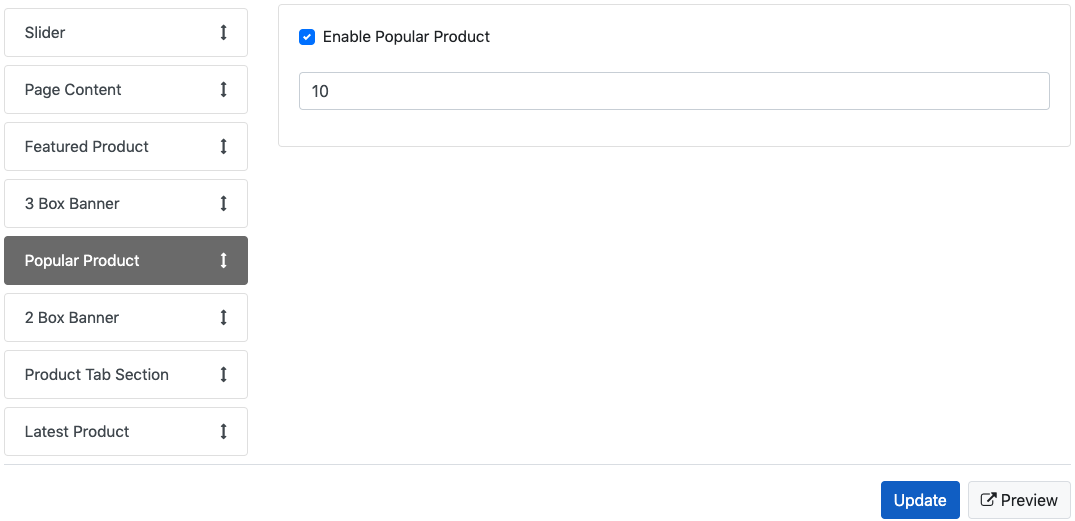
- Enable Latest Product – To enable latest product on public side you can check this.
- Update - On click on Update button your landing page settings will be saved.
- Preview – You can view the preview by click on this button.
- 2 Box Banner - You can manage the banner 3 box from here to show on the landing page.
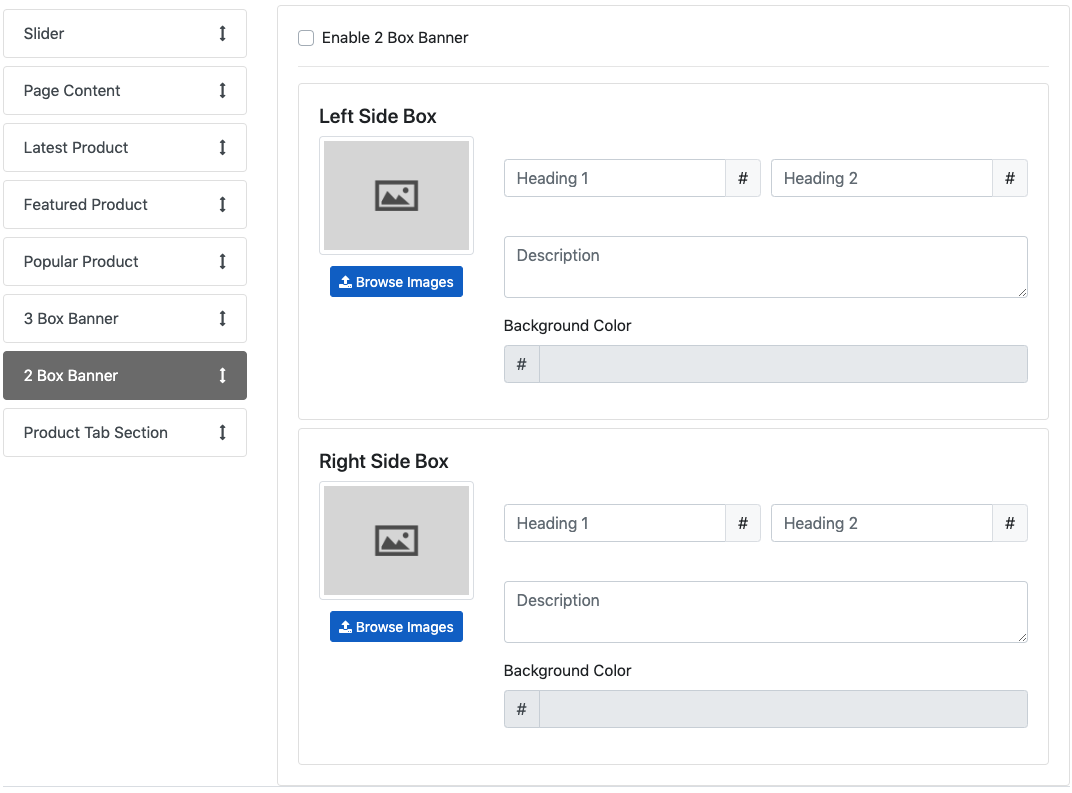
![]()
- Enable 2 Box Banner – To enable 2 box banner on public side you can check this.
- Left Side Box – You can manage the left side box out of 2 box banner using the following fields
- Browse Images – You can browse the image for the left side big box using this.
- Heading 1 – You can add the first heading for the left side big box from here. Also you can apply the heading text color as per your choice using heading 1 color by click on
 .
. - Heading 2 – You can add the second heading for the left side big box from here. Also you can apply the heading text color as per your choice using heading 2 color by click on
 .
. - Description – You can add the description for the left side big box from here.
- Background color – Using this you can add the background color for the left side big box.
- Right Side Box – You can manage the right side box out of 2 box banner using the fields available in left side box.
- Update - On click on Update button your settings for the 2 box banner will be saved.
- Preview – You can view the preview by click on this button.
- Product Tab Section - You can set the product tabs from here to show on the landing page.
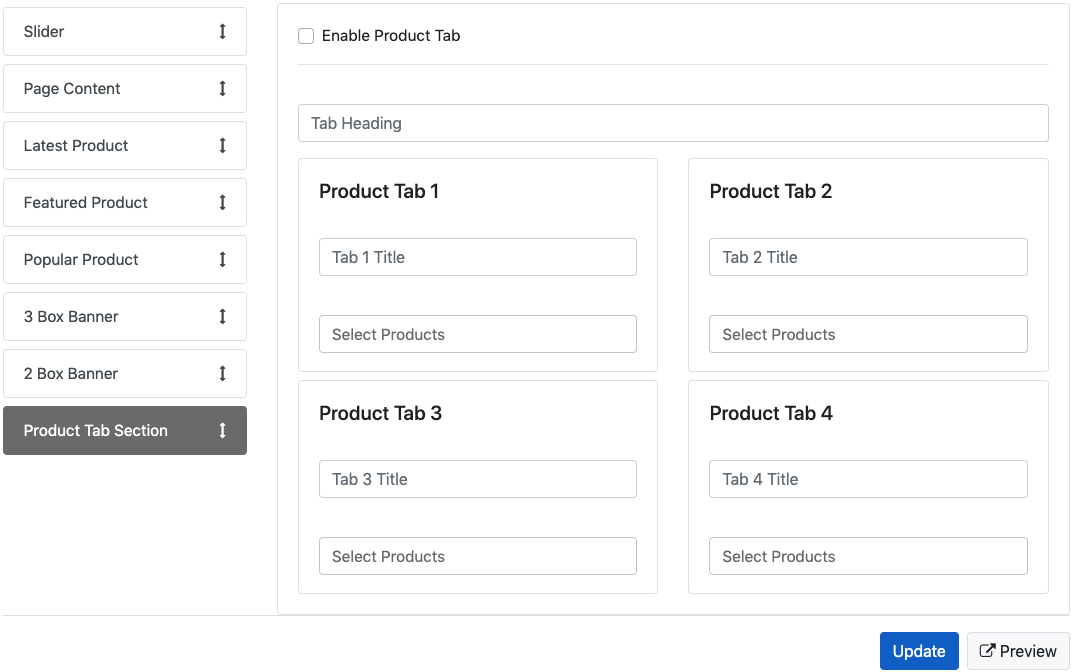
- Enable Product Tab – To enable product tab on public side you can check this.
- Tab Heading – From here you can add the heading of the tab.
- Product Tab – Using this tabs you add the four product tabs on landing page. Each product tab contains the following fields.
- Tab Title – Using this you can add the tab title.
- Select Products - From here you can select the products to show under the above tab title.
- Update - On click on Update button your settings for the 2 box banner will be saved.
- Preview – You can view the preview by click on this button.
- Latest Products - You can set the number of the latest products from here to show on the home landing page.
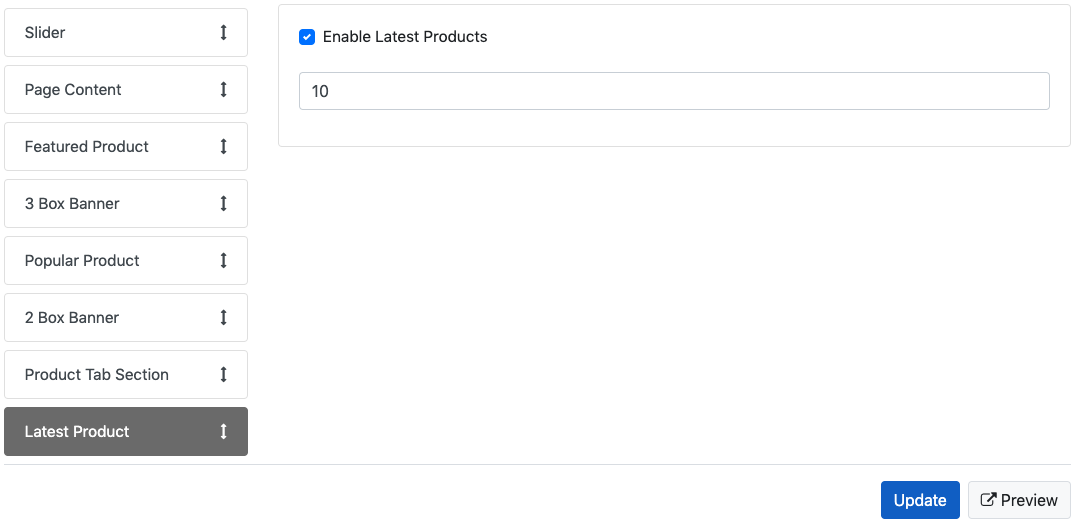
- Enable Latest Product – To enable latest product on public side you can check this.
- Update - On click on Update button your landing page settings will be saved.
- Preview – You can view the preview by click on this button.
Manage Sliders
Using this you will be able to Manage Sliders. You can edit & add new slider right from here.
Add New Slider
You can add new Slider. By clicking on ![]() button at top right corner will open a dialog to add new slider. With following fields.
button at top right corner will open a dialog to add new slider. With following fields.
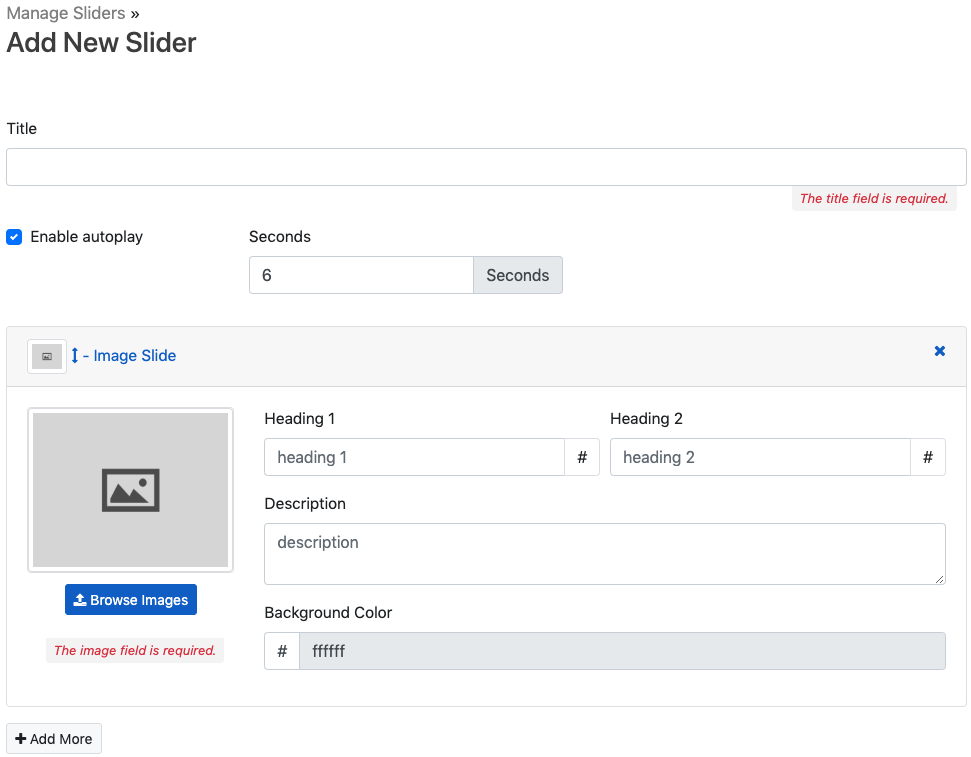

- Title – You can add the title of slider from here.
- Enable Autoplay – If check this then slider plays automatically one by one.
- Seconds – From here you can set the autoplay speed in seconds.
- Image Slide – Using fields under this you can manage the image to slide.
- Browse Images – You can browse the image using this button.
- Heading 1 – You can add the Heading 1 for the image slide.
- Heading 2 – You can add the Heading 2 for the image slide.
- Description – You can add the Description for the image slide.
- Background Color – You can set the Background Color of the slider image.
- Using
 button you can add N numbers of image slide for the slider.
- Submit - Click on Submit button will save this slider.
- Your added sliders will show as list you can Edit/Delete that specific slider using
 buttons.
Email Templates
You can manage Email related settings using this under Template & Content.
- Use Email Settings From .env File – You can enable this for doing email setting by .env

- If you disable this Use Email Settings From .env File then you can choose the any one mail driver from the given list.
- Mail From Address – You can add your from mail address from here which is common for the all mail drivers.
- Mail From Name - You can add your from name from here which is common for the all mail drivers.
- Mail Driver – From here you can choose the mail driver as per your need.
- SMTP – By fill up following settings for SMTP you can send the emails via SMTP mail driver.
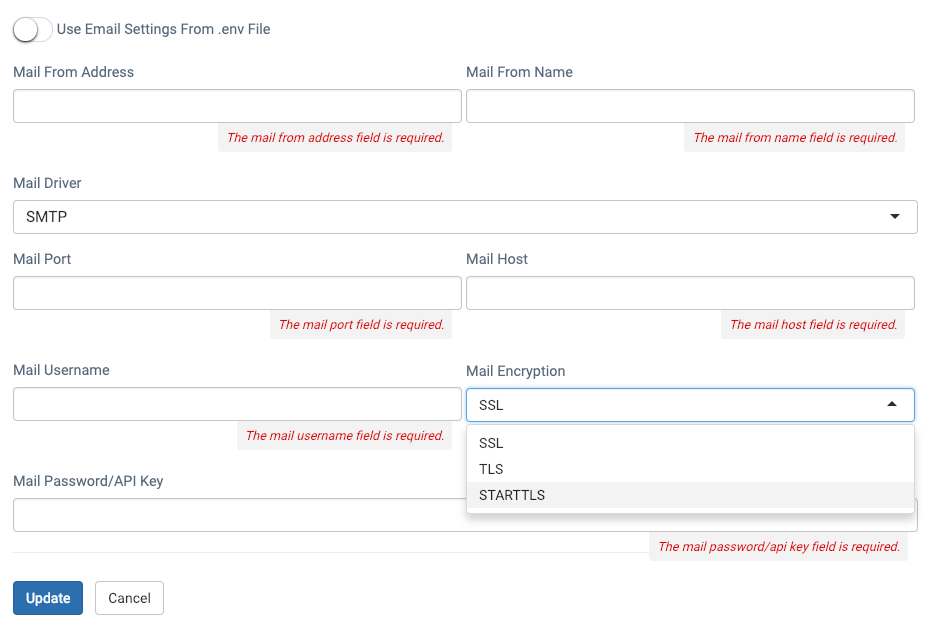
- Mail Port – You can add mail port for your SMTP driver.
- Mail Host – You can add your mail host for the SMTP driver.
- Mail Username – You can add your mail username from here.
- Mail Encryption – Your mail encryption type you can select from here.
- Mail Password/API Key – Your mail password/API key you can add from here for SMTP mail driver.
- Sparkpost – By fill up following settings for Sparkpost you can send the emails via Sparkpost mail driver.

- Mail Password/API Key – Your mail password/API key you can add from here for Sparkpost mail driver.
- Mailgun - By fill up following settings for Mailgun you can send the emails via Mailgun mail driver.
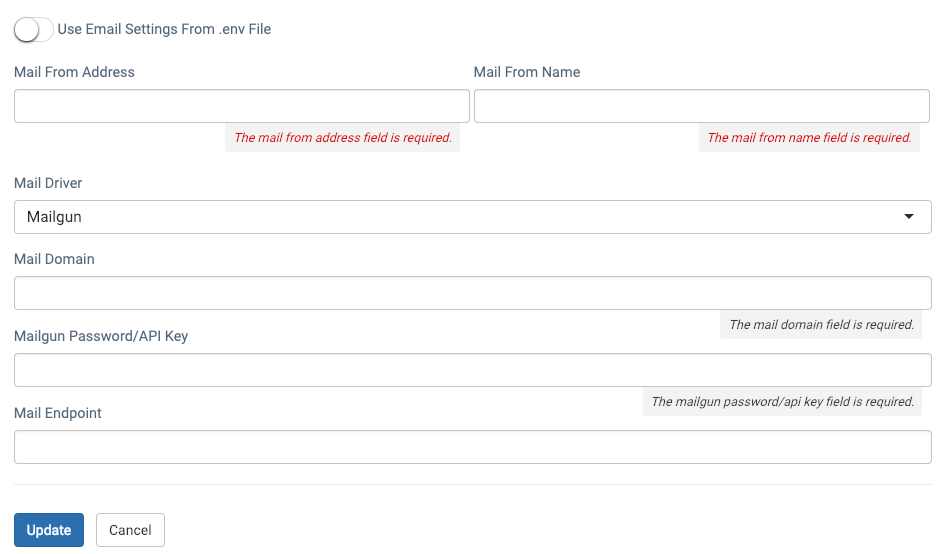
- Mail Domain – You can add your mail domain from here.
- Mailgun Password/API Key – Your mail password/API key you can add from here for Mailgun mail driver.
- Mail Endpoint - You can add your mail endpoint for mailgun mail driver from here.
On click on Update button your settings will be saved.
CSS Styles
Using this you can add your custom CSS styles.
Please be careful While adding your own CSS it will affect whole site.
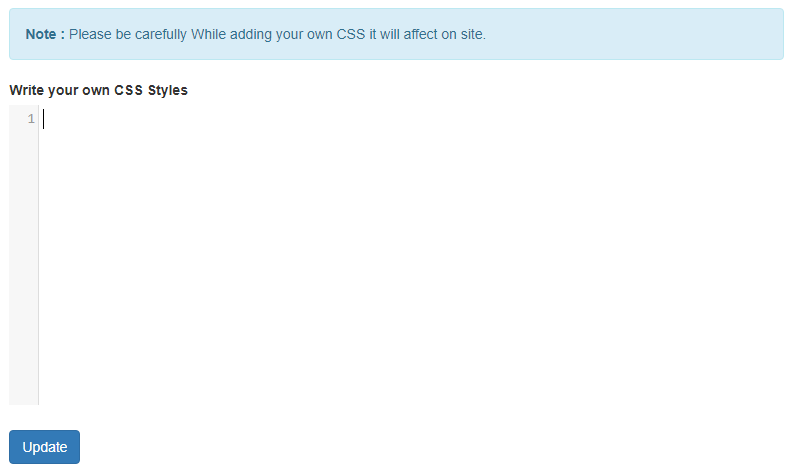
On click on Update button your settings will be saved.
Placements & Misc Settings
You can set Items Placements & other Misc Settings from here.
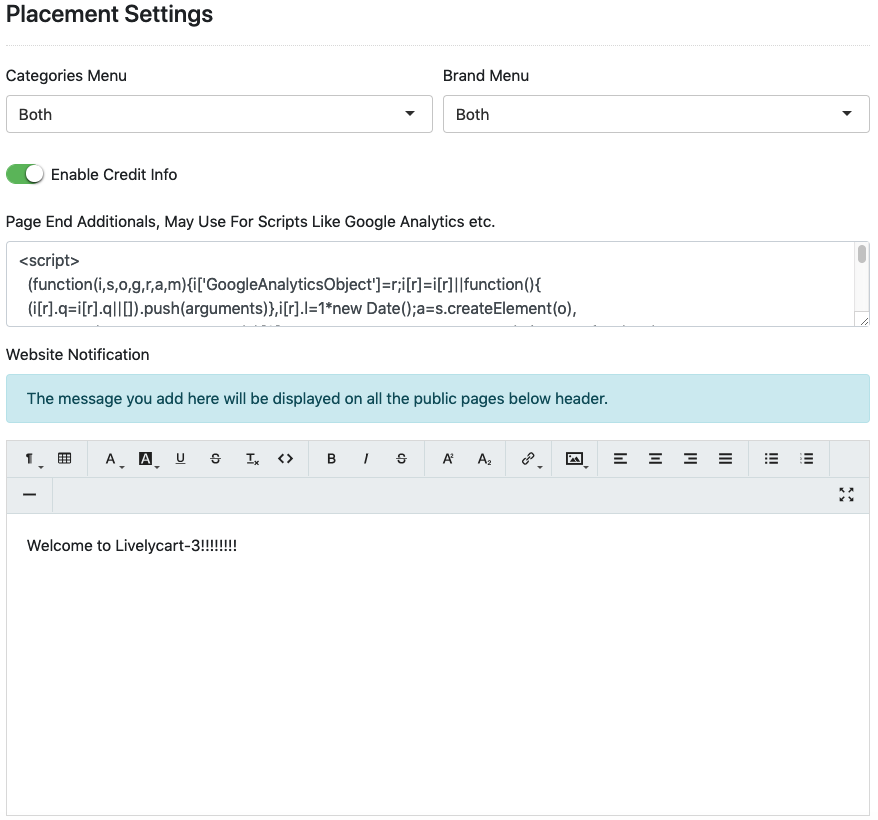
- Categories Menu – You can choose where to display category menu using these options Top, Sidebar, Both or Don’t show.
- Brand Menu – You can choose where to display Brand menu using these options Top, Sidebar, Both or Don’t show.
- Enable Credit Info – You can choose whatever to show credit information to LivelyCart/LivelyWorks for this product. Thanks for keeping it active.
- Page End Additional – You can add and additional content here to add at bottom of the page it may be used for Google Analytics code etc.
- Additional Footer Text – You can add Additional footer text if you may require after store name & copy right.
- Website Notification – You can add the message for the notification in the available field for website notification. The message you add here will be displayed on all the public pages below header.
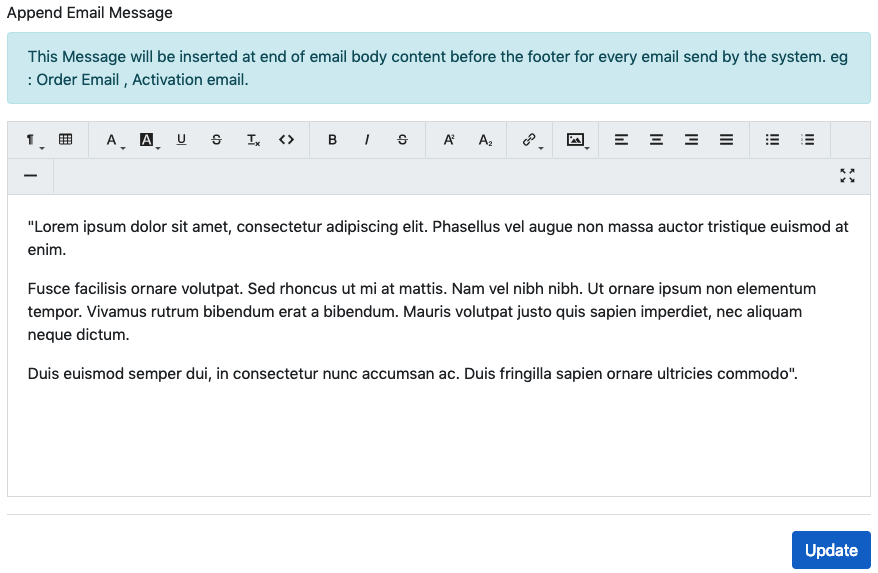
- Append Email Message - You can also append Notification type messages into Emails sent by System using Append Email Message.
On click on Update button your settings will be saved.
Footer Settings
You can manage Footer related settings using the following footer editor.
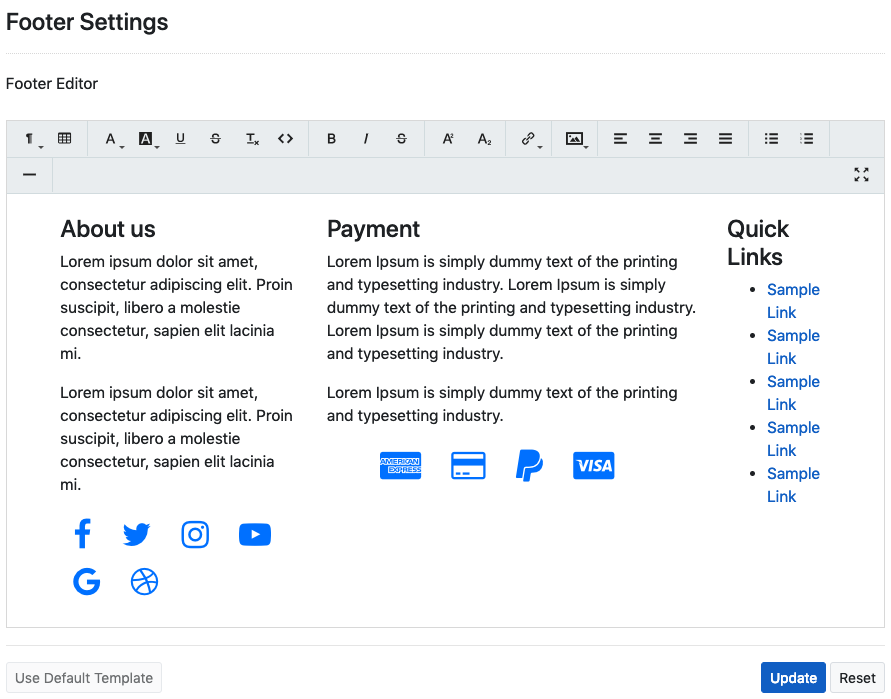
- Footer Editor – You can edit & set the footer content using this editor.
- Use Default Template – To use the default template you can click on this button.
- Reset – To reset the formatting & enhancements you can click on the Reset Button.
On click on Update button your settings will be saved.
Privacy Policy
You can add your privacy policy, if you added content for it then link to show this will be placed at footer.
Link to privacy policy will be shown at footer.
![]()
On click on Update button your settings will be saved.
Contact Info
From here you will be able to Set Contact details like email address & address, telephone related.
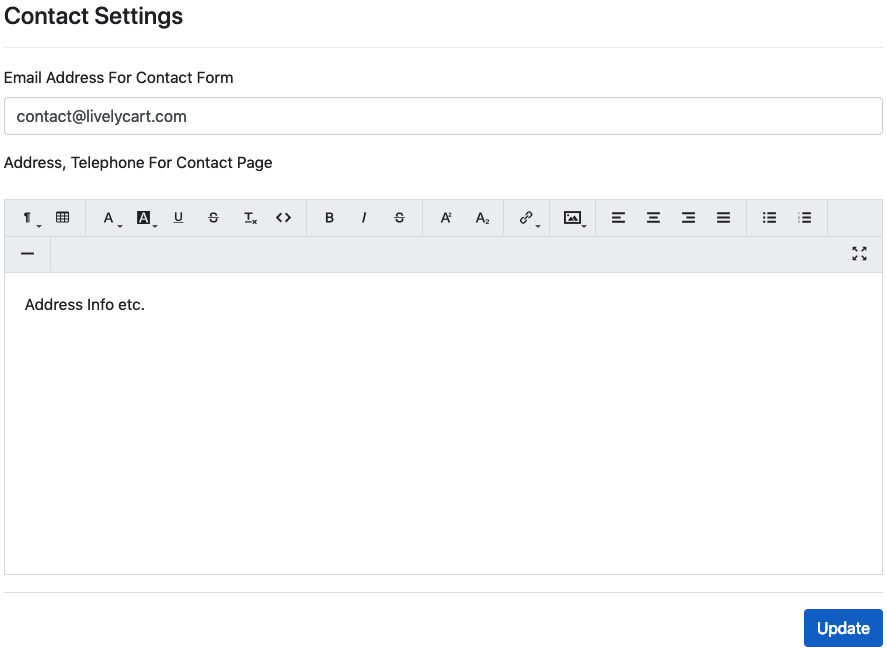
- Email – This email will be used to receive email which are sent via Contact Form.
- Address etc. – Address, telephone etc. information you can set here & which will show on contact page.
On click on Update button your settings will be saved.
OTHER SETTINGS
You should need to configure as per your needs like currency, products, users & email etc.
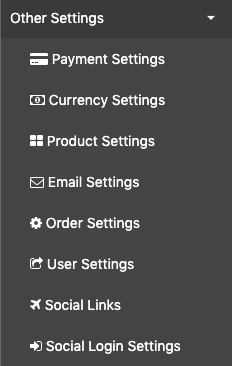
Under this, you will find various settings which needs to run LivelyCart Pro as per your choice. All these settings are distributed under various headings, we will see those settings one by one.
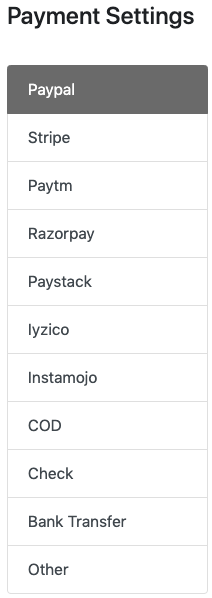
Payments Settings
You can make settings related to the payments from here.
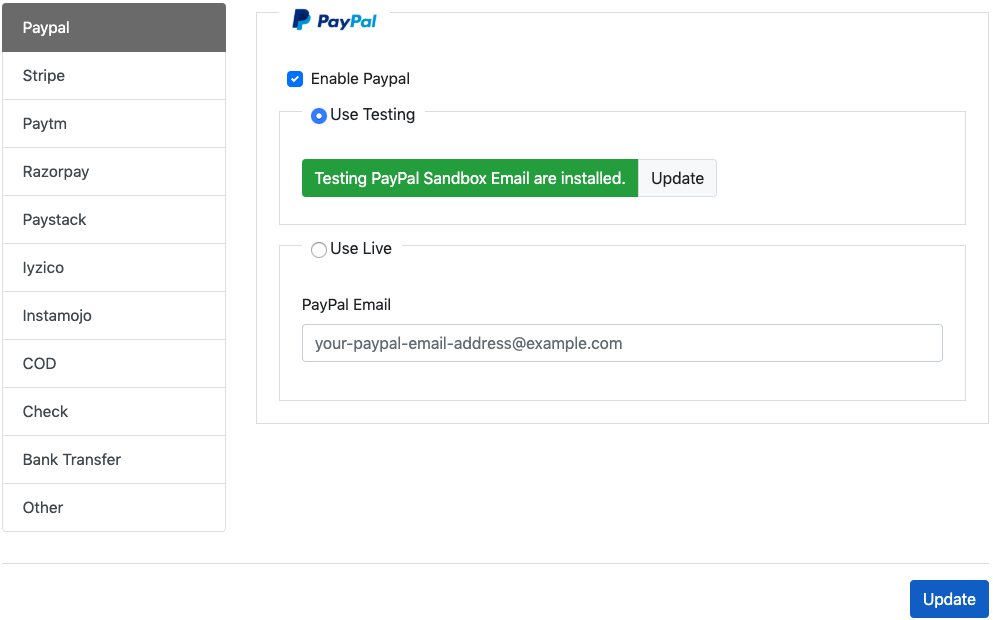
PayPal
- You can enable/disable payment using checkbox Enable PayPal, using this method Customer will be able to make payment using PayPal. If the payment successfully completed from the PayPal payment will be marked as completed if not the order payment status will be shown as Pending and you need to make manual checks & needs to update order payment accordingly.
-
- You need to check the checkbox Enable PayPal to enable it.
- You need to add PayPal & PayPal Sandbox email
- If the Sandbox mode is set using configuration then sandbox email will be used by the system.
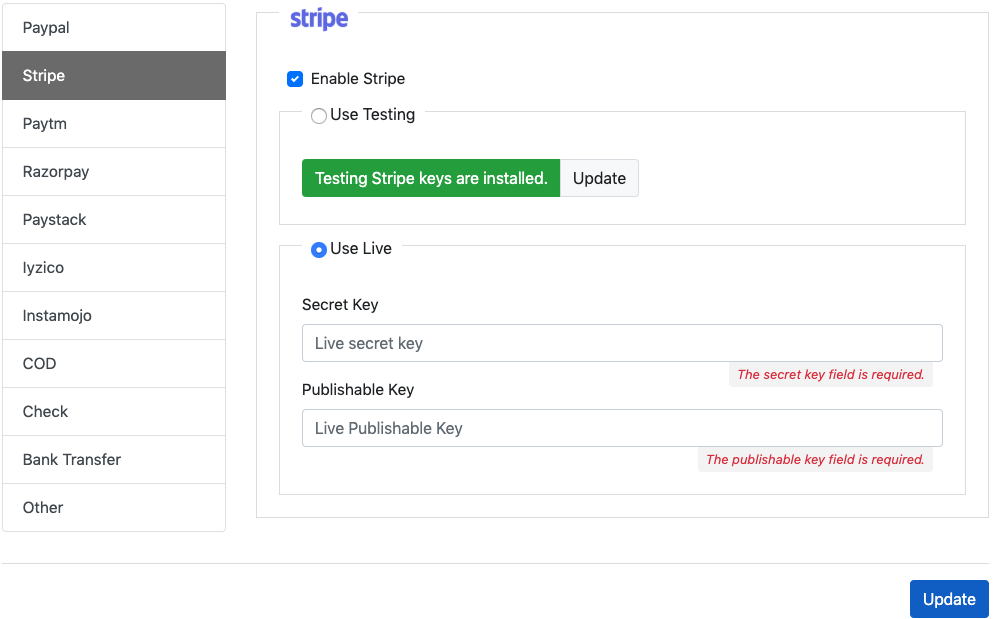
Stripe
- You can enable/disable Stripe payment using the checkbox Enable Stripe, using this method Customer will be able to make payment using Credit/Debit Cards via Stripe. If the payment successfully completed from the Stripe payment will be marked as completed if there is any problem with cards or payment it will be failed, and order will be cancelled.
-
- You need to check the checkbox Enable Stripe to enable it.
- You need to required keys for Stripe
- If the Test mode is set using configuration then test keys will be used by the system.
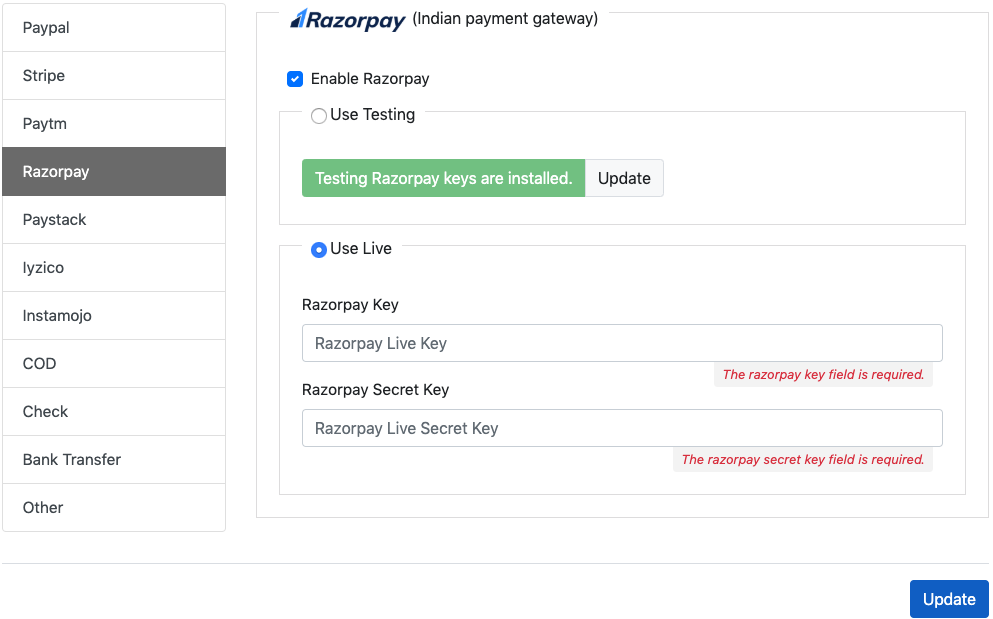
Razorpay
- You can enable/disable Razorpay payment using the checkbox Enable Razorpay, using this method Customer will be able to make payment using Credit/Debit Cards/Netbanking/Wallet/UPI/QR via Razorpay. If the payment successfully completed from the Razorpay payment will be marked as completed if there is any problem with cards or payment it will be failed, and order will be cancelled. This is an Indian payment gateway, supports to INR only.
-
- You need to check the checkbox Enable Razorpay to enable it.
- You need to required keys for Razorpay.
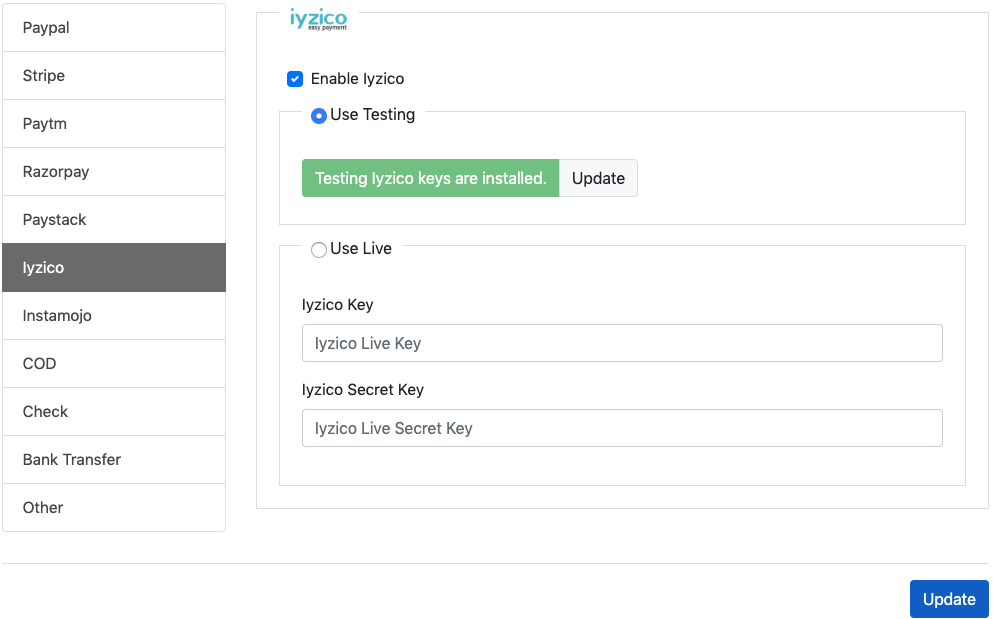
Iyzico
- You can enable/disable Iyzico payment using the checkbox Enable Iyzico, using this method Customer will be able to make payment using Credit/Debit Cards via Iyzico. If the payment successfully completed from the Iyzico payment will be marked as completed if there is any problem with cards or payment it will be failed, and order will be cancelled. This is an Turkish payment gateway, supports to TRY only.
-
- You need to check the checkbox Enable Iyzico to enable it.
- You need to required keys for Iyzico.
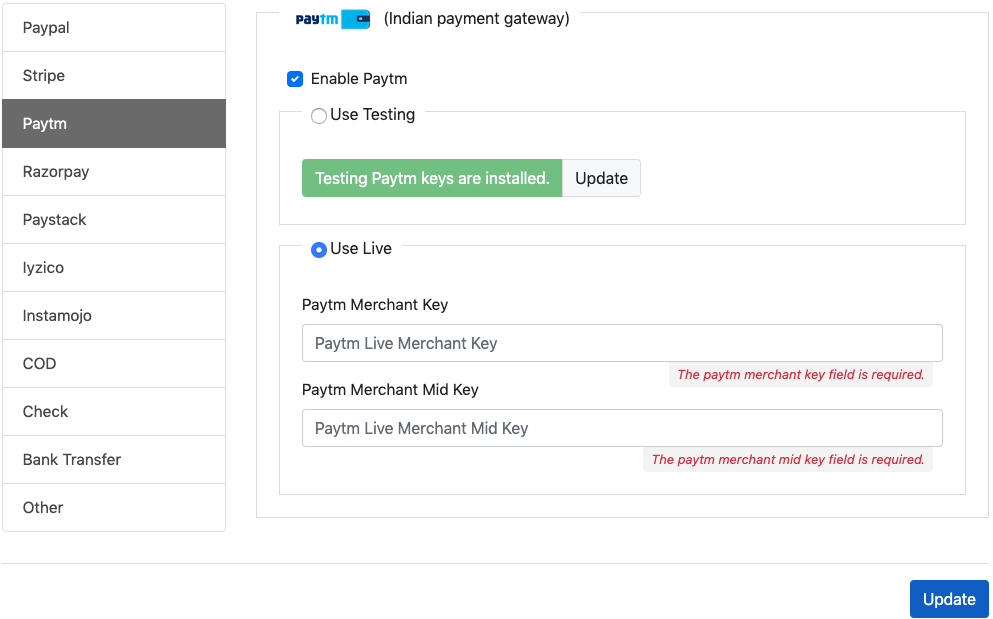
Paytm
- You can enable/disable Paytm payment using the checkbox Enable Paytm, using this method Customer will be able to make payment using Credit/Debit Cards via Paytm. If the payment successfully completed from the Paytm payment will be marked as completed if there is any problem with cards or payment it will be failed, and order will be cancelled. This is an Indian payment gateway, supports to INR only.
-
- You need to check the checkbox Enable Paytm to enable it.
- You need to required keys for Paytm.
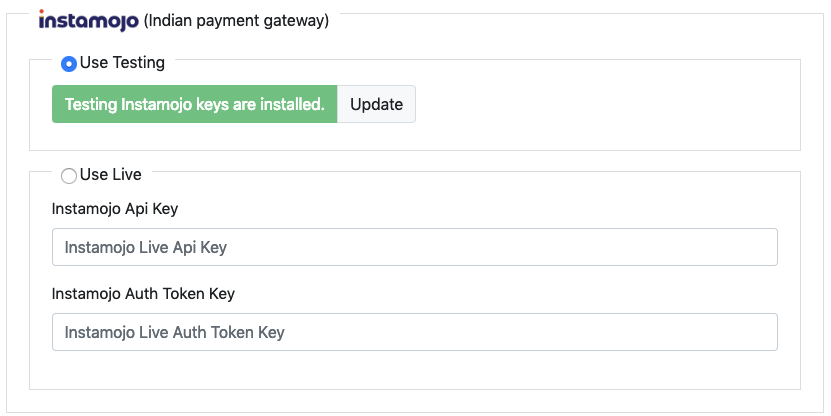
Instamojo
- You can enable/disable Instamojo payment using the checkbox Enable Instamojo, using this method Customer will be able to make payment using Credit/Debit Cards via Instamojo. If the payment successfully completed from the Instamojo payment will be marked as completed if there is any problem with cards or payment it will be failed, and order will be cancelled. This is an Indian payment gateway, supports to INR only.
-
- You need to check the checkbox Enable Instamojo to enable it.
- You need to required keys for Instamojo.
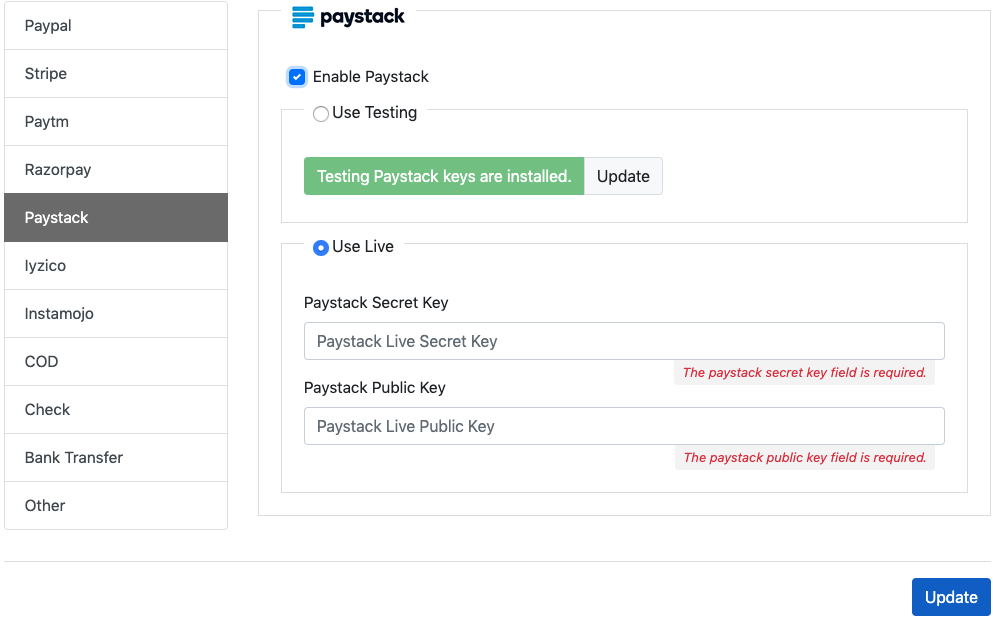
Paystack
- You can enable/disable Paystack payment using the checkbox Enable Paystack, using this method Customer will be able to make payment using Credit/Debit Cards via Paystack. If the payment successfully completed from the Paystack payment will be marked as completed if there is any problem with cards or payment it will be failed, and order will be cancelled. This is a African payment gateway, supports to NGN only.
-
- You need to check the checkbox Enable Paystack to enable it.
- You need to required keys for Paystack.
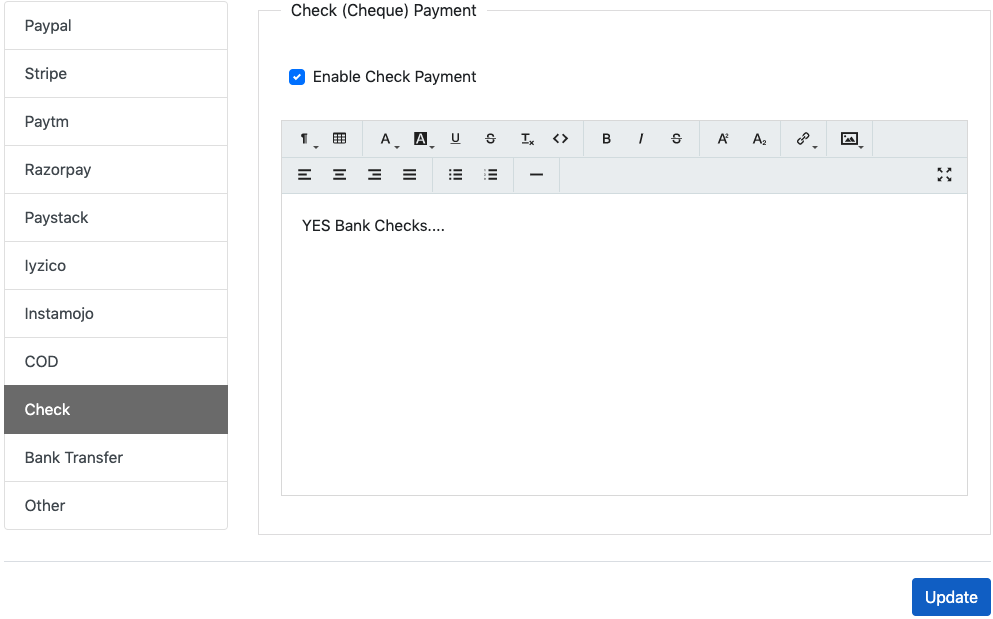
Check Payment
- You can enable/disable payment by Check using the checkbox Enable Check Payment. It will be considering accepting payment by check, so you need to provide additional information. By choosing this option any additional information shows to Customer while ordering & order get submitted, you/Customer may need to contact for the payment.
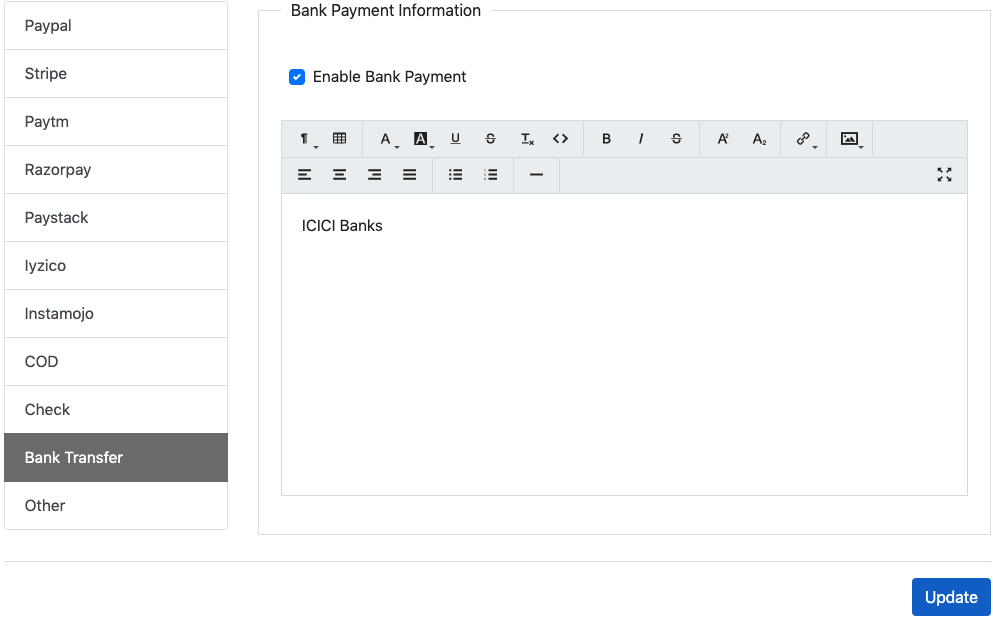
Bank Transfer
- You can enable/disable payment by bank transfer using this switch. It will be considering accepting payment by Bank Transfer, so you need to provide additional information may require for Bank Transfer. By choosing this option any additional information shows to Customer for Payment while ordering & order get submitted, you/Customer may need to contact for the payment.
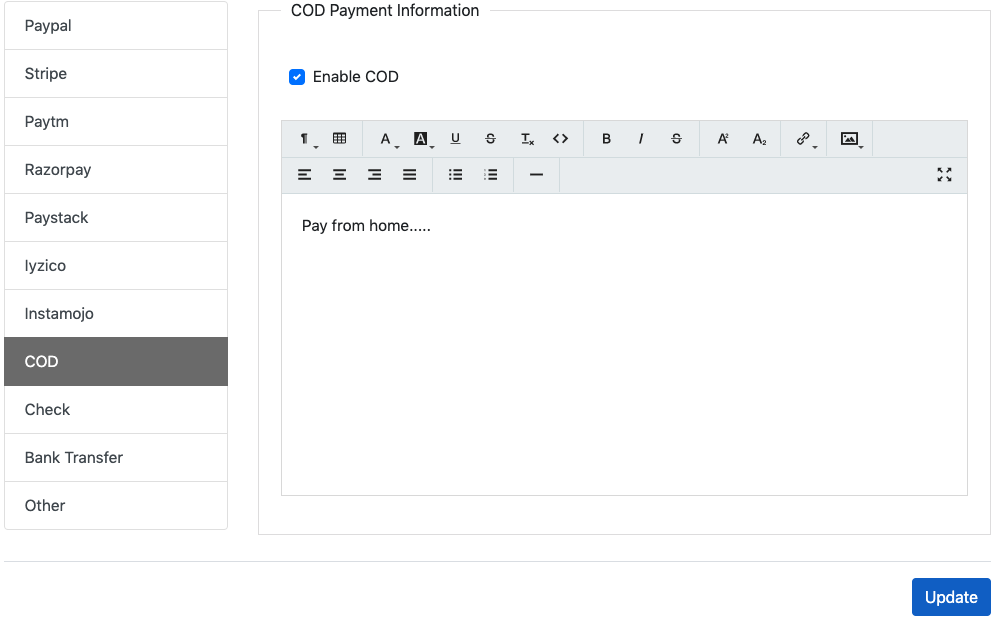
COD
- You can enable/disable COD Payment using this switch. It will be considering to accept payment by Cash on Delivery so you may need to provide additional information. By choosing this option any additional
information shows to Customer while ordering & order get submitted and can collect payment on delivery.
Other
- You can enable/disable Other Payment using this switch. It can be used for Offline payments using this option any additional information shows can be shows to Customer while ordering like bank account details etc.
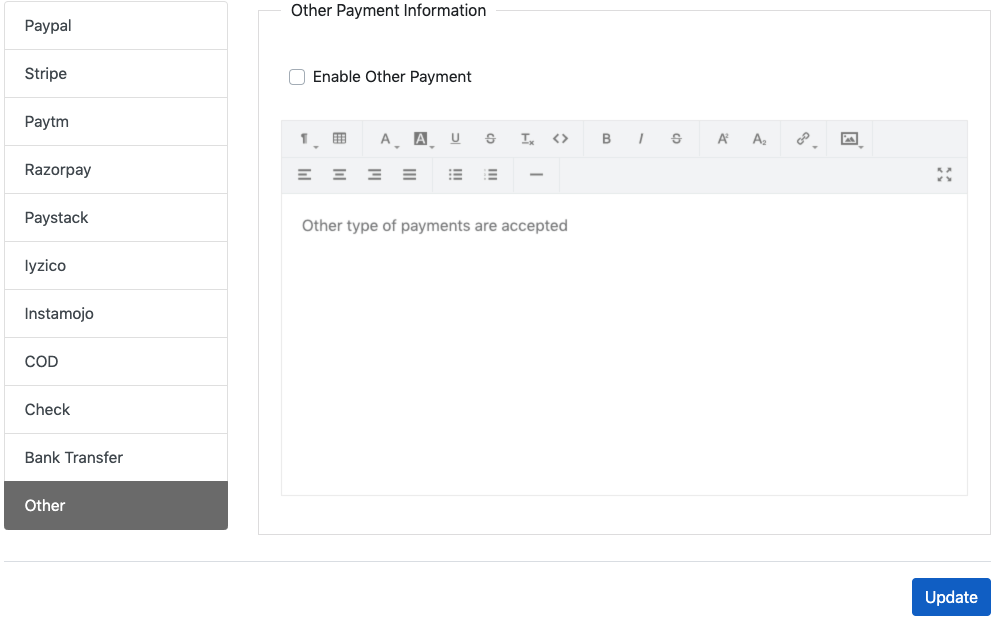
On click on Update button your settings will be saved.
Currency Settings
You can setup currency using Currency Settings & you have the following options for the same.
Currency
You can setup or update currency using Currency.
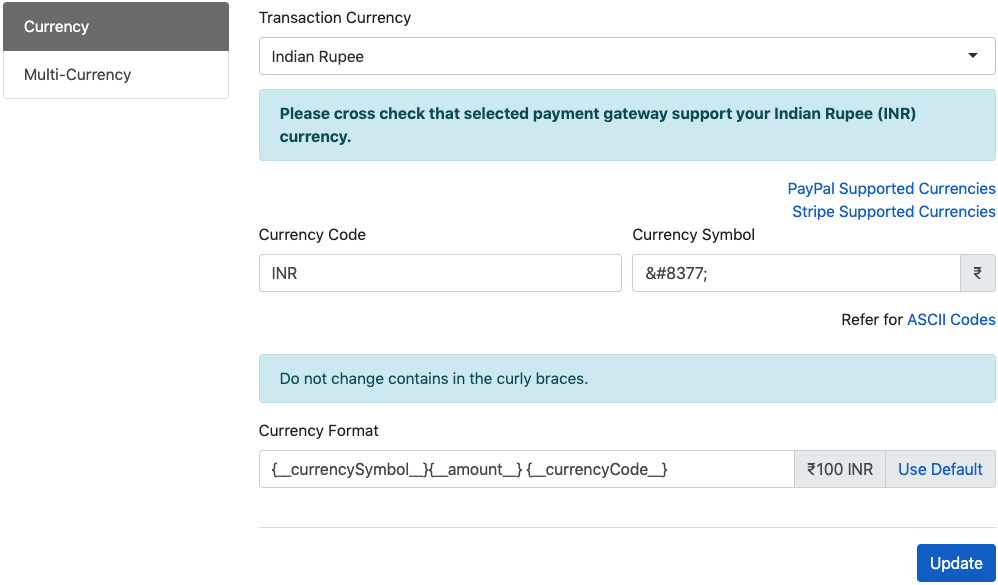
- Currency – You can choose from the list or given your own.
- Currency Code – Currency are identified by this code on chosen from currency list it will set automatically but you can also give your custom.
- Currency Symbol – It will be currency symbol code on chosen from currency list it will set automatically but you can also give your custom.
- Currency Format
You can format currency settings using this field, do not change content in curly braces e.g.
{_ _currencySymbol_ _}, these are the system variables.
- We have identified some of the currencies are NON-DECIMAL currencies I we tried our best to handle it. If the choose currencies identified as non-decimal currency options for handling it will be shows like in below example.
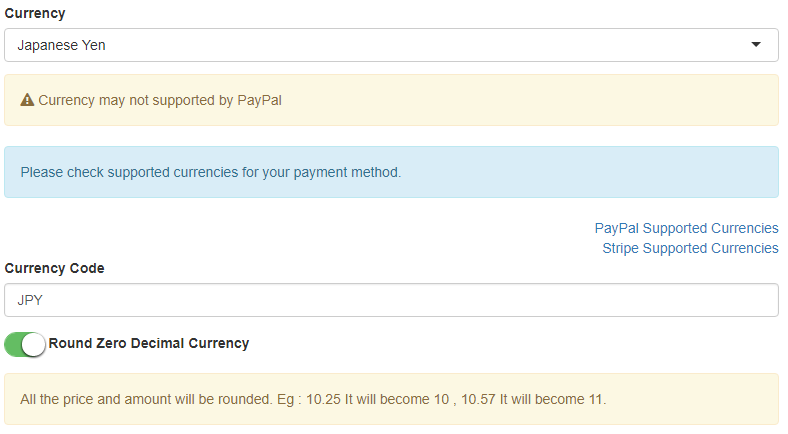
In this case we recommend rounding off the prices and amounts, you can change this behavior using Switch button, but these payments may generate errors at payment gateways.
Multi-Currency
You can setup or update multi-currency using Multi-Currency.
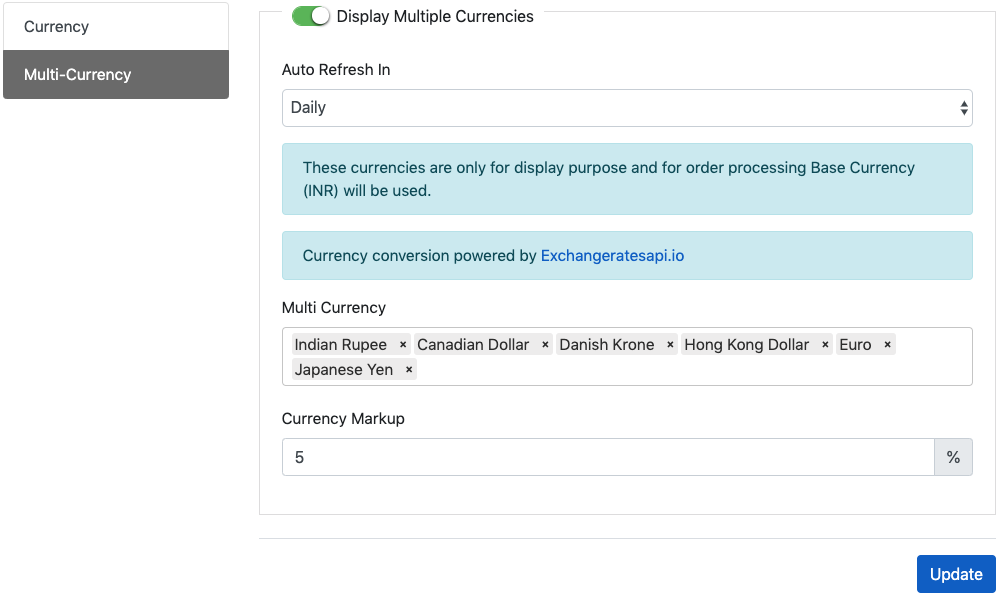
- Display Multiple Currencies – You can enable/disable Display Multiple Currencies using Switch. But these currencies are only for display purpose and for order processing base currency will be used.
- Auto Refresh In – You can set the auto refresh time for the currencies as per the given options ex. Realtime, Daily, Weekly or Monthly.
- Multi-Currency – You can select multiple currencies for display purpose from the given list.
- Currency Markup - You can add Currency Markup value in this field which will be applicable.
On click on Update button your settings will be saved.
Product Settings
Using these settings, you can set products related settings.
Product
You can setup or update the product display settings from here.
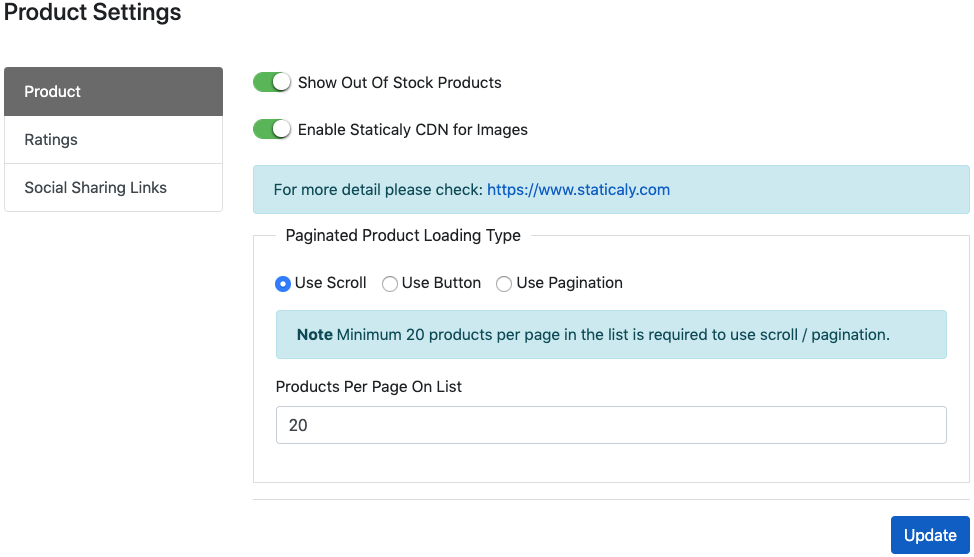
- Show Out of Stock Products - You can show/hide Out of Stock products in list using this switch.
- Enable Staticaly CDN for Image – If you enable this then file will be delivered from the CDN (Content Delivery Network.)
- Product Loading Type – You can choose how the paginated products should load on scroll, click on button or using pagination.
- Products Per Page on List – You can set how many products you want to show per request/page on list.
On click on Update button your settings will be saved.
Ratings
You can setup or update the product display settings from here.
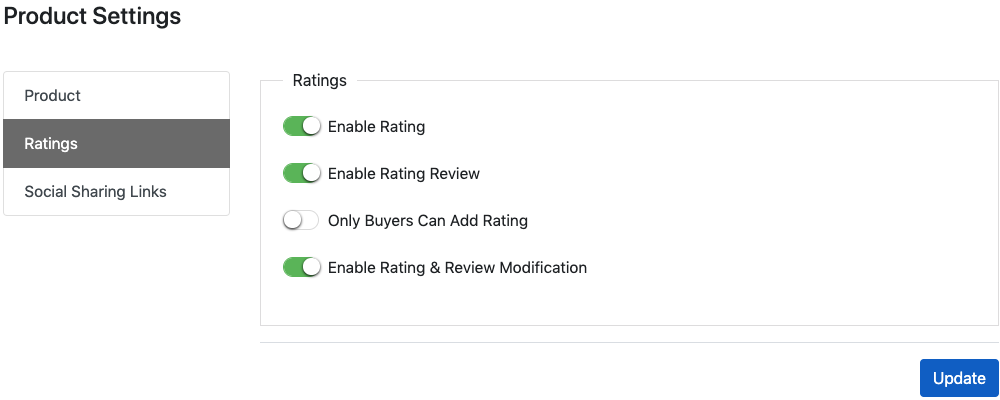
- Ratings – You can manage the different settings for the ratings & reviews from switch available in this.
- Enable Rating - Users can add ratings for the product if this switch is enable & if the switch is disable then the users can’t add ratings.
- Enable Rating Reviews - Users can add rating reviews for the product if this switch is enable & if the switch is disable then the users can’t add rating reviews.
- Only Buyers Can Add Ratings – Only buyers can add ratings for products if this switch is enable & if the switch is disable able then any logged in user can add ratings for products.
- Enable Rating & Review Modification – If this switch is enabled then user can able to make modification in ratings & reviews & if this switch is disable then user can’t able to make modification in ratings & reviews.
On click on Update button your settings will be saved.
Social Sharing Links
You can setup or update the product social sharing links settings from here.
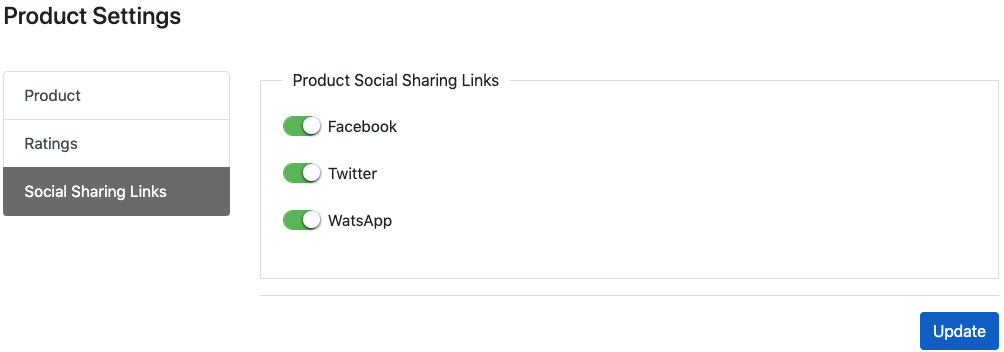
- Product Social Sharing Links - You can set the social sharing links for the products from here like Facebook, Twitter & WhatsApp. You need to enable this links from these settings to share products via social sharing.
On click on Update button your settings will be saved.
Email Settings
You can manage Email related settings using this menu from sidebar under Other Settings.
- Use Email Settings From .env File – You can enable this for doing email setting by .env

- If you disable this Use Email Settings From .env File then you can choose the any one mail driver from the given list.
- Mail From Address – You can add your from mail address from here which is common for the all mail drivers.
- Mail From Name - You can add your from name from here which is common for the all mail drivers.
- Mail Driver – From here you can choose the mail driver as per your need.
- SMTP – By fill up following settings for SMTP you can send the emails via SMTP mail driver.

- Mail Port – You can add mail port for your SMTP driver.
- Mail Host – You can add your mail host for the SMTP driver.
- Mail Username – You can add your mail username from here.
- Mail Encryption – Your mail encryption type you can select from here.
- Mail Password/API Key – Your mail password/API key you can add from here for SMTP mail driver.
- Sparkpost – By fill up following settings for Sparkpost you can send the emails via Sparkpost mail driver.
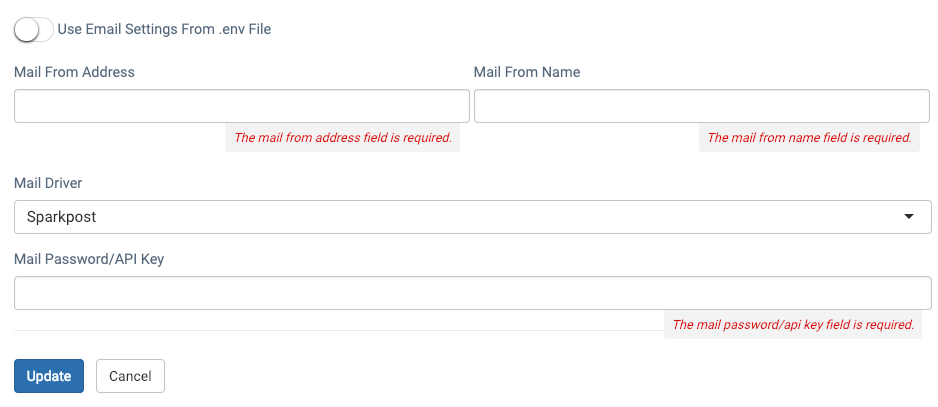
- Mail Password/API Key – Your mail password/API key you can add from here for Sparkpost mail driver.
- Mailgun - By fill up following settings for Mailgun you can send the emails via Mailgun mail driver.

- Mail Domain – You can add your mail domain from here.
- Mailgun Password/API Key – Your mail password/API key you can add from here for Mailgun mail driver.
- Mail Endpoint - You can add your mail endpoint for mailgun mail driver from here.
On click on Update button your settings will be saved.
Order Settings
You can make settings related to the orders from sidebar under Other Settings.
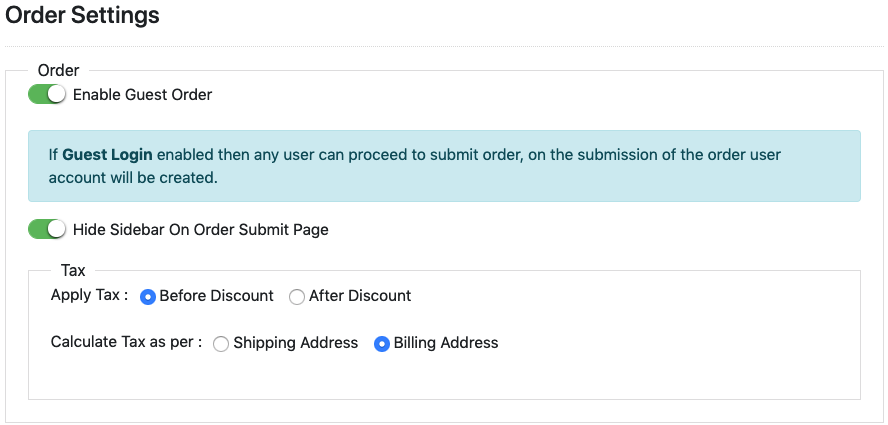
- Enable Guest Order – You can enable/disable guest order using switch Enable Guest Order.
- Hide sidebar on order page – You can enable/disable sidebar on order submit page this using switch.
- Tax – You can select & set Tax from here:
- When to apply tax before or after discount.
- Also calculate tax as per shipping or billing address.
- Allow Customer Order Cancellation - You can enable/disable Order Cancellation allow to the customer using this switch.
- The user will be able to cancel order if the order is not Completed or Delivered or Cancelled or the order status are selected from the given list.
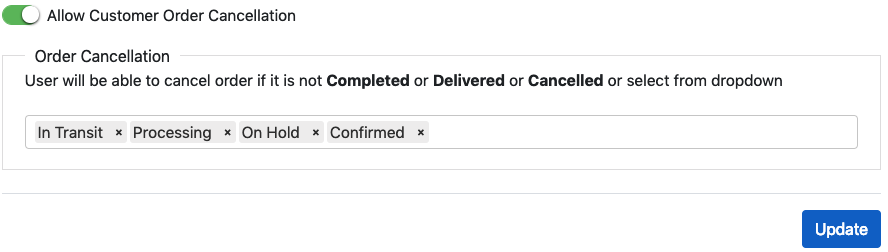
On click on Update button your settings will be saved.
User Settings
Using this dialog, you can manage user related settings like login throttle etc. from sidebar under Other Settings.
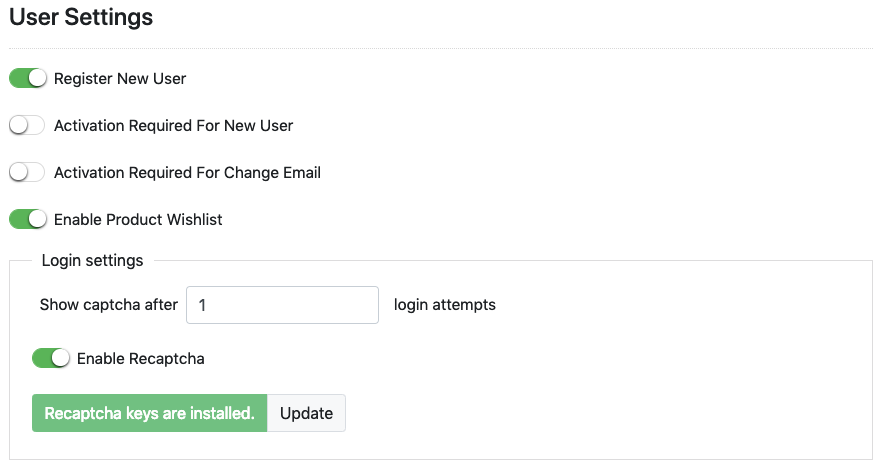

- Register New User - You can enable/disable registration of new user by Register New User.
- Activation Required For New User - You can enable/disable Email Activation Required for New User registration.
- Activation Required For Change Email - You can enable/disable Email Activation Required for Change Email.
- Enable Product Wishlist - You can enable/disable Wishlist from this switch.
- Login Settings - You set how many login attempts should allowed without Captcha. On login page after specified number in following format captcha will be shows.
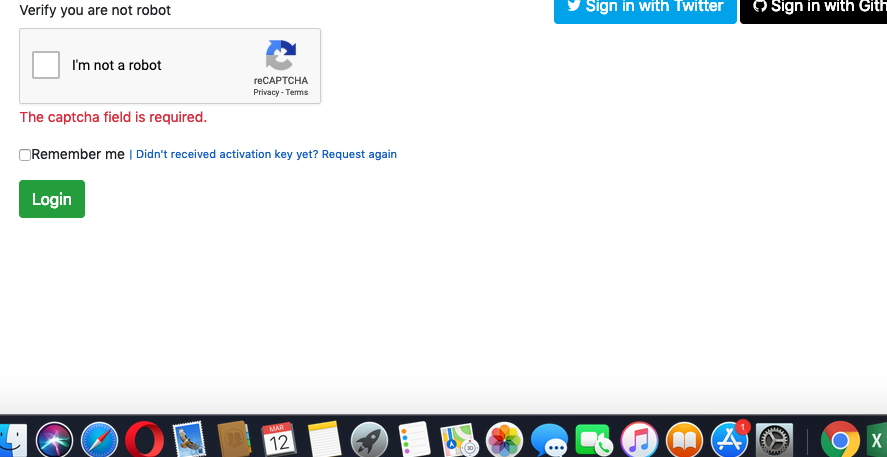
- ReCaptcha - If you enable the ReCaptcha then recaptcha gets enable & if you disable it then captcha get enable.
- Terms and Conditions For User Registration - From here you can add terms & conditions for user, if set any user needs to be accept these while register as user.
- You can set user terms and conditions here, acceptance and read link will be displayed on user registration page.

On click on Update button your settings will be saved.
Social Links Settings
You can add your Social usernames here which will be used in email & footer of site.
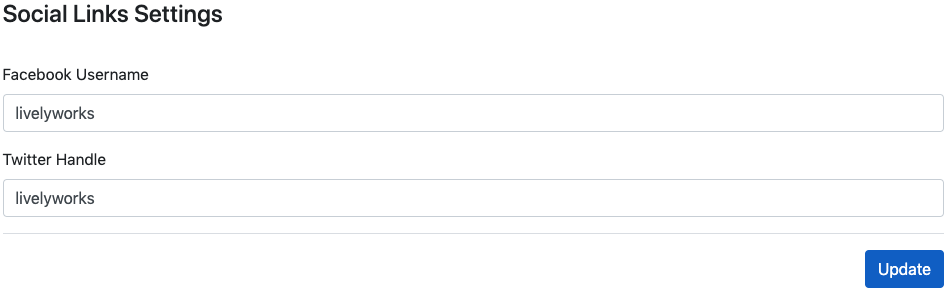
Which will further be used in Site Footer and in the Emails.
![]()
On click on Update button your settings will be saved.
Social Login Settings
Using this page, you can setup social login settings.
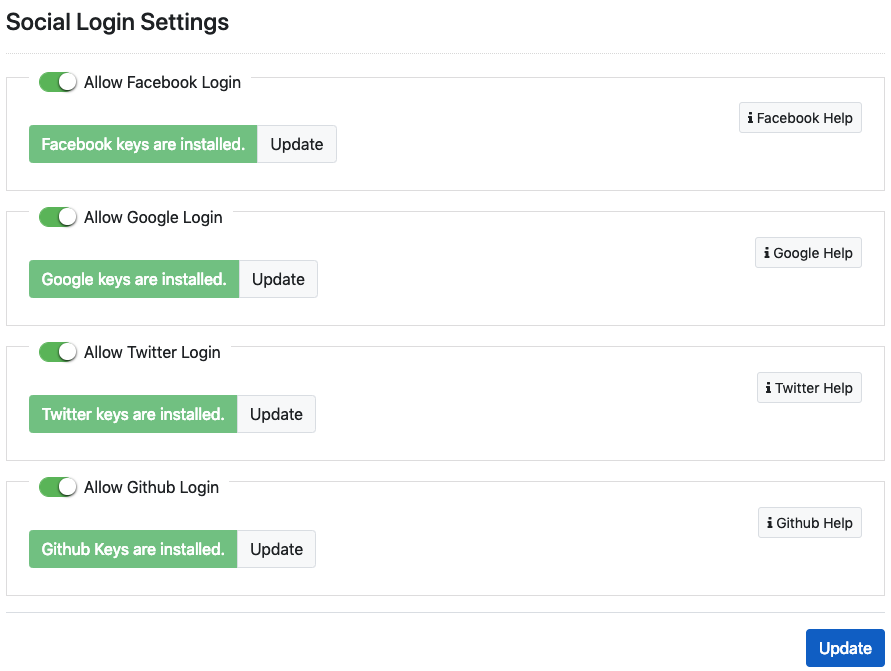
- You can allow your users to login using their social accounts, for that you need to grab some keys from social accounts. Detailed information to grab keys has given on integration page.
On click on Update button your settings will be saved.
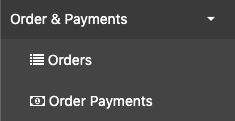
ORDER & PAYMENTS
You can manage the all orders & payments related settings as per the your needs from this section.
Under this, you will find separate sections to manage the orders & payments. Both of these are distributed under separate headings, we will see those sections one by one.
Manage Orders
By clicking on Orders under Reports & Orders section at sidebar it will take you to Manage orders page.
There are 3 Tabs underneath:

- Active - It shows the list of active orders; Active orders are those statuses are not Completed or Cancelled.
- Cancelled – This tab holds the list of cancelled orders status. Please Note: Cancelled order status cannot be change. If the payment has already been completed, then you can record Refund for it using Update Payment button.
- Completed – This tab shows list of completed orders status. Please Note: Completed order status cannot be change.
Once the Order Status changed to Cancelled or Completed you will not able to change it.
Every order has having buttons as shown:
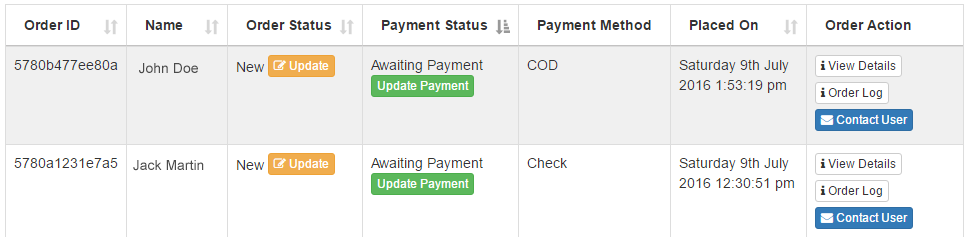
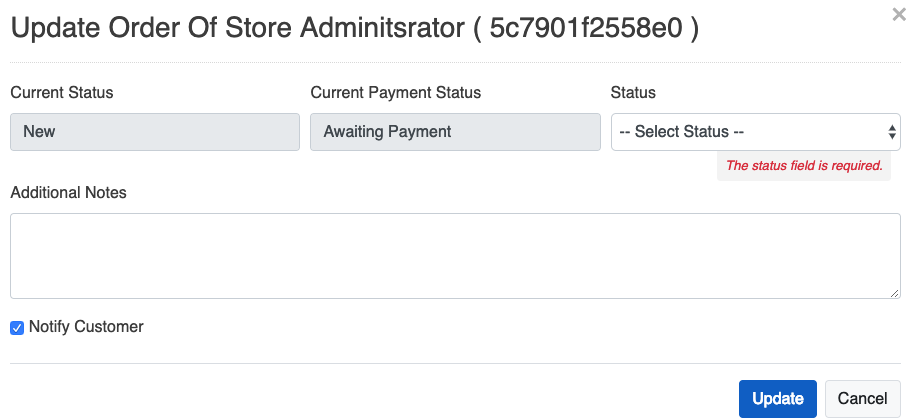
- Order Status – Update – You can update order status using Update button in Order Status column.
-
- Current Status - It Shows You Current Order Status.
- Current Payment Status - It also shows Current Payment Status for this Order.
- Status – You can choose new status from available dropdown options:

-
- Additional Notes – you can add additional notes if any.
- Notify Customer - You choose to send email notification for this order status update.
- Update – You can update order using Update button.
- Payment status - Update Payment – You can update payment status using Update Payment button in Payment Status column.
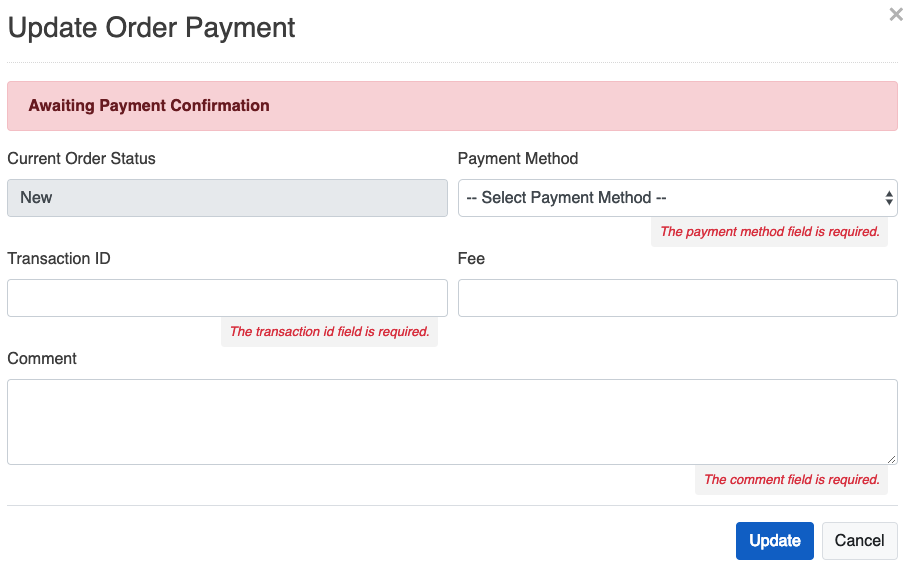
- Current Order Status – By default it shows the current order status which is not able to change from here.
- Payment Method – You can select the payment method of the transaction from here.
- Transaction ID – You can mention the transaction ID from this field.
- Fee – You can add the fee for the transaction from this field.
- Comment - You can add the comments here if any.
- Update – You can update order payment using Update button.
How Order Works
Order Submission Basically Categorized into Online payments which is currently PayPal, Stripe, Razorpay, Paytm, Instamojo & Iyzico and Other is Offline payments which are Bank Transfer, Check, COD and Other
Online Payment using PayPal

It’s give Customer a choice to make an online payment using PayPal.
If the PayPal order checkout method selected, then you cannot update payment status manually.
When new order submitted using PayPal as payment method order gets recorded in the system as Pending payment status & Customer gets redirected to the PayPal website to make the Payment:
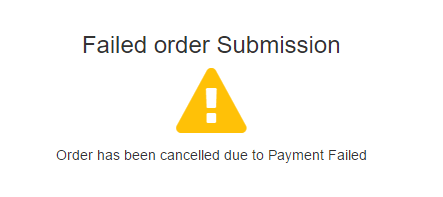
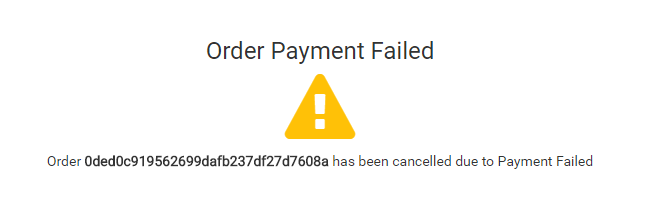
- If the use cancelled the payment & return to the website orders order status will be updated as Cancelled & Payment status will be Failed
Email Notification will not be sent for this cancelled order.
- If the Customer completes the payment successfully & Payment Status received from PayPal is Completed, then Order Payment Status will be updated as Completed. Customer will get redirected to store with Payment success message
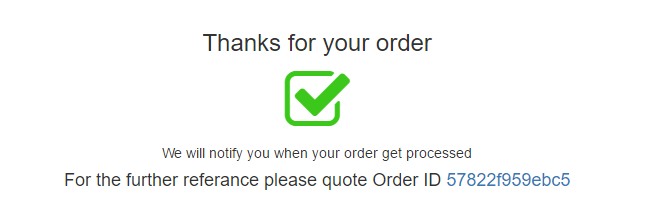
Order Success Notifications email will be sent to Customer & Store Administrator.
- If the Customer completes the payment successfully but if Payment Status received from PayPal is Not Completed may be pending for certain reasons, then Order Payment Status will be updated as Pending (and when receives completion response then order payment will be updated as Completed.) Customer will get redirected to store with Payment Not Completed message.
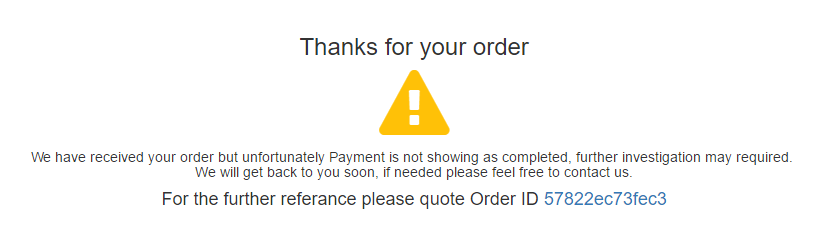
Email Notification will be sent to Customer & Store Administrator as Order is submitted but Payment Not Showing as completed & needs to be investigation.
Online Payment using Credit/Debit Cards via Stripe
It’s give Customer a choice to make an online payment using Stripe.
To get order submitted customer has to select Stripe as Payment method & click on
 button will open Stripe Payment dialog asking for card details.
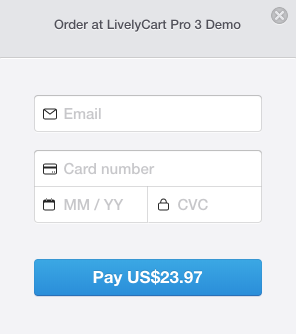
Once the payment complete. User will be taken to success page & order will be updated as Completed.

Order Success Notifications email will be sent to Customer & Store Administrator.
On Payment failed order status will be updated as Cancelled & Payment status will be Failed.
Offline Payments
Offline Payment which show the available options as given below, all order just saved into database & notify Store Administrator as New order received and admin needs to update payment status manually into the system. These options are just informative, which shows to user on their selection based on information set by Store Administrator using Configuration & Settings at Payments Settings.
Email Notification will be sent to Customer as well as Store Administrator for Order Submission.
Manage Order Payments
By clicking on Order Payments under Orders & Reports section, it will take you to Manage Order Payments page. Using it you will be able to view the all payments done against the orders are generated as per order payments are paid in specific duration for selected duration.

- Generate Excel File – You can generate the Excel file for the order payments.
- Delete - Order Payments can be deleted by the click on the delete button.
REPORTS
By clicking on Reports section it will show you the Order & Products Reports. So you can access the all reports pages on by one. Using it you will be able to view the calculated reports.
Under this, you will find separate sections to generate the reports of orders & products. Both of these are distributed under separate headings, we will see those sections one by one.
Order Reports
You can view the all orders reports for specific duration as per the select from the Duration. Report of all Orders for specified duration & different order status is as follows
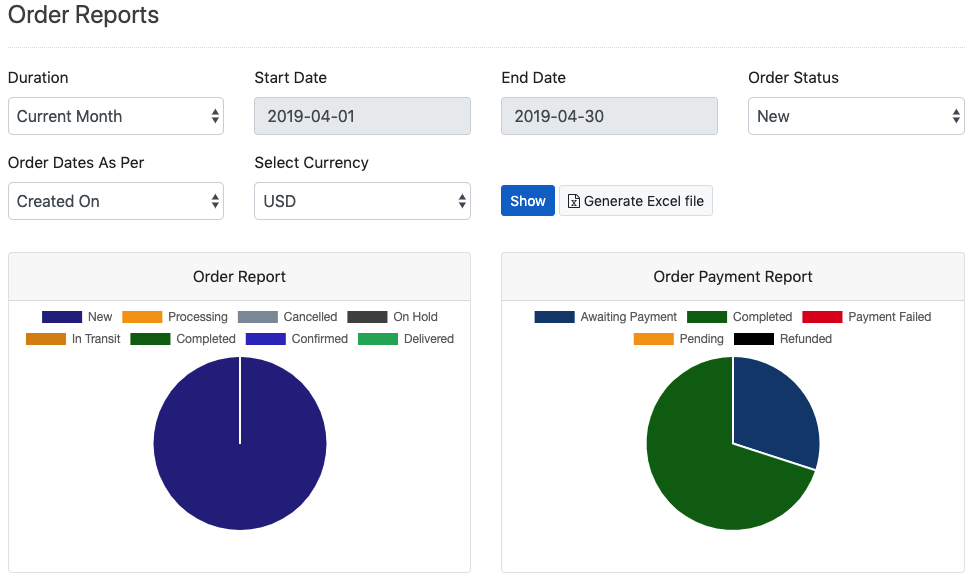
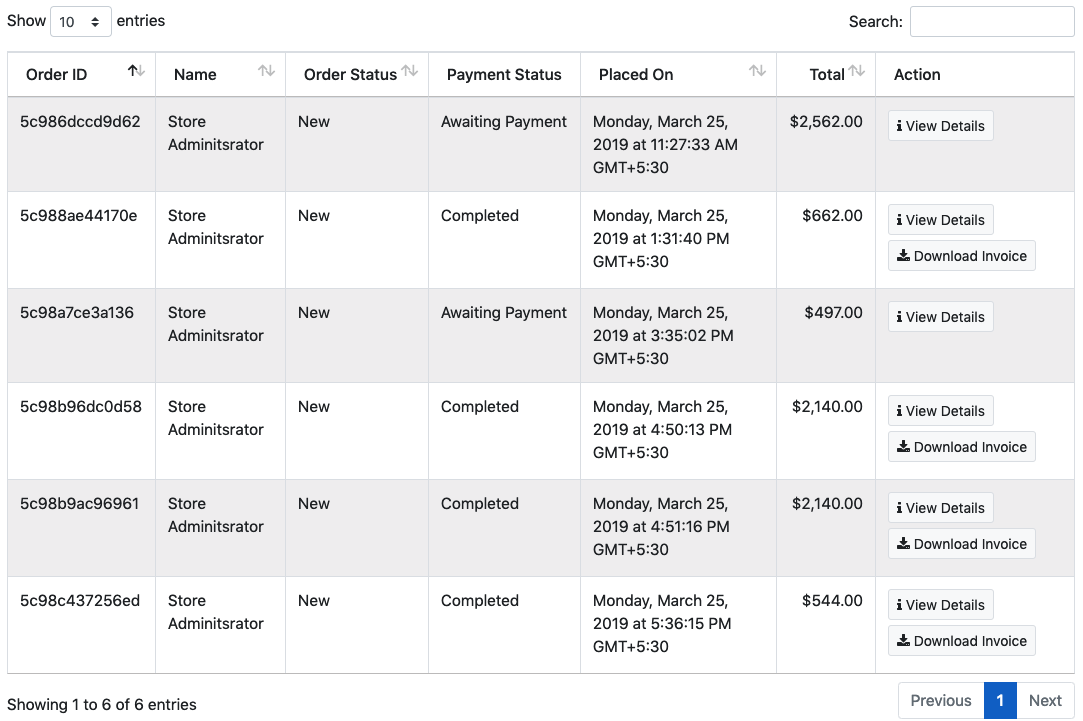
Report for the Orders contains the all details of the Orders.
- Generate Excel File – You can generate the Excel file for the all orders.
- Download Invoice – You can download the invoice by click on the Download Invoice button for any order.
- View Details – You can view the details.
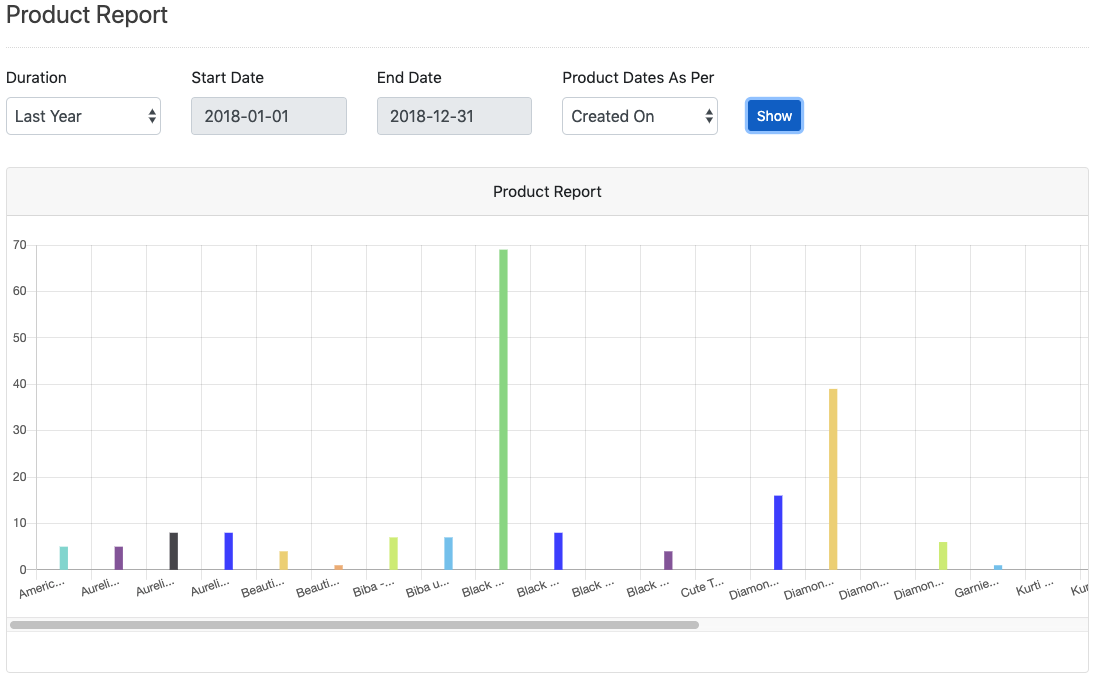
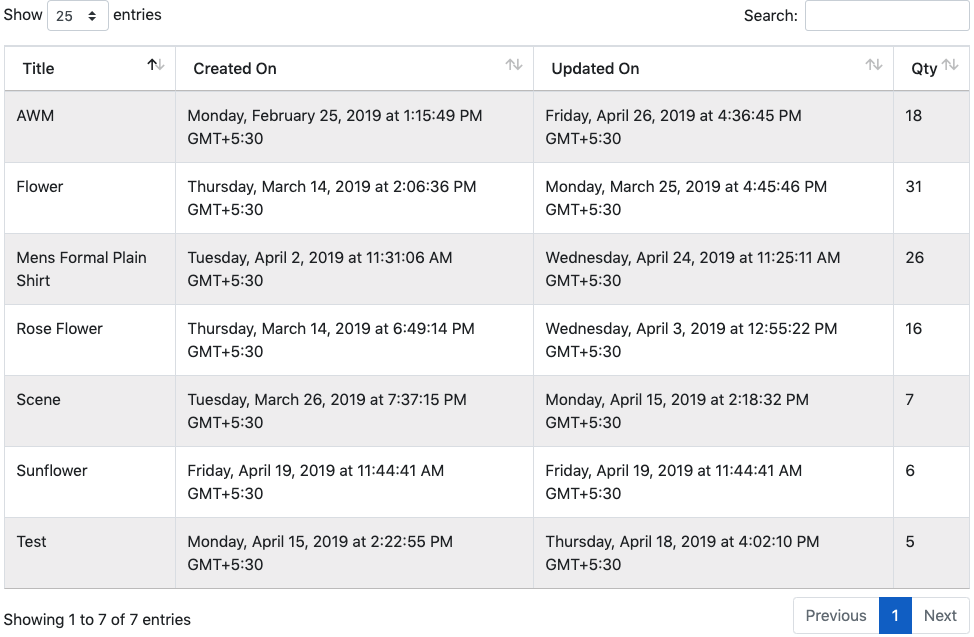
Products Reports
You can view the all products reports for specific duration as per the select from the Duration. Report of all Products for specified duration is as follows
OTHERS
You can manage the all other things as per the your needs from this section like User, User Roles, Pages & Menu.
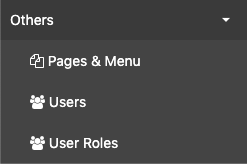
Under this, you will find separate sections to manage the User, User Roles, Pages & Menu. All of these are distributed under separate headings, we will see those sections one by one.
Pages & Menu
Using it you will be able to manage Main Menu and Custom Pages of the site. You can view, edit & add new pages/ link right from here.
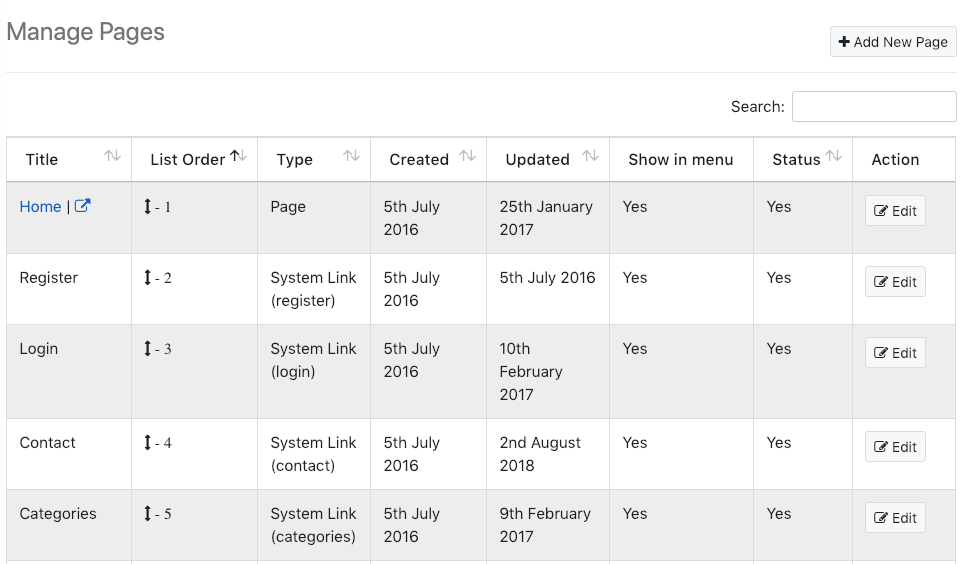
- In the list, you will find System links also these are the links used by the system like for login, register etc. You can change name of it for the menu and can decide whatever this item should show in menu or not.
- Created custom pages can be deleted.
- To Add new page/ link you need to click on
 button.

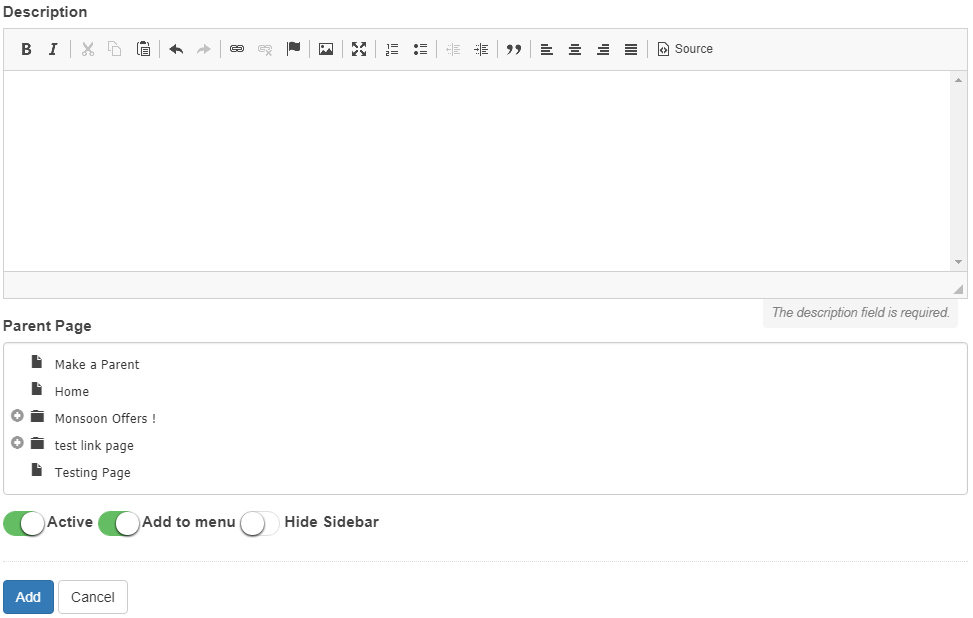
- Title – You can add Title of the Page/Link in this field.
- Type – You can select the Type (Link/Page) from the Type field.
- Description - You can add Description of the Page/Link.
- Parent Page – You can select Parent Page for the new page from this list.
- Active/Inactive – You can decide the state of the new Link/Page by this Switch.
- Add in menu – You can decide that new Link/Page is show in menu or not by this Switch.
- Hide Sidebar - You can decide that new Link/Page is show at sidebar or not by this Switch.
- Add - On click on Add button your Page/Link will be added.
Manage Users
Users can be managed from here.
There are 3 Tabs underneath:

- Active - It shows the list of active users.
- Deleted – This tab holds the list of Deleted users. You can’t permanently delete user from deleted tab. But you can Restore users present in deleted tab.
- Never Activated – This tab shows list of never activated users.
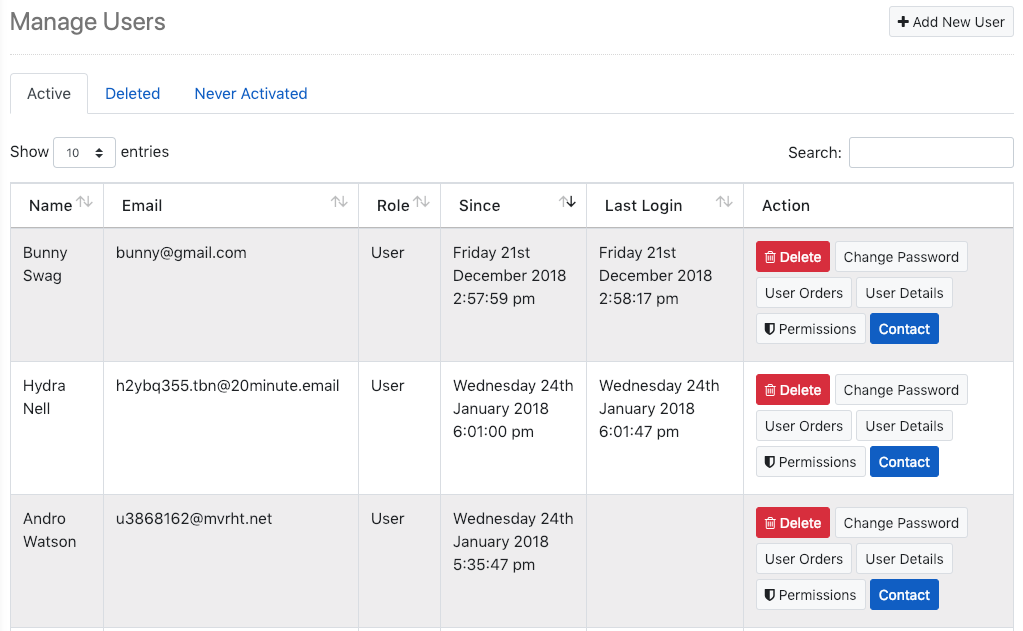
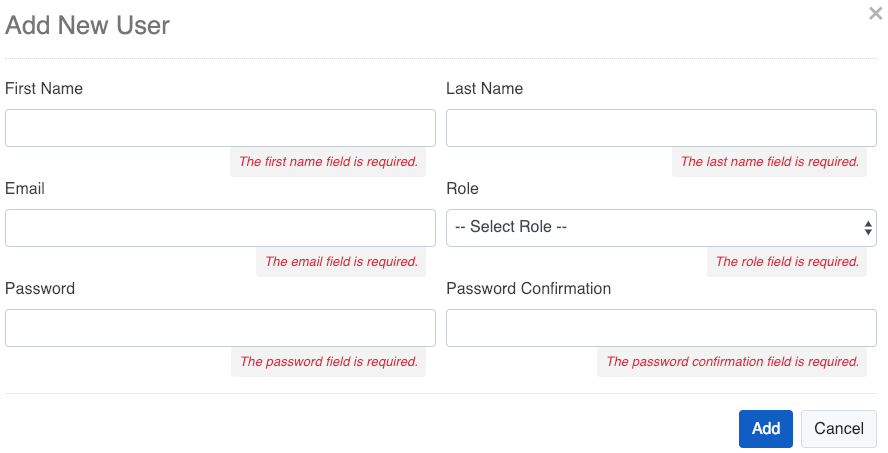
Add New User
- You can Add New User.
- To add new User, click on
 button will open dialog with form to add new user.
 - If you Delete user, it will be in deleted state and will available under Deleted tab. You can’t permanently delete that user from deleted tab.
Manage User Roles
- First Name – You can add First Name of User.
- Last Name – You can add Last Name of User.
- Email – You can add Email of User.
- Role – You can select the user role.
- Password – You can add Password for User.
- Password Confirmation – You can re-enter the Password for the confirmation.
- Add - On click on Add button your User will be added.
- User Roles can be managed from here.
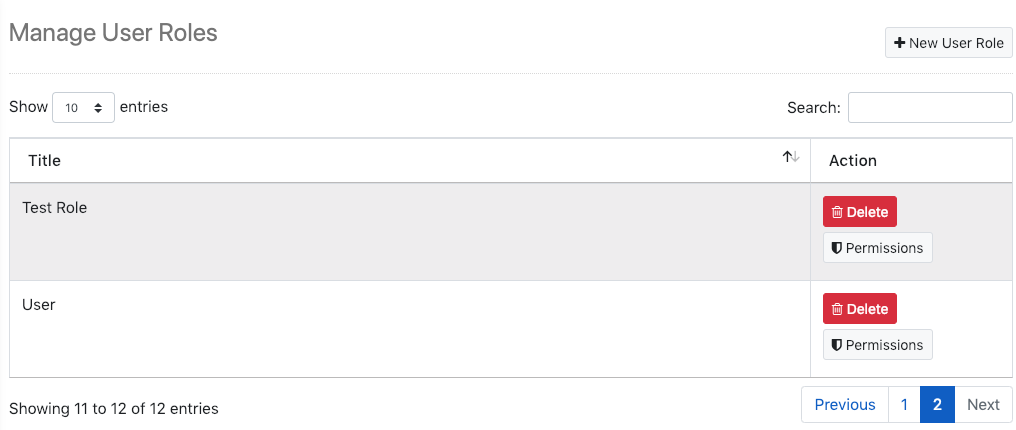
Add New User Role
- You can Add New User Role.
- To add new User Role, click on +New User Role button will open dialog with form to add new user role.
- You can Delete user by click on Delete button.
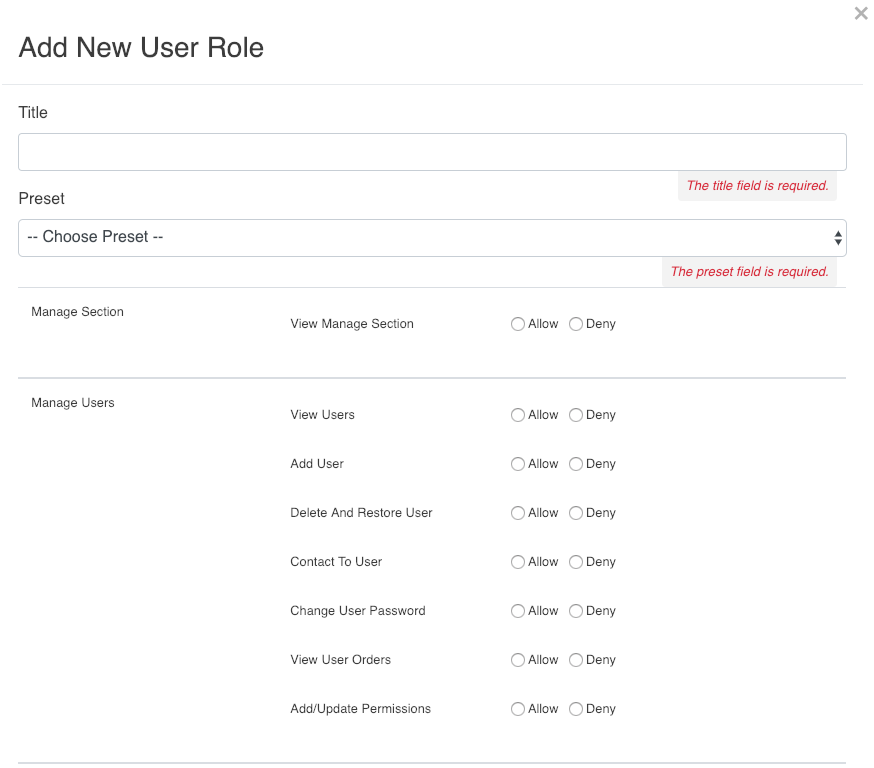
- Title – You can add Title for the new User Role.
- Import Permission from – You can import the role permission of existing user for new user role from here. (Please note: It just for your connivance to select the permission item checkboxes & won’t carry this relation further.)
- Then from the given entity of permission you can assign the permission to the new role or able to update existing imported permission.
- Submit – Click on the submit button you can submit the permission for that role.
Users Role Behavior
Now we added the user role section to add the user dynamic role with permissions. This role you can select while creating the new user. The permissions of that role is applicable to the users & you can update the that role level permission from role level or user level.
At primary level role level permissions are applicable to the user. But when any permission is update from user level permission then for that updated section, updated permission will be applicable.
Manage Languages
You can add new language or alter the current one using PoEdit software.
- Poedit software this is free application available for Windows, Mac OSX & Linux to edit PO files. You can download it from http://www.poedit.net/
- Once you have successfully downloaded application, install it on your system.
- Once the installation successful you can add new language or edit existing one as required.
- All the locale/language files are in folder called locale
- Follow below instruction to edit current language/words etc.
- Go to folder called locale then choose which language you want make changes for suppose you want to make changes for English the go to folder called en_US (Language Culture Name: http://msdn.microsoft.com/en-us/library/ee825488(v=cs.20).aspx use _ (underscore) instead of – (hyphen)) there is also folder called LC_MESSAGES go to it. Now you should see 2 files there.
- First is messages.mo is Binary file which the PHP will use for translation we do not need to do anything to this file.
- Second file is messages.po you need to edit this file.
- Kindly open this file in Poedit:
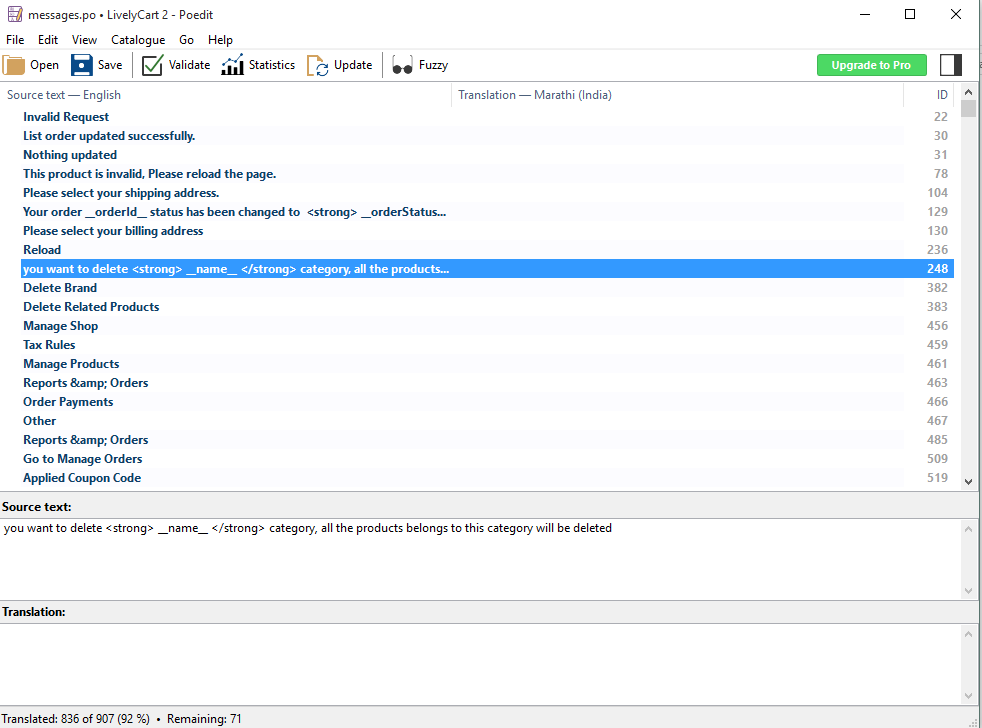
-
- The first column called source text is the original text. Second column called translation is replacement word for the same. E.g. if you want to change Delete Brand word to your translation then what you can do here you can change it right in translation. Shows in the image below.
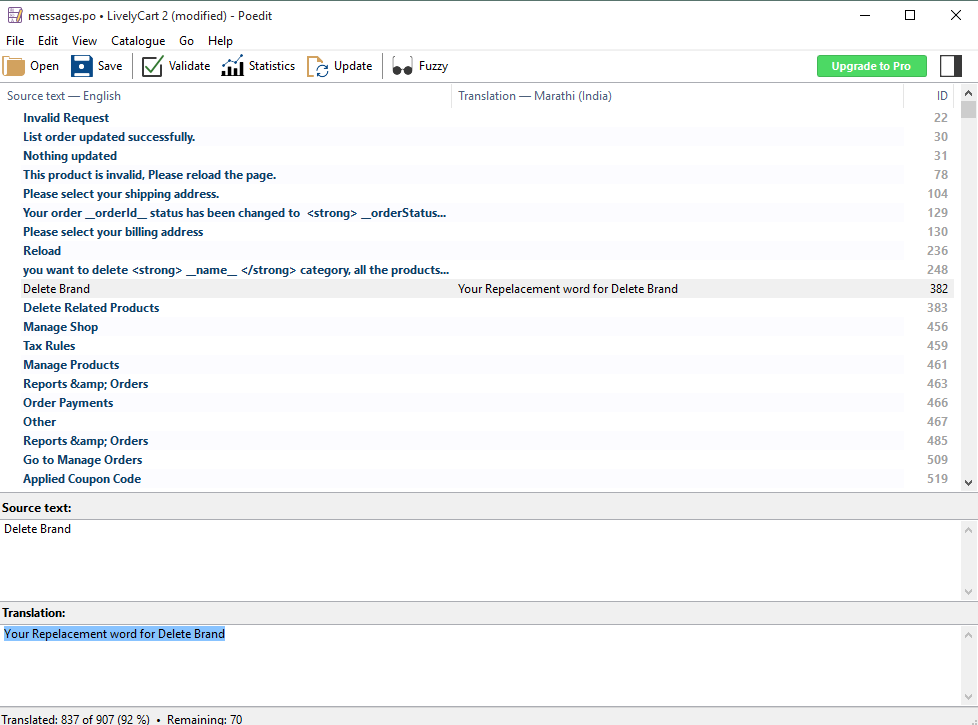
-
- Now Save it. It will automatically update messages.mo file & will available for use.
- To add New Language, follow below instruction
- Go to folder called locale and make copy of en_US folder for your language say hi_IN (follow the folder naming convention).
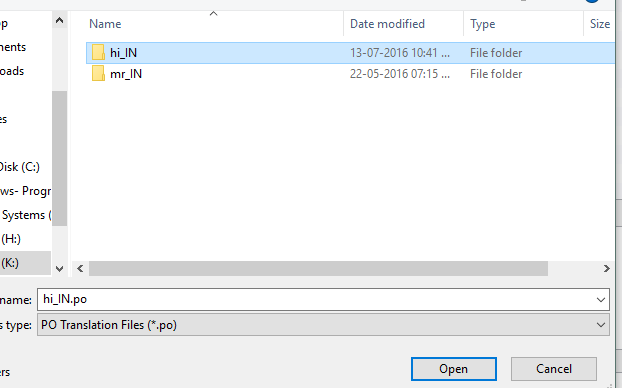
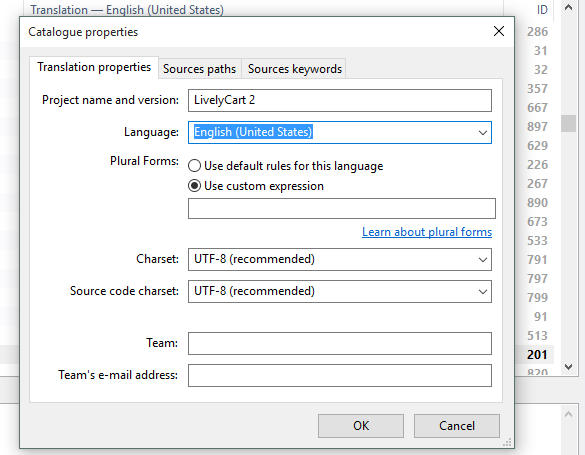
- Then open file messages.po open it in to the PoEditor, once it opens first you need to edit properties.
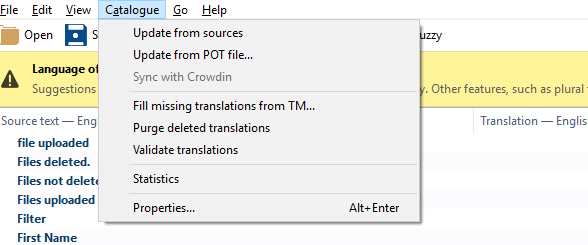
- Choose Your language.
- And make Translations for source text as show above.
-
- Please note do not change word like __word__, :word, %wod% etc. These are the special words will automatically replace with dynamic words. Say for store name etc. Fit these to complete your sentence. E.g., Welcome to __storeName__ will turn to Welcome to Your XYZ Store like so.
- Save the file.
- Now open Store configuration file (config/locale.php ) in any text editor & add/ edit values to available array. Like I have added for French 'fr_FR' => 'français'.
-
- It’s done for now you may set this as default language from General Settings under Configuration Settings.
Translate/Transliterate
You can translate/transliterate all your dynamic text & shows at public side as per the change the language. Using this you can translate/transliterate your all dynamic text & view the effects on change the language.
How Translate/ Transliterate Works
To auto transliterate/auto translate the text you need click on the Edit button. On Edit page/dialog the field which contain the ![]() icon, only for that fields you can auto transliterate/auto translate.
icon, only for that fields you can auto transliterate/auto translate.

- By click on
 icon the dialog of Translate/Transliterate will opens.
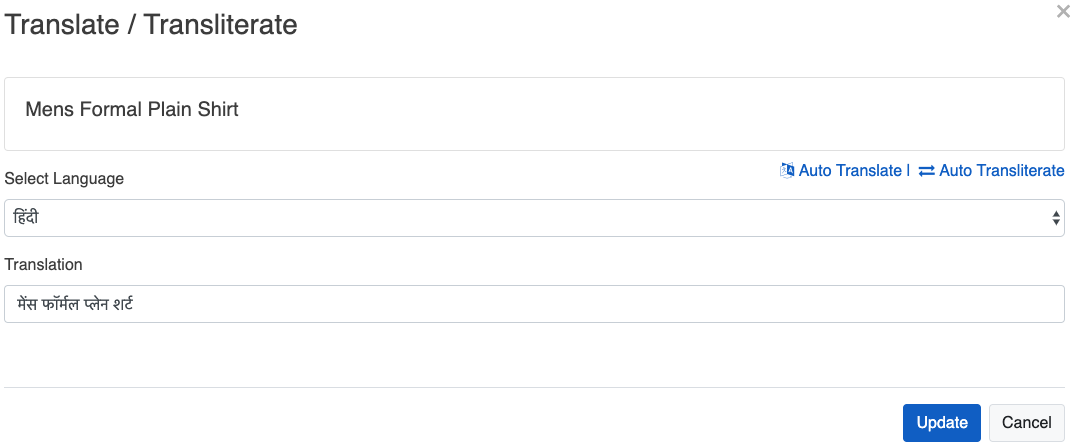
- Select language – Using this you can select the language for which you want to translate the above text.
- Translation – You can add the translated text here or you’re your translated/transliterated text shows in this area.
- Auto Translate - You can click on this link for the auto translation the text. This link is visible after you select the language only. This will gives your translated text of your original text.
Note : Shows the following note because it has the some limitations as per the this note (Translation Failed : As google started paid translation service, this method has a limitation, may your ip get blocked for a particular time.)
- Auto Transliterate – You can click on this link for the auto transliterate the text. This link is visible after you select the language only. This will gives your transliterated text of your original text.
For auto translate you can refer the following link : https://developers.google.com/transliterate/v1/getting_started
- Click on Update button to update the translations/transliterations.
Emails
Here is the list of emails sent by system for the particular events.
- User registration activation – Email contacting the activation link will be sent using this email. To activate account, one needs to follow the link.
- Forgot Password – User can ask for reset password using the forgot password functionality, which sends an email to user containing link for password reset.
- Email Change – Email gets verified while requesting change, an email sends to the new email address containing verification link for activation of new email.
- Order – Order related emails are sent to Store Administrator as well as Customer, while updating order Admin have option to send customer email or not.
- Contact Store – This form sends an email at business email address.
- Contact Customer – This form sends an email to Customer of that order.
Thank You
Once again thank you so much for purchasing this product. I would be glad to help you if you have any questions relating to this product. No guarantees, but I will do my best to assist.
We have small team of Designer & Developers, here are some of the Great tools and technologies we use day2day for the development: HTML5, CSS3, jQuery, PHP, Laravel, AngularJS etc.
we also build iOS & Android Application.
If you need any Customization Work / Support on this Product or having any project for us. Please feel free to email us at [email protected]
Our New Service
![]()
We are happy to inform you that we just launched our new service called ServePHP for managing Servers and Applications for PHP.
ServePHP will help you in creating, provisioning and managing server tuned for PHP. It helps in performing many important tasks like Attaching Domains, Applications, Cron Jobs, Firewall Rules, Auto Deployments and many more without writing single line in Terminal, these tasks are just a click away using simple interface.
Many Advance features like Auto Deployments using Git Push requests, these deployments can be configured conditionally to avoid unnecessary commands executions.
Get started with free account without any credit card information and you can quick sign up via the Google, GitHub, Bitbucket, DigitalOcean, Slack, Gitlab to get hassle free ride to functions & features of site.
To know more about this application please visit our site at the servephp.com
Thank You & Good Luck

livelyworks.net | [email protected] net | @livelyworks | https://github.com/livelyworks