Articart
Setup Guide
Setup Guide
Installation
Server Requirements
As given below.
- PHP >= 5.7.x
- MySQL 5.x
- OpenSSL PHP Extension
- PDO PHP Extension
- Mbstring PHP Extension
- Tokenizer PHP Extension
- FileinfoPHP Extension
- GD Library (>=2.0)
- Curl
- JSON
Files & Directories in Download Package
In the downloaded Zipfile, you will find below files & folders:
- Source – a folder containing all the required files you need to deploy on to the server.
- articart.sql- a file containing database structure &initial data to get started.
- Setup-Guide.pdf – an Instruction manual for setup (This Document)
- Quick-Start-Guide.pdf - BasicProduct introduction.
- Technical-Guide.pdf – Technical information may help for further customizations.
Setup Database
Follow the below steps to setup database.
- Create a Database using your choice for the demonstration purposes I used phpmyadminif you are doing it on Shared Hostingdatabase creation method may vary you may also needs to create& assign user to it.
- Once database is created, say articart
- Then you need to click on articartdatabase from left sidebar
- go to the phpmyadminand clickon SQL tab.
- Open articart.sqlin any text editor
- Copy the content of this file
- Paste copied content in to above selected SQL tab.
 And click on Go button
 - If everything goes fine, there should not be any errors& your database setup is now completed.
Configure & Setup files
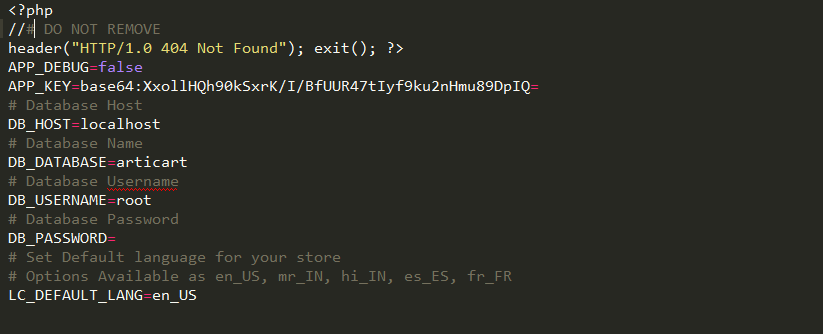
Now go to Source folder & open .env file in to text/code editor.
- Do not touch yellow highlighted lines
- It’s not mandatory to setup APP_KEYbut for better to use new key, you can generate 32-bit key using http://passwordsgenerator.net
- Now you need assign values forDatabase Configuration values so the application can connect to database.
-
- DB_HOST- your database host in most cases its localhost
- DB_DATABASE- your database name.
- DB_USERNAME - your database username.
- DB_PASSWORD - your database password.
- Using LC_DEFAULT_LANG you can choose default language using available (Available language options given in comment in .env file) for your application. E.g.LC_DEFAULT_LANG=en_USUS English chosen here.
Now save this file.
Deployment
If everything goes fine you are now ready to deploy itnow you need to copy all the source folder files to your web server.where you want it to access / host.
If you done above steps carefully and for exampleIf you placed this in root of your domain, then you should access following page by pointing your browsers address bar tohttp://yourdomain.com.
Verify Installation
Now you can test your installation at http://yourdomain.com/verify-install if shows any problems fix it. It check server requirements and .env settings for database etc.
Please do not forgot to delete verify-install.php ones everything is ready.
Login
Now you need to configure it as you required. For that you need to go tohttp://yourdomain.com/user/loginor click on login menu item from top navigation bar.
Now you will come to login page of the site. For the First time you need to use following credentials to get logged in.
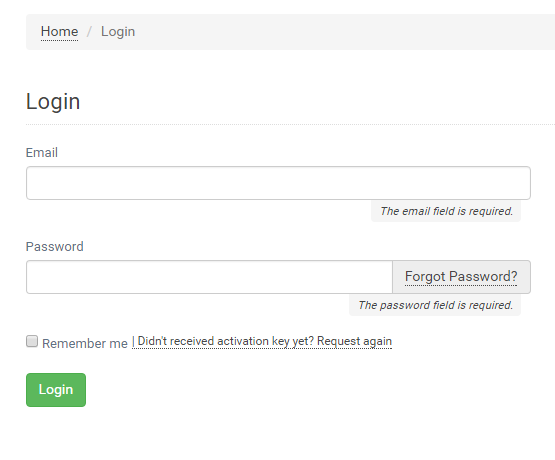
Email: [email protected]
Password: firstadmin123
Once you get successfully logged in, Please change your email address & Password
Now you should see Dashboard with various statistics.Menu at sidebar allows you to manage as per the needs, let’s see Configurations and Settings.
Under this page, you will find various configurations and settings which needs to run Articart as your choice. All these settings are distributed under various headings, you can find those using the filter at top of the panel. We will see those settings one by one.
Configurations and Settings
General Settings
By clicking on General Settingsbutton will show you dialog with following items as shown in the below screenshot.
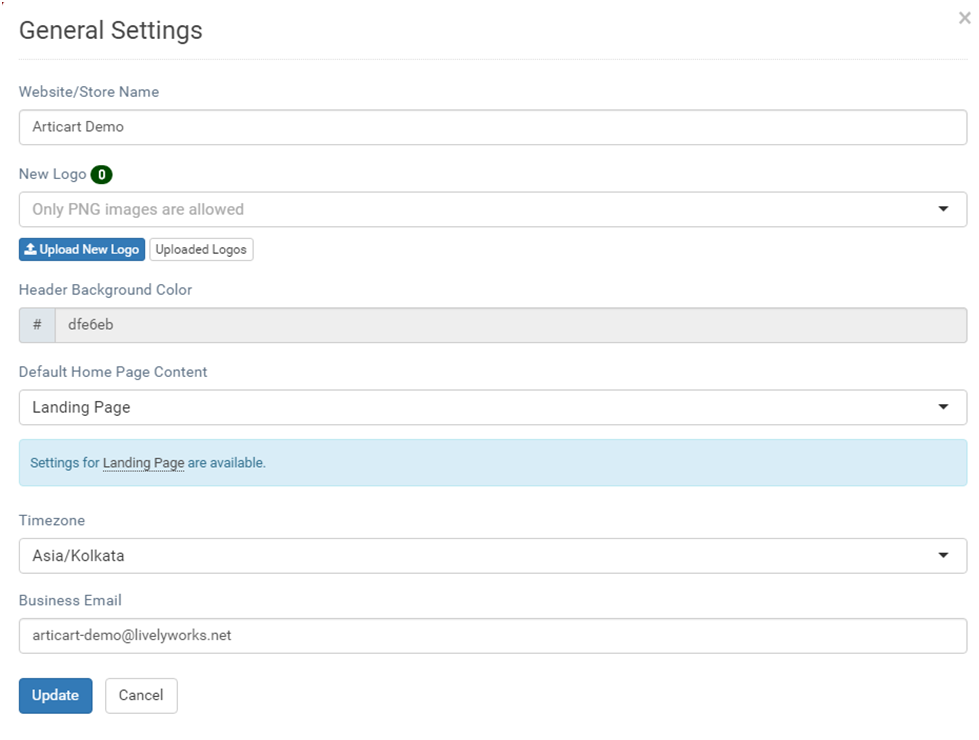
- Website/Store Name – It will be used throughout application.
- Logo
- New Logo –you canupload your new logo using button called Upload New Logo once you upload new images you can select it from New Logo dropdown.
Please note: Only PNG files are allowed for logo images.
- New Logo –you canupload your new logo using button called Upload New Logo once you upload new images you can select it from New Logo dropdown.
- Header Background Color – You can change header background color right from here to suite your logo or to your choice. You can see the preview of this at current logo.
- Business Email – This email will be used for various purposes like from in send order emails & you will be able to receive emails at this address.
- Default Home Page Content – What the content you want to show for home/landing page. You have choices from Below:
- Home Page –A specified page from Pages, you can customize it using editor in Manage Pages link.
- Landing Page - This is special page which can used as Home Page some settings are available for this page as settings link is given in information.
- All Items – It is all items page which you can set as Home
- Featured Products – It is featured products page which can be set as Home
- Shop – If you want to shopping items page as Home page.
- Timezone – You need to select your own time zone as needed.
- On click on Update button your settings will be saved. You can reload the page to see the changes
Blog Settings
You can manage blog related settings from this Dialog
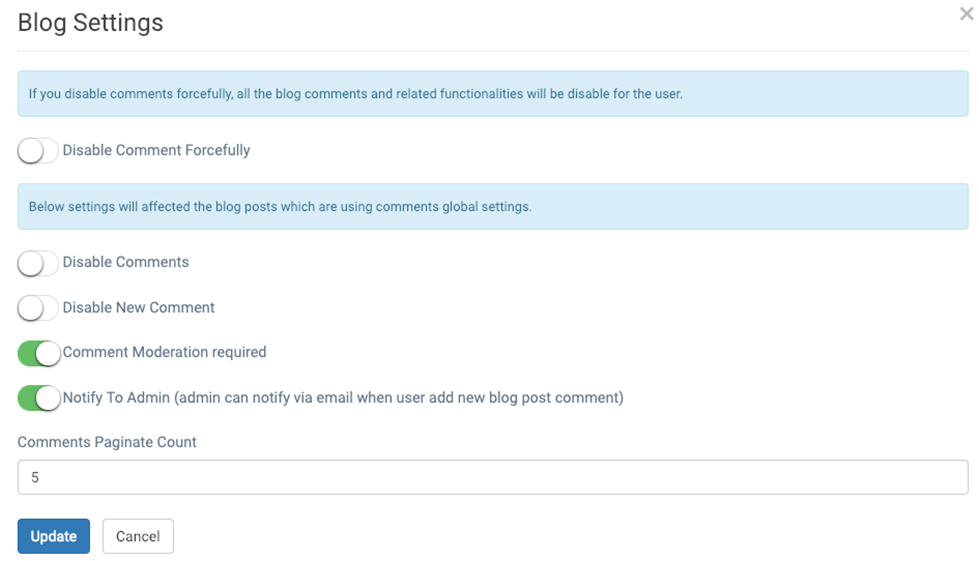
- Disable Comment Forcefully – It will disable comments for the all the blog post, without honoring below mentioned settings and Blog Post specific settings.
- Disable Comments -It will disable comments for blog posts which are using Default Settings.
- Disable New Comments – It will disable functionality to add new comments for the blog posts which are using Default Settings.
- Comment Moderation Required - If it’s on then comments added by the user won’t publish without admin moderation it will be applicable for the blog posts which are using Default Settings.
- Notify To Admin – It will enable the Notify To Admin, by this admin can notify via email when user add new blog post comment.
- Comments Pagination Count -Using it admin can control how many comments should be displayed per page.
Item Settings
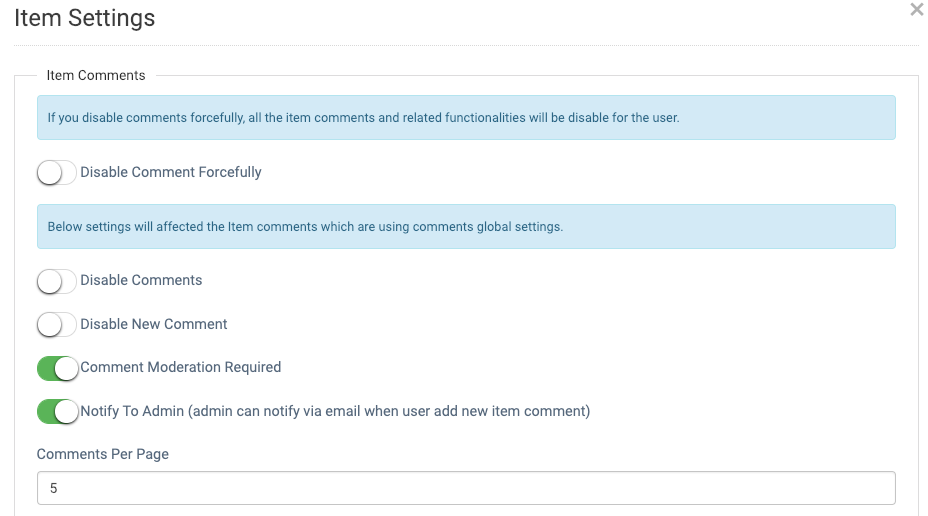
Using this dialog content, you can manage various configurations and settings related to item.
- Item Comments
-
- Disable Comment Forcefully – It will disable comments for the all the Item, without honoring below mentioned settings and Item specific settings.
- Disable Comments - It will disable comments for items which are using Default Settings.
- Disable New Comments – It will disable functionality to add new comments for items which are using Default Settings.
- Comment Moderation Required - If it’s on then comments added by the user won’t publish without admin moderation it will be applicable for the items which are using Default Settings.
- Notify To Admin – It will enable the Notify To Admin, by this admin can notify via email when user add new item comment.
- Comments Per Page- Using it admin can control how many comments should be displayed per page.
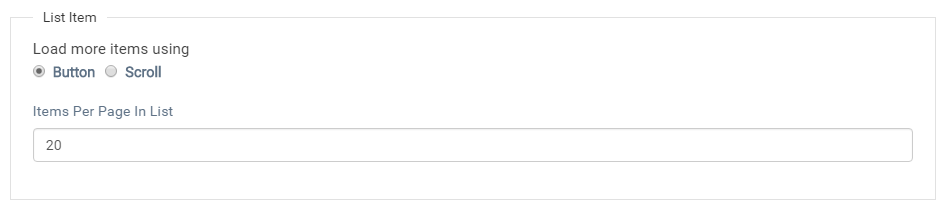
- List Items
-
- Load More Items Using – You can choose how to load paginated items, on Button click or on Scroll.
- Items Per Page in List – You can define how many items should load in per request call it’s just like per page items for pagination.

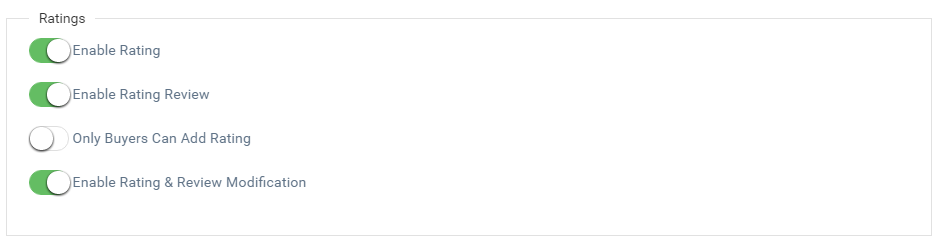
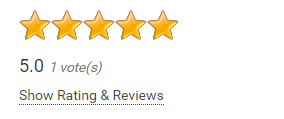
- Ratings
-
- Enable Ratings –You can choose to enable or disable item ratings,
- Enable Rating Review – If ratings are enabled, you can choose to enable/disable review for that particular ratings.If the Item ratings are disabled, then Item Rating Review will be disabled as well.
- Only Buyers can add ratings - You can restrict adding rating functionality only to the buyers of that particular Item.
- Enable Rating&Review Modifications -You can choose whatever to allow user to modify his rating & review or not.
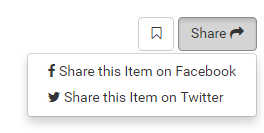
- Social Sharing – You can enable item URL sharing functionality of the details using following social services.

Privacy Policy
You can write your Privacy policy using this dialog.
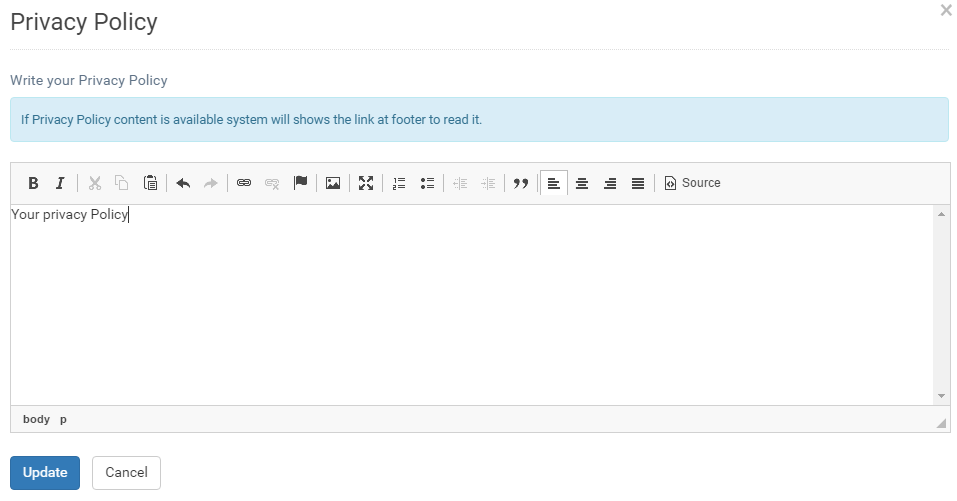
Link to privacy policy will be shown at footer.
![]()
User’s Setting
Using this dialog, you can manage user related settings like login throttle etc.
![]()
You can enable/disable Email Activation Required for New User registration.
![]()
You can enable/disable Email Activation Required for Change Email
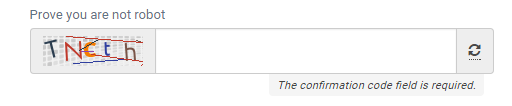
Login Settings

You set how many login attempts should allowed without Captcha.
User Terms and Conditions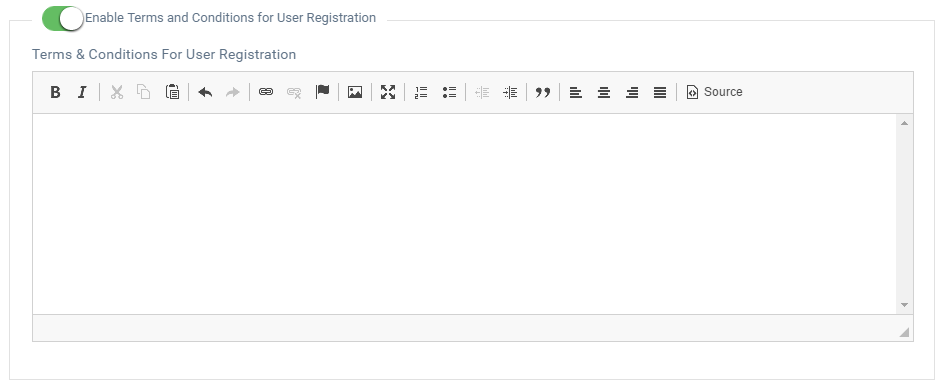
You can set user terms and conditions here, acceptance and read link will be displayed on user registration page.
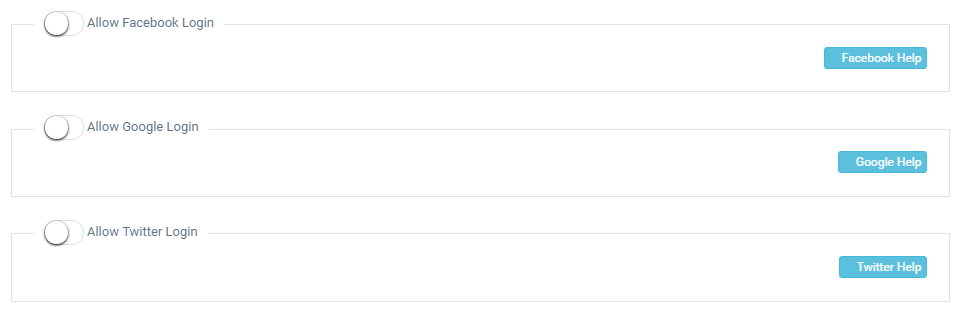
Social Logins
You can allow your users to login using their social accounts, for that you need to grab some keys from social accounts.Detailed information to grab keys has given on integration page.
Social Account
You can add your social account username/handles
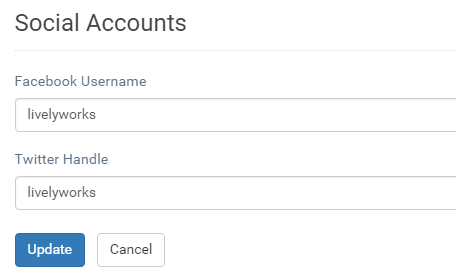
Which will further be used in Site Footer and in the Emails.

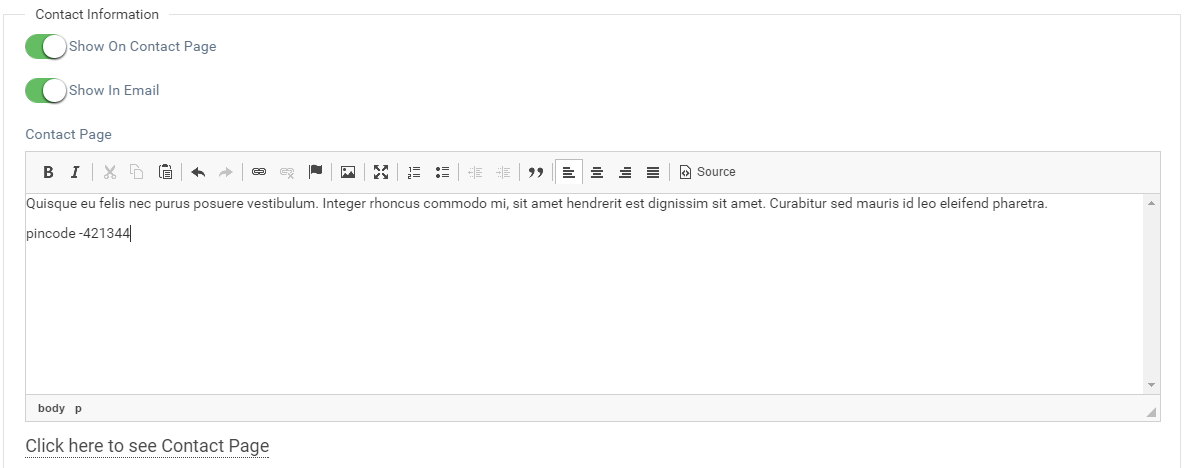
Contact
Using this dialog, you can set contact related information as give below.
- Email address for contact form

- Contact Information
Currency Settings
You can setup currency using this dialog& you have the following options for the same.
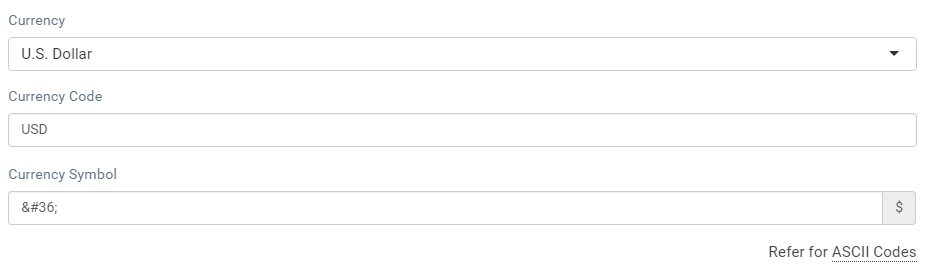
- Currency – You can choose from the list or given your own.
- Currency Code – Currency are identified by this code on chosen from currency list it will set automatically but you can also give your custom.
- Currency Symbol –It will be currency symbol code on chosen from currency list it will set automatically but you can also give your custom.
- We have identified some of the currencies are NON-DECIMAL currencies I we tried our best to handle it. If the choose currencies identified as non-decimal currency options for handling it will be shows like in below example.
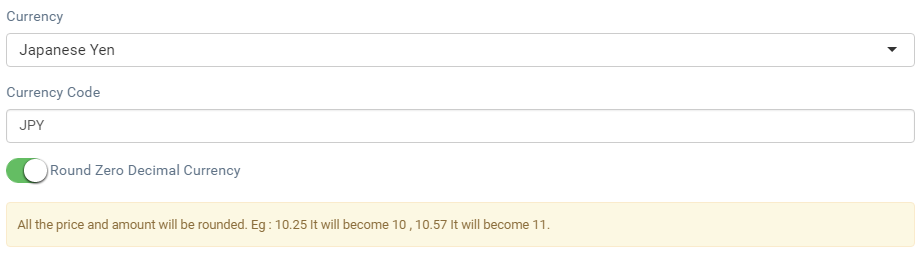
In this case we recommend to round off the prices and amounts, You can change this behavior using Switch button, but these payments may generate errors at payment gateways. - Currency Format
You can format currency settings using this field, Do not change content in curly braces eg.{__currencySymbol__}
You can share your contact information using this section, you can also decide whatever this information should show on Contact page and or in the Email.
Payment and Checkout Methods
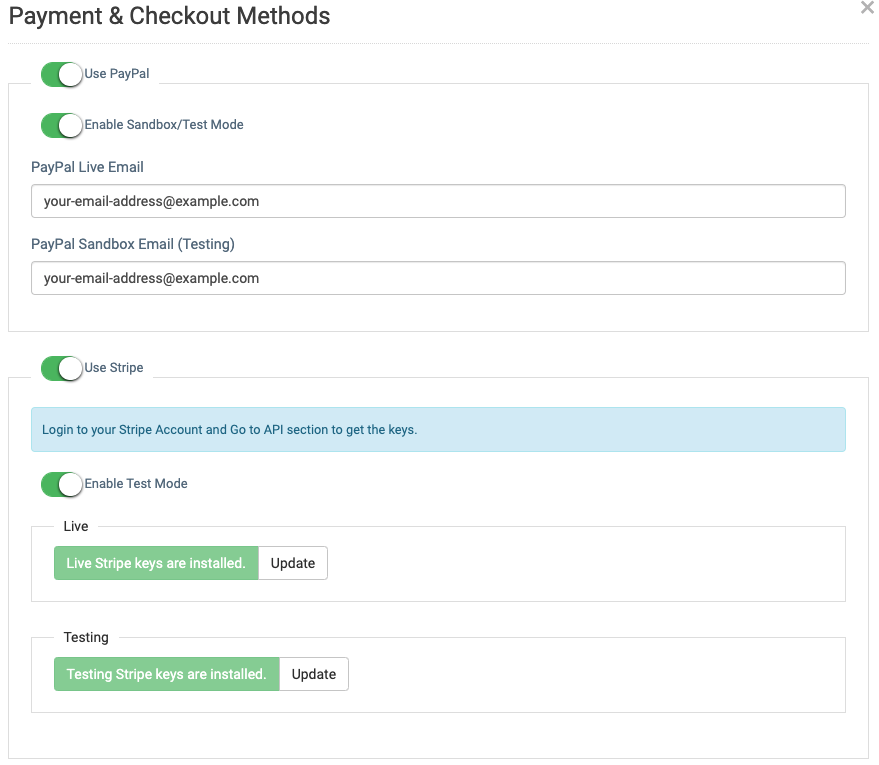
Using this dialog, you can setup order Payment and Checkout methods
- Use PayPal - You can enable/disable payment using this, using this method Customer will be able to make payment using PayPal. If the payment successfully completed from the PayPal payment will be marked as completed if not the order payment status will be shown as Pending and you need to make manual checks & needs to update order payment accordingly
- Enable Sandbox/Test Mode – Using this you can you can set sandbox or live mode for the PayPal payment.
- You need to add PayPal Live Email & PayPal Sandbox email to use it.
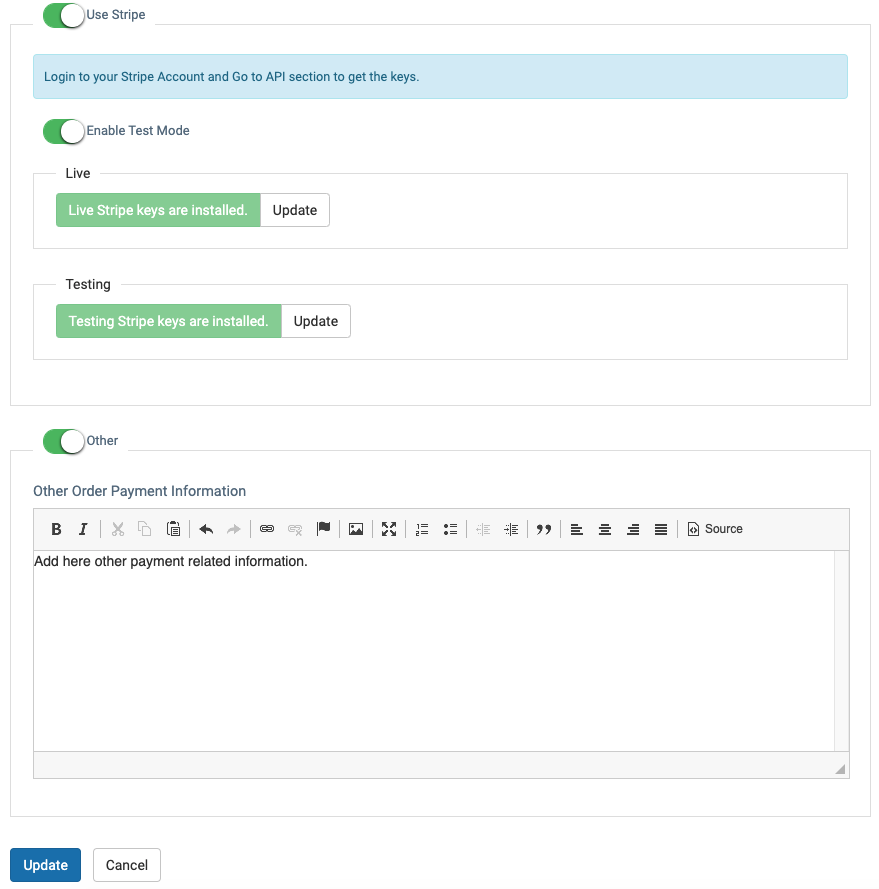
- Use Stripe – You can enable/disable payment using this, using this method Customer will be able to make payment using Credit/Debit Cards via Stripe. If the payment successfully completed from the PayPal payment will be marked as completedif there is any problem with cards or payment it will be failed and order will be cancelled.
- Enable Test Mode - Using this you can you can set testing or live mode for the Stripe payment.
- You need to required keys for Stripe
- Other Method– It can be used for Offline paymentsusing this option any additional information shows can be shows to Customer while ordering like bank account details etc.
-
Purchase Settings
You can manage purchase/order related settings using this dialog.
- Discount Coupon - You can set when should discount coupon field should displayed.

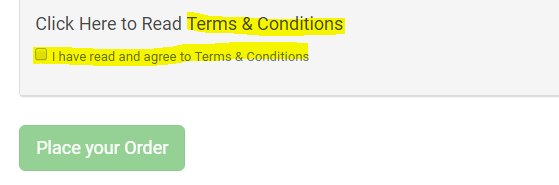
- Terms and Conditions - You can add global terms and condition so on order finalization user should accept it to submit order.
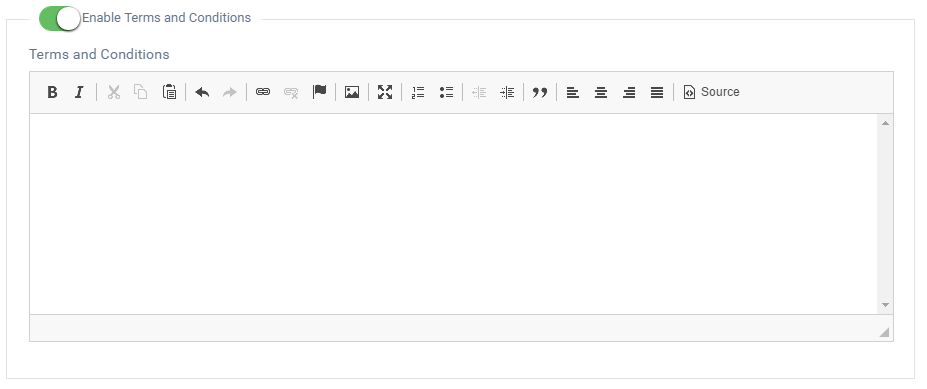
- Then it will be show on order page as below
- Enable Invoice Download for Customer on order completion – You can choose whatever to allow user to download invoices for their completed orders or not.

- Shopping Cart – You can on or offShopping cart functionality using this Switch.

- Buy Now - You can on or Off Buy Now functionality using this Switch

Please Note: if both switches are off buying/purchasing functionality will be disabled.
Notifications
You can manage following notification from this dialog.
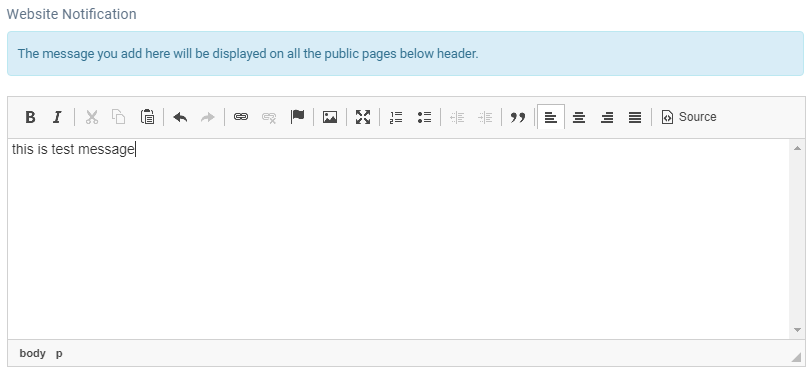
- Website Notification - Site wide notification can be displayed usingWebsite Notification.
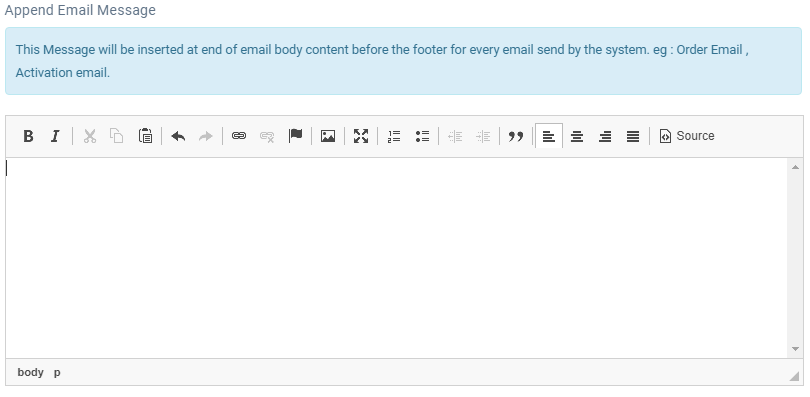
- Append Email Message - You can also append Notification type messages into Emails sent by System using Append Email Message
Landing Page Setup
A landing page has been set as Home page in General Settings Now you have settings for that page as given below.
- You can show the logo at header by enable this like other pages or you can disable header logo.

- You can set logo for it using

- You can control items count for the landing page & which items should include in this Any Items or Only Featured items.

Placement and Misc. Items
You will find Some uncategorized settings items in this dialog
- Item Categories –You can show/hide item categories from sidebar using this Switch

- Enable Articart Credit Info – You can choose whatever to show credit information to Articart/LivelyWorks for this product.Thanks for keeping it active.

- Show Language Menu – You can show hide language change menu at top menu right corner.

- Enable Tag Cloud – You can enable or disable tag cloud using this switch.

- Page End Additional – You can add and additional content here to add at bottom of the page it may be used for Google Analytics code etc.

- Footer Text – Additional footer text you may require after website name.

Email Settings
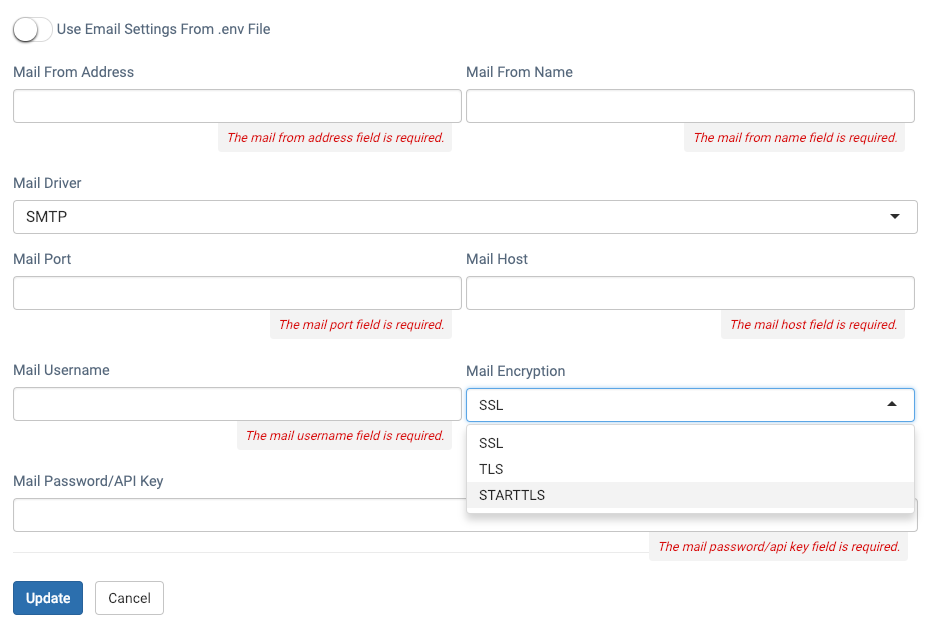
You can manage Email related settings using this dialog
- Use Email Settings From .env File –You can enable this for doing email setting by .env
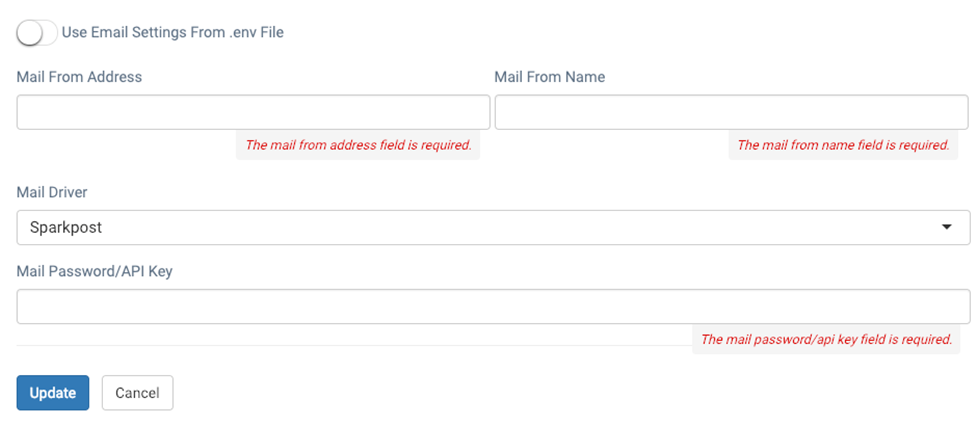
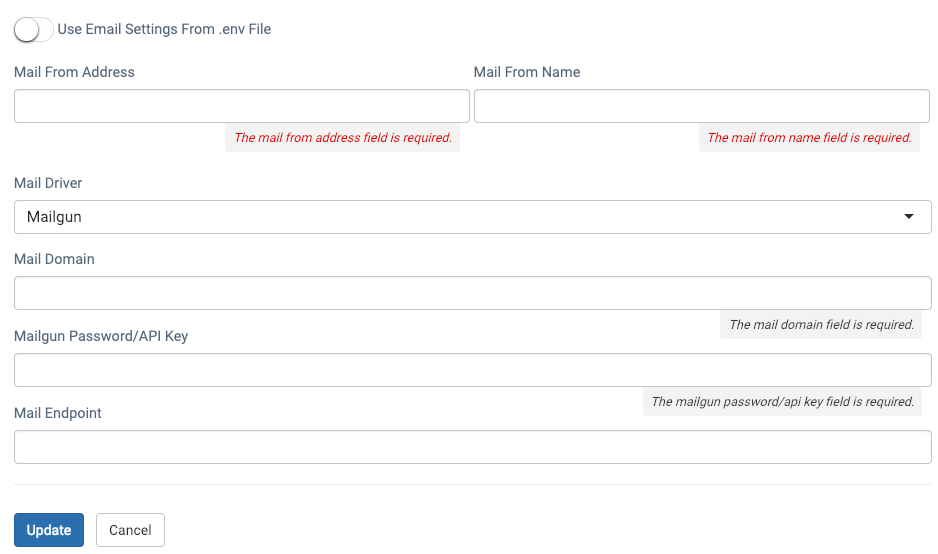
- If youdisable this Use Email Settings From .env File then you can choose the any one mail driver from the given list.
- Mail From Address – You can add your from mail address from here which is common for the all mail drivers.
- Mail From Name - You can add your from name from here which is common for the all mail drivers.
- SMTP – By fill up following settings for SMTP you can send the emails via SMTP mail driver.
- Sparkpost– By fill up following settings for Sparkpost you can send the emails via Sparkpost mail driver.
- Mailgun-By fill up following settings for Mailgun you can send the emails via Mailgun mail driver.
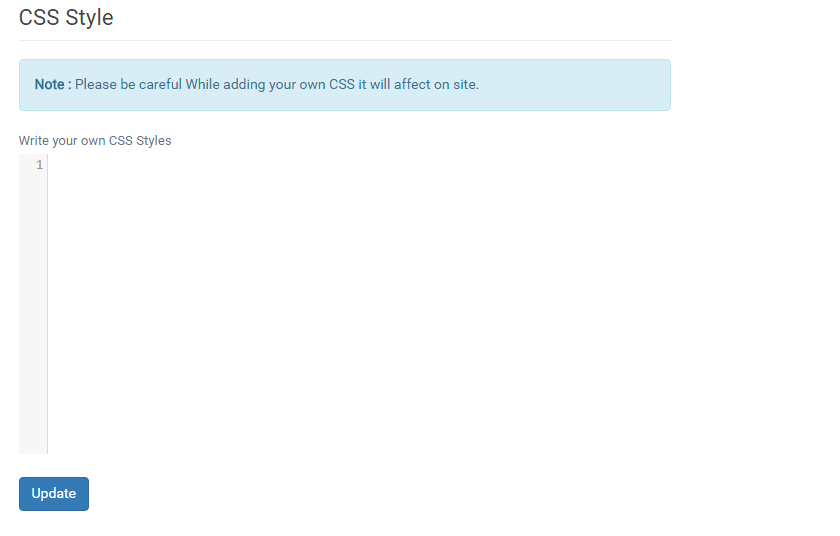
CSS Styles
You can add your custom CSS styles using this section.
Please be careful While adding your own CSS it will affect whole site.
Manage Taxes
By going to Tax item under Manage menu at Sidebar, will open list of taxes with details like Label Country, status etc.
Add New Tax
You can add Tax for country, each country can have multiple taxes. By clicking on![]() button at topright corner will open a dialog to add new tax rule. With following fields.
button at topright corner will open a dialog to add new tax rule. With following fields.
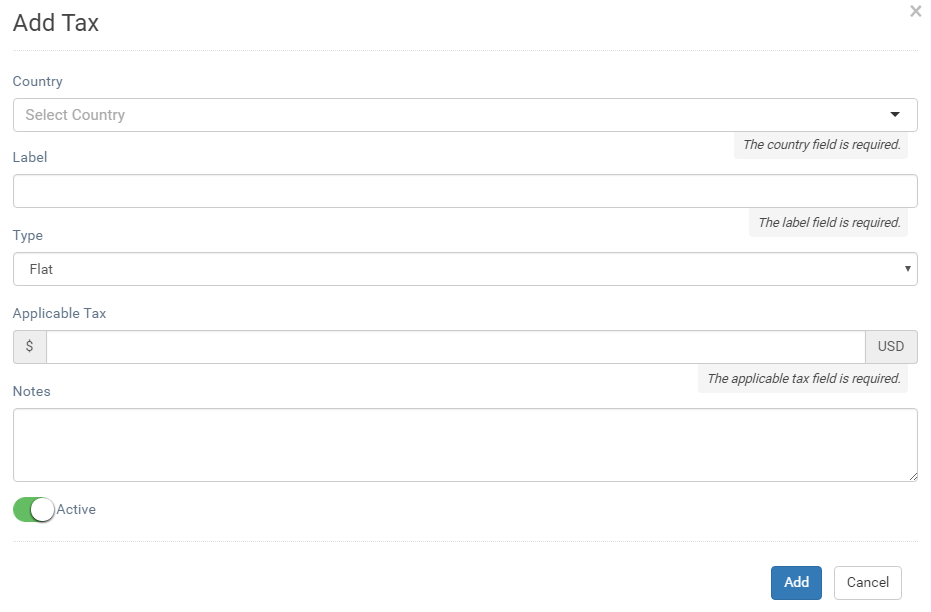
- Country – You need to select country for which you need to add tax.
- Label – Label you want for that tax e.g. GST etc.
- Type / Applicability – You need to choose from below options
- Flat – This option offers single flat amount as Tax
- Percentage – This option will offer you for the percentage based tax.
- Applicable Tax – Based on the above option you can add flat or percentage based tax here.
- Notes – Any notes you may want to add.
Click on Add button will save this rule.
List of Tax Rules
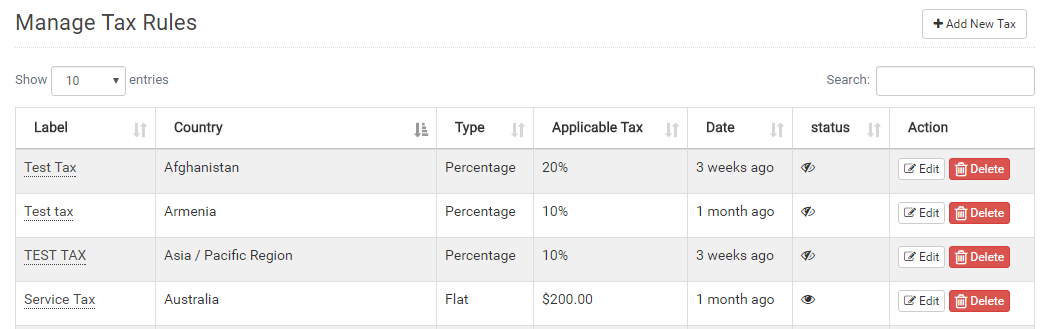
From the list of Tax rules, you can edit/delete using buttons:![]()
Manage Discount Coupons
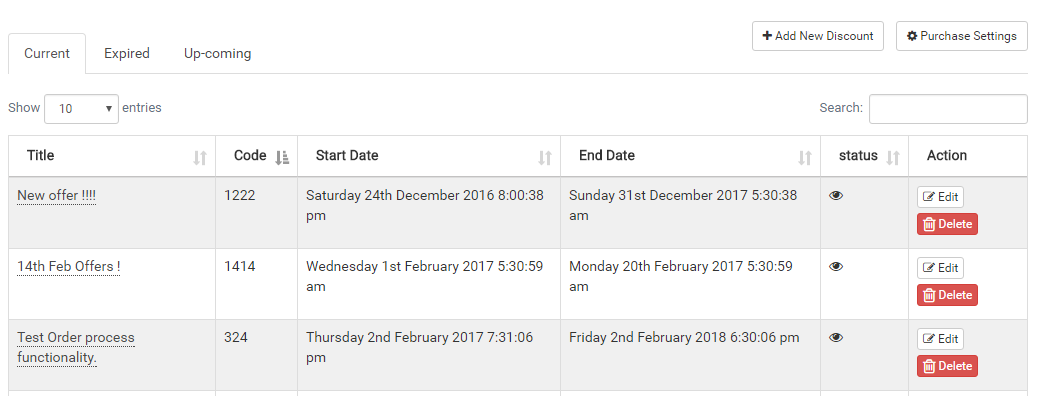
Using Coupons link under manage sidebar, will show you the Coupon Manage section with 3 Tabs under it as follows:
- Current – Under this tab you will have currently applicable list of coupons.
- Expired - Under this tab you will have the all expired coupons.
- Up-coming –Future applicable coupons will list here.
Add New Coupon
Using![]() button at top right, you can add new coupon. Following fields are available to fill.
button at top right, you can add new coupon. Following fields are available to fill.
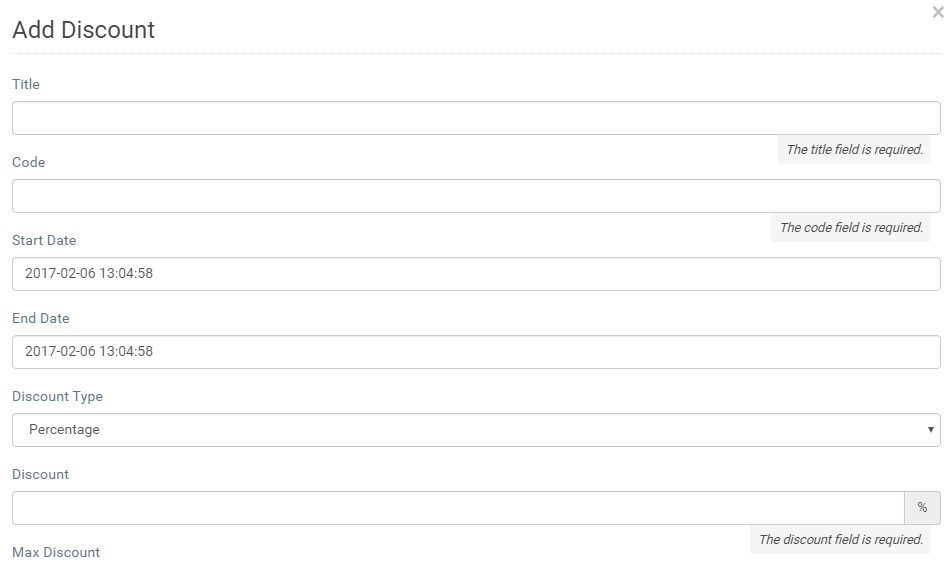
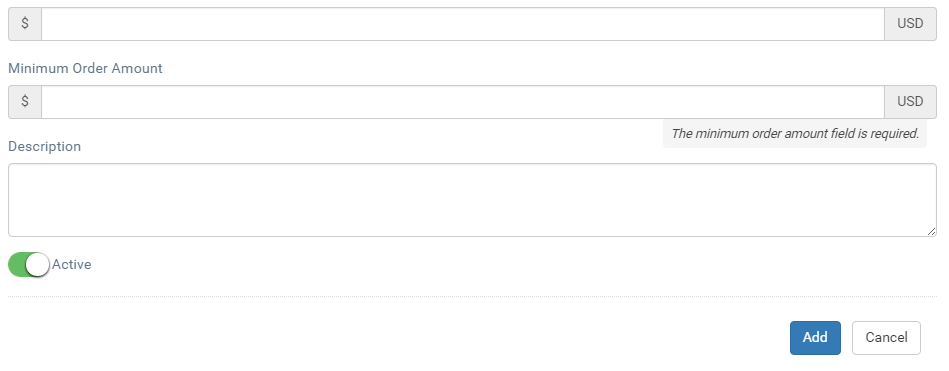
- Title –Title for your coupon
- Code –An alpha-numeric code for your coupon which will use by customers to apply it.
- Start Date –From which date time you want to start applicability of this coupon.
- End Date – When you want to end applicability of this coupon.
- Discount Type – options as given below
-
- Amount – You can offer flat amount discount using this option, if you choose this option then you also need to set maximum discount in percentage of order amount, so this discount amount cannot be greater that order amount.
- Percentage – You can also offer percentage based discount if you choose this option then you option to set Maximum discount amountyou want to offer.
- Discount – discount you want to offer based on the above selected options amount or percentage.
- Minimum Order Amount – You can set minimum order amount for coupon to be applied.
- Description – If want to any additional information related to coupons.
- Status – You can choose to make it active or inactive.
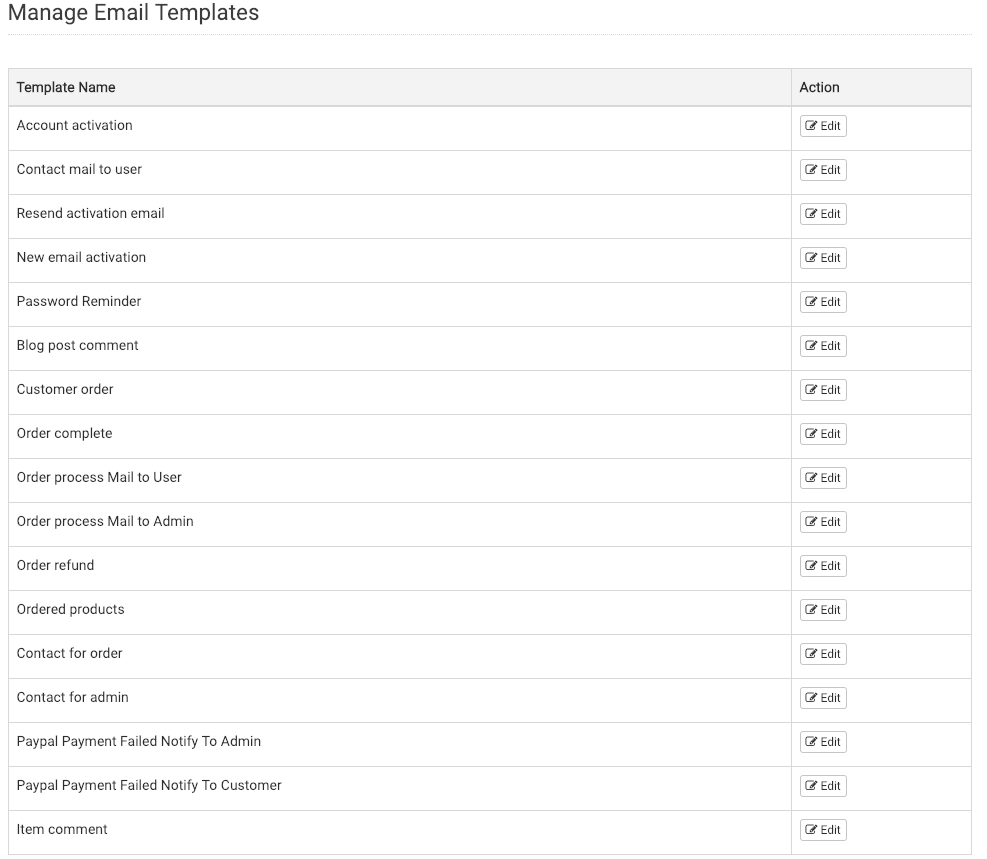
Email Templates
From here you can manage the different types of emails send by the system using various email templates as per your choice. You can edit or manage all email templates as per your requirement or can use default setting of email template.
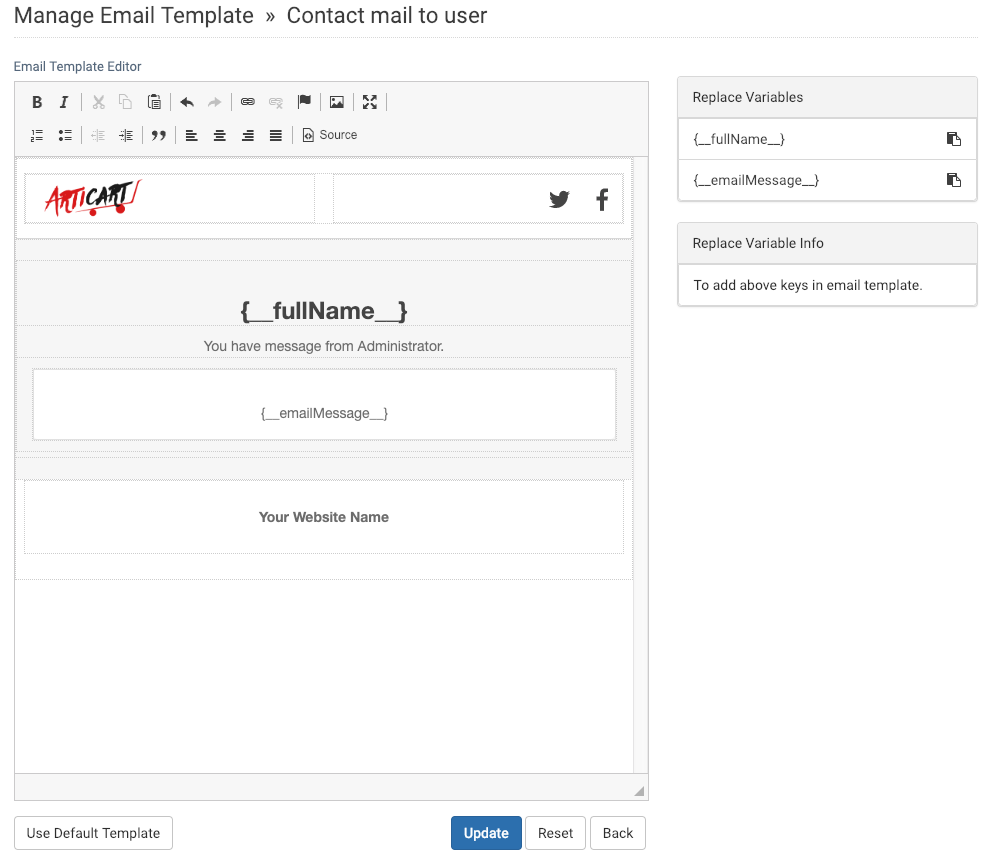
- Subject – From here you can manage the subject of the your email.
- Email Template Editor – From this editor you can edit your template as per your choice.
- Replace Variables – These are the preset variables which you can manage any where in your email template.
Following are all email templates available for you to manage your emails.
Following is the sample email template for the Contact mail to user.
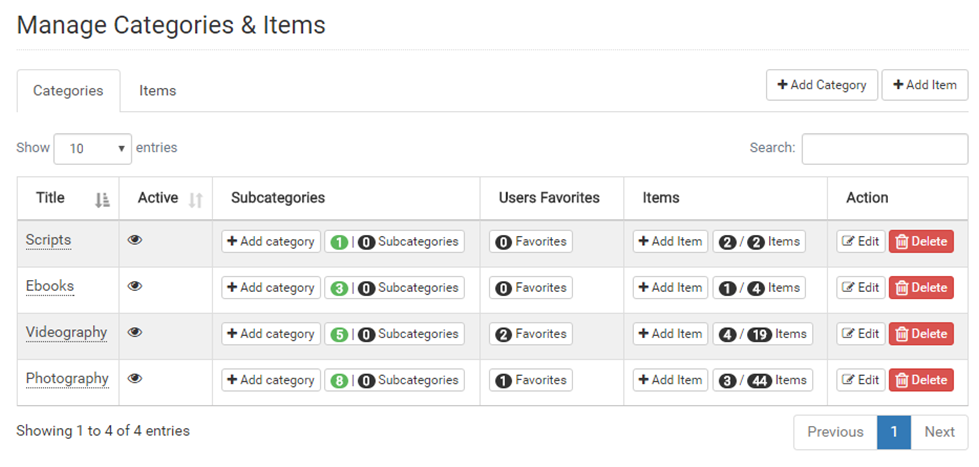
Manage Categories
By acceding Categories & Items link at sidebar will take you the categories& items management page.There are mainly 2 Tabs 1 for Categories and 1 for Items Clicking on each category will take you to its children Categories &Items Tab.
You can add new sub category using ![]() button.
button.
On each row of category have some button & works as given below.
 will open Add new category dialog with Parent Category preselected of Row Category. It simply means you can add sub category in to it.
- Click on
 will take you the tabs of children categories &items and Categories tab as selected. The count in Green Shows Active& red color shows Inactive subcategories under this category.
 - Click on
 will take you to page where you will be able to add item under this category.
 - Click on
 will take you the children of this item categories &items tab with Items tab selected. First count in black (e.g. 3) is showing direct child items in the category & other count is showing all the nested items count under category.
 - You can edit or delete the category using
- While deleting the category system will ask you for the password to delete it.
Please Note: All the categories &items will bedelete as well which are under deleting category.
Add New Category
To add newcategory, you need to click on![]() at top right will open dialog for add new category with following options.
at top right will open dialog for add new category with following options.

- Name – It will be category name.
- Parent Category – You can select parent for this category if you want it to nest in another category.
- Status – You can enable or disable category using Status button.If the category status is disabled, all the products & categories under this category will be disabled and won’t available for purchase.
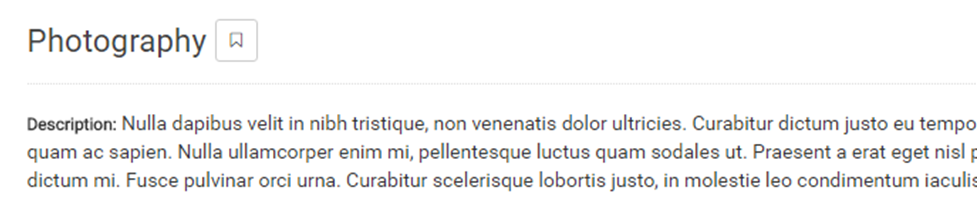
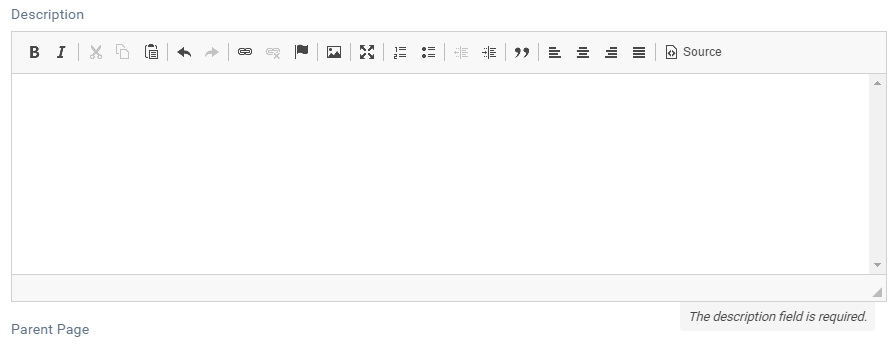
- Description - You can add brief descriptionabout the category. It will be shown on the category items page like below.
Manage Items
Click on Items tab will show you the list of the items under this category.
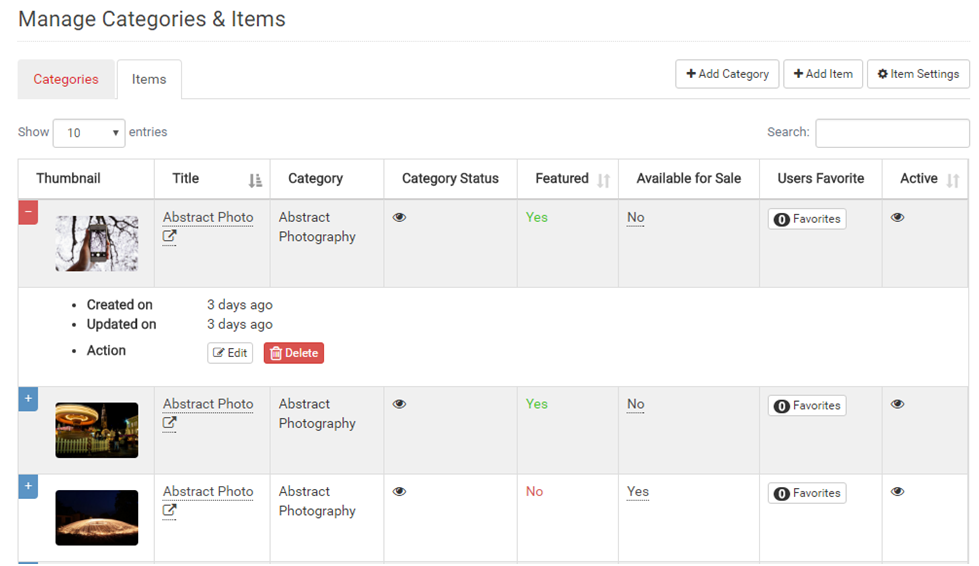
Each rowhas some buttons & works as below:
 Click on the item name will open product details in new page.
- Clicking on
 and will take you the edit details page.
![]() by using these buttons, you can Edit or Delete products.
by using these buttons, you can Edit or Delete products.
Add New Item
Once you reach on add new product page by clicking![]()
Following page will open with form for adding item details as follows:
- Name – Item Name
- Item ID- A unique alphanumeric item identifier.
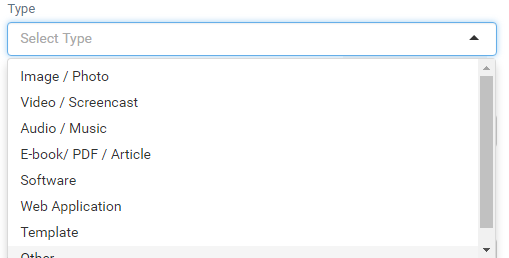
- Type – You need to choose your item type, It won’t affect anything just will be show on details page.
- Category – You need to select category for this item.
-

- Thumbnail – You need to select thumbnail image for your item. If not available, you can upload new one using
 or can manage the list of uploaded images using
  .
. - Featured – If enabled item will be listed in Featured items
- Related URL–You can add any related URL for more information etc.
- Description – You can add your Item details here.Once you done with this information you can click on
 this will save itemasInactive status so the item won’t available for public & you will be redirected to edit page of this item from where you can edit this item details, add previews,addtags, create item for sale, manage item rating and commentsetc.
Once you done, you need make this item active so it can available publicly using top right switch![]()
AnAdditional Information like Previews, Tags, Item for Sale, Ratings and Comments.
There are tabs available to manage those things.
Item Previews

You can manage items previews using Previews,various types of previews can be added as given below options.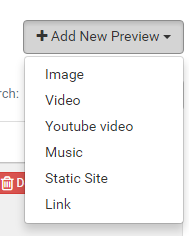
- Using switch
 you can make this preview item as primary to show this preview as main preview on details page.
 - Using switch
 you can set this preview item status.
 - Each added preview item will show in the list & each one having buttons for Edit &Delete preview item.
Add New Image
You can add new Image by choosing Image option from list. Clicking on it will open following dialog with form fields.
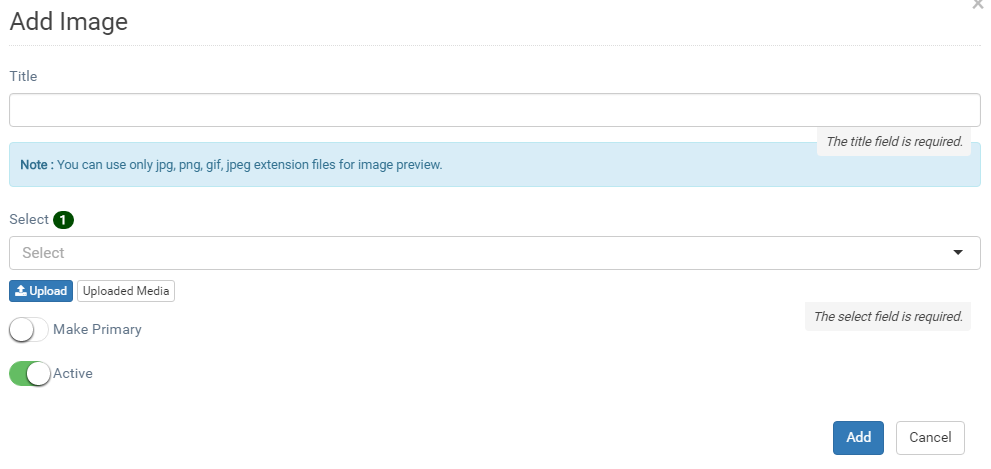
- Title – Add a title to image.
- Select – You can choose from the uploaded image or can upload new image using Upload button, you can also manage those using button called uploaded Media.
Add New Video
You can add new Image by choosing Videooption from list. Clicking on it will open following dialog with form fields.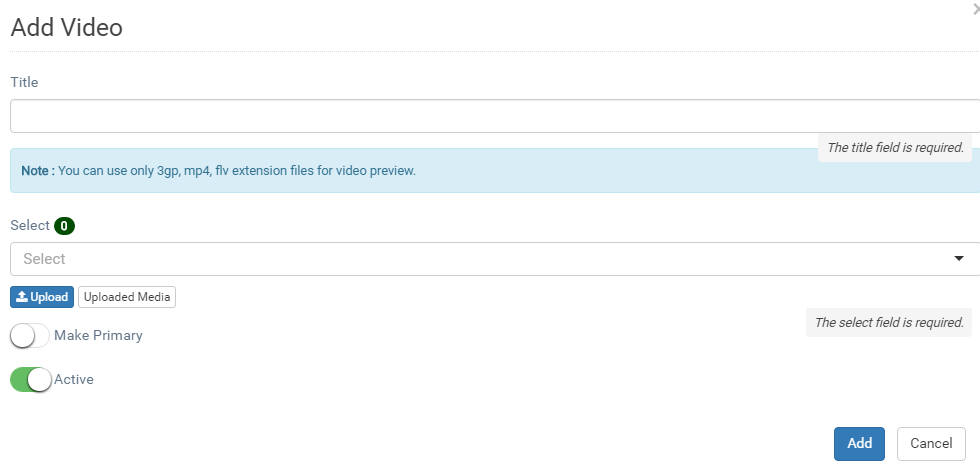
- Title – Add a title to video.
- Select – You can choose from the uploaded image or can upload new video using Upload button, you can also manage those using button called uploaded Media.
Add YouTube Video
You can add new Image by choosing YouTube Videooption from list. Clicking on it will open following dialog with form fields.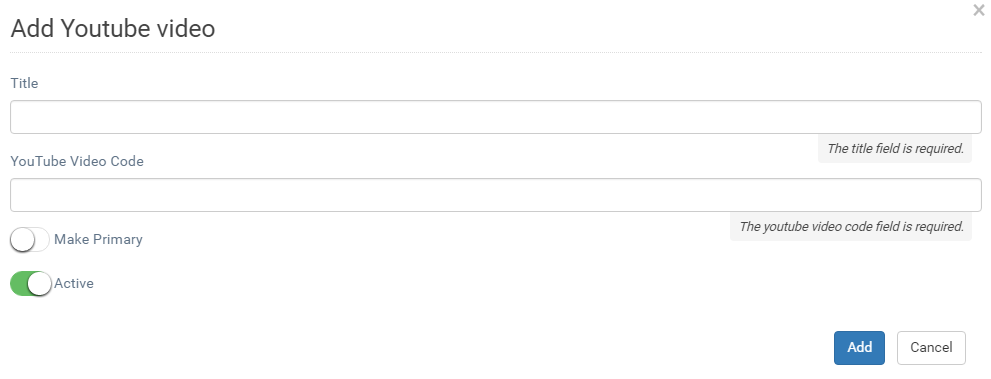
- Title – Add a title to video.
- Youtube Video Code –You need to use only YouTube video code like yellow highlighted in example given.
eg.
Add New Music/Audio
You can add new Music by choosing Musicoption from list. Clicking on it will open following dialog with form fields.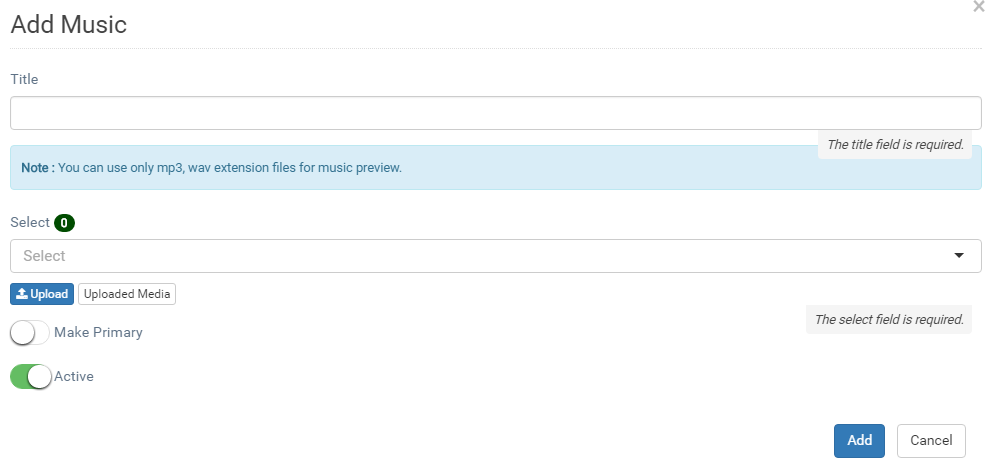
- Title – Add a title to music.
- Select – You can choose from the uploaded music files or can upload new music file using Upload button, you can also manage those files using button called uploaded Media.
Add New Static Site
You can add new Static Site by choosing Static Siteoption from list. Clicking on it will open following dialog with form fields.
Please note zip file content should be on direct level & it should containsindex.html file.
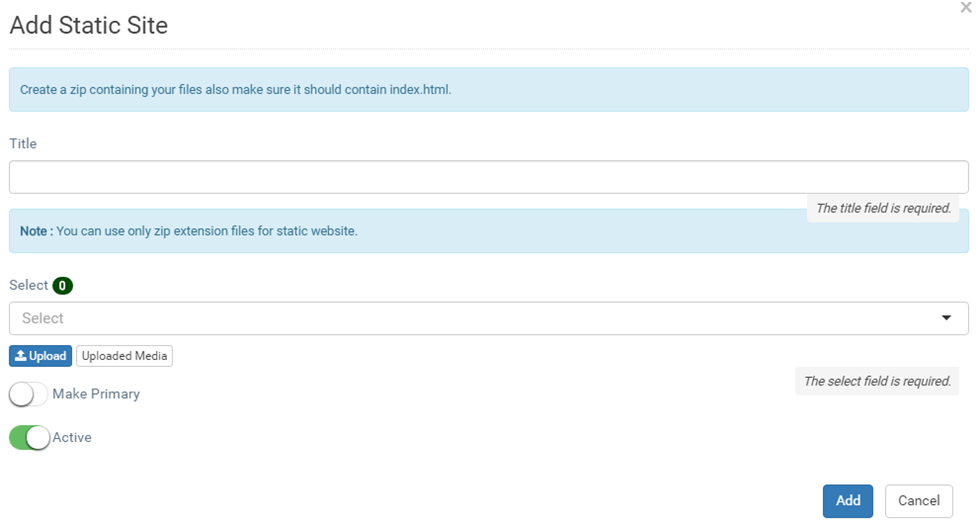
- Title – Add a title to Static Site.
- Select – You can choose from the uploaded zip files or can upload new zip file using Upload button, you can also manage those files using button called uploaded Media.
Add New Link
You can also add a link for your preview using option Link, will open dialog with required fields.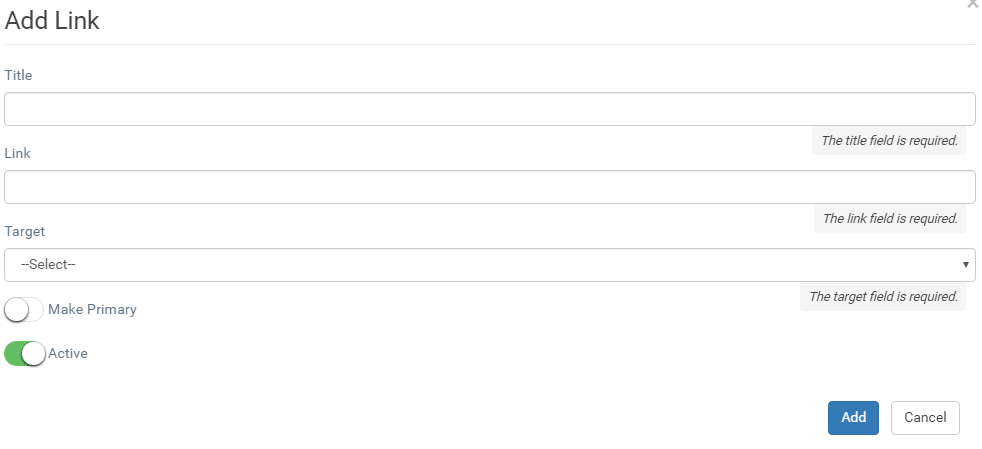
- Title – Add a title for Link.
- Link –Valid URL required for link.
- Target - Choose how you want to open that link.
Tags
Items tags can be managed using Tags tab. These tags will be used for tag cloud as well as clicking on it from item details will search items by Tag.
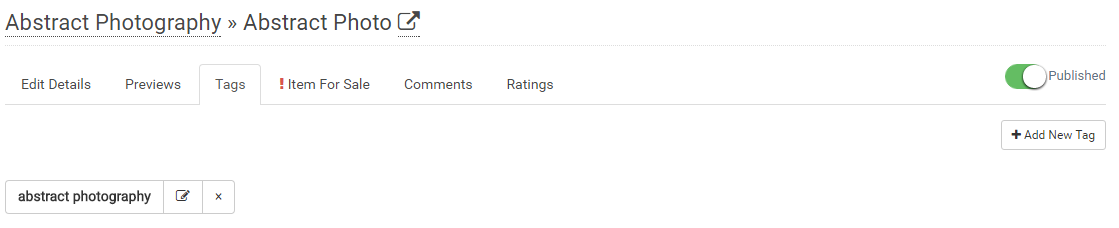
Add New Tag
To add new tag, you need to click on![]() button at top right which will open dialog as below:
button at top right which will open dialog as below:

- Name – It will be the Tagname;System helps you to add it from previously added names
- Clicking on Add button will save record, and tags will be added to the list. From this list, you can Edit/removethese tags.
Editing any tags will impact all the item tags which are using this same tag.
![]()
Item for Sale
You can create any item for sale, using Tab.
Clicking on Create Item for Salewill open dialog with required fields.
- Selection Type – There are user selection for you need to choose from, Selection type will decide how user will purchase your item.

- Single – For this chosen selection typeuser will have radio buttons to choose download file item from the list.
- Price will need to add on per download item basis
- Multiple –In this selection type user will have checkboxes to select download file items from.
- Price will need to add on per download item basis
- Package –You can have multiple download Items & you want to sale those as whole package then this selection type will do the work.
- You canadd Price for this packageif not item will be treated as Free
- Package or Multiple – You can have multiple download Items & you want to sale those as whole package as well as Individual then this selection type will do the work. You would need to choose as Package or he can choose Individual items using checkboxes.
- You can add Price for this package if not item will be treated as Free
- You also need to add prices to download items those prices will be used for multiple selection.
- Single – For this chosen selection typeuser will have radio buttons to choose download file item from the list.
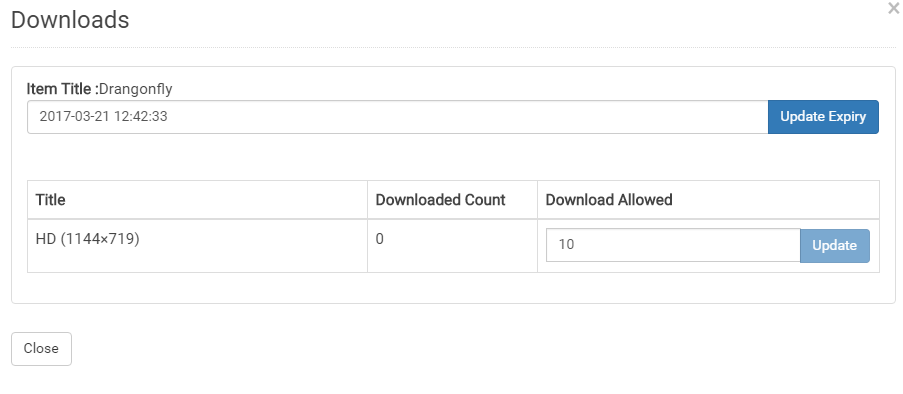
- Download Item Expiry
If you want to restrict downloads for the particular time period then you can set expiry for particular days. It will be restricting user to download those purchase items for that particular days from date time of purchased item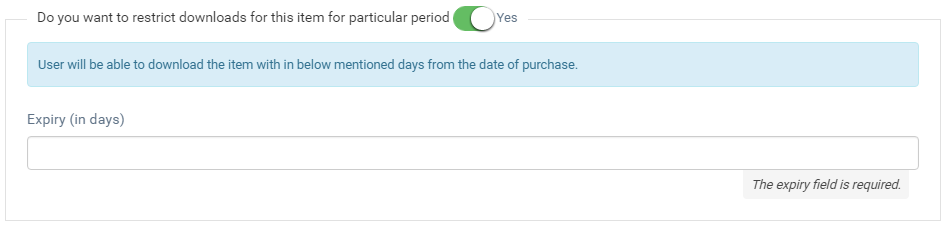
- Description
You can add any details or description about this sale item you can add it here.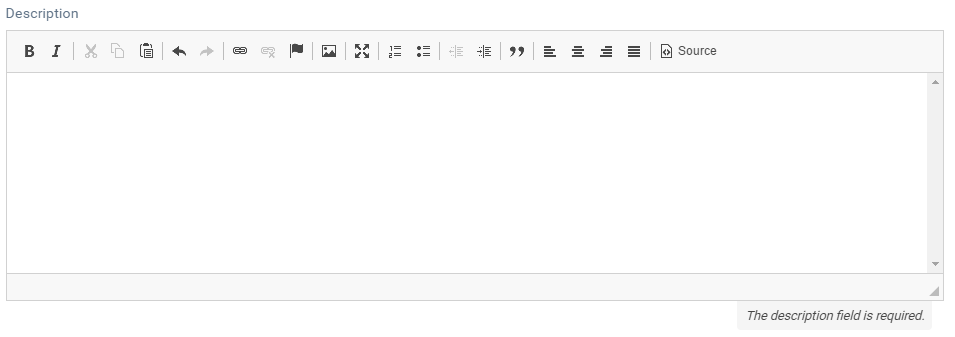
- Terms & Condition
If you need any specific Terms and condition to buy this item you can add it here, if the terms and conditions are there then user will need to accept those conditions before buy this item.
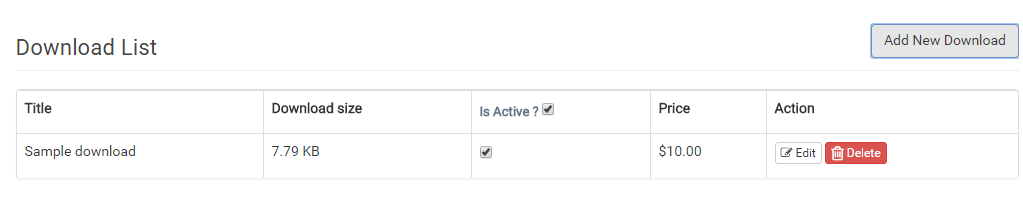
Once Saved your Item for sale will be Active, you will see the page something like this.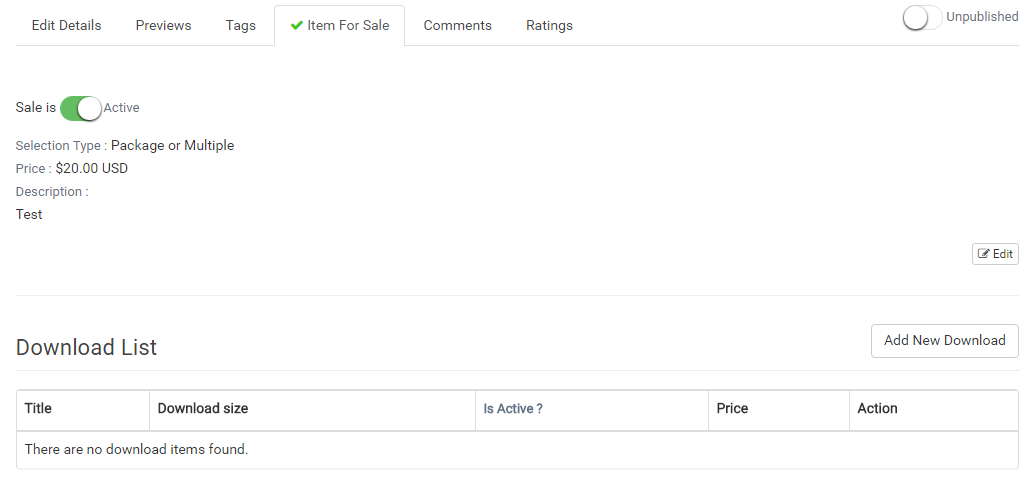
Now you need to download file items to sale item, by clicking on![]() you can do so, click on it will open following dialog to add files.
you can do so, click on it will open following dialog to add files.
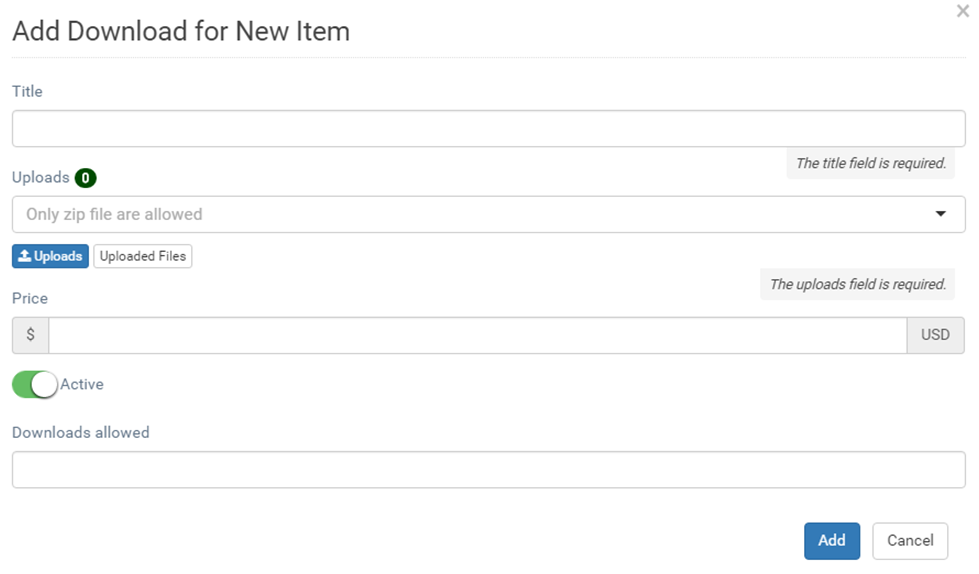
- Title – Add a title for Download Item.
- Upload –You need to upload Zip filecontain your download files
- Price- Depending on your Item Selection type price may be available or may not be.
- Status – Using this switch you can decide whatever to activate download or not.
- Downloads Allowed (Optional) – If you want to restrict number of download to each purchase then you can add that count here.
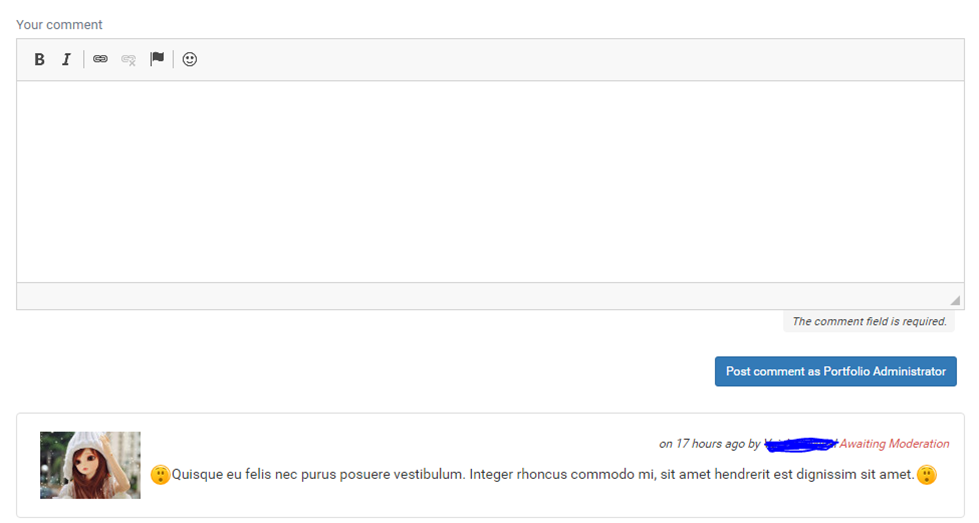
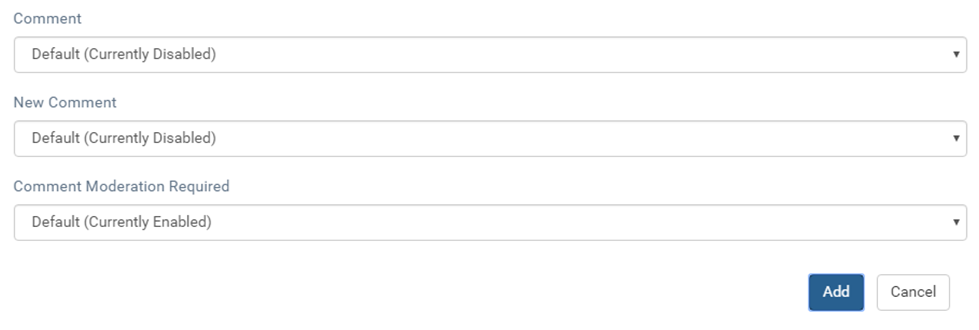
Item Comments
You can manage comments for this this item using this tab.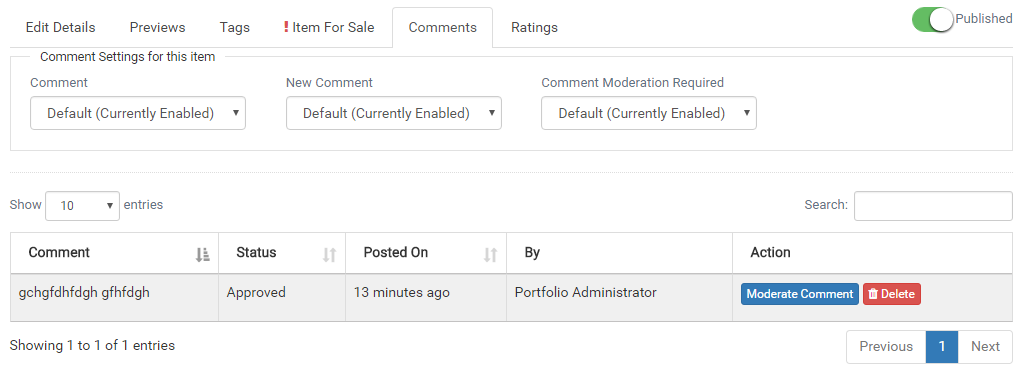
- Comment Settings for this Item
- Comment – You can choose from the below options
- Default – This setting is inherited from configuration settings
- Enable –You can enable comment regardless of configuration settings.
- Disable – You can disable comment regardless of configuration settings.
- New Comment – You can choose from the below options
- Default – This setting is inherited from configuration settings
- Enable – You can enable comment regardless of configuration settings.
- Disable – You can disable comment regardless of configuration settings.
- Comment – You can choose from the below options
-
- Comment Moderation Required– You can choose from the below options
- Default – This setting is inherited from configuration settings
- Yes – You can enable comment regardless of configuration settings.
- No – You can disable comment regardless of configuration settings.
- Comment Moderation Required– You can choose from the below options
- List of comments
- You will be able to moderate comment using
- You can delete comment using

- You will be able to moderate comment using
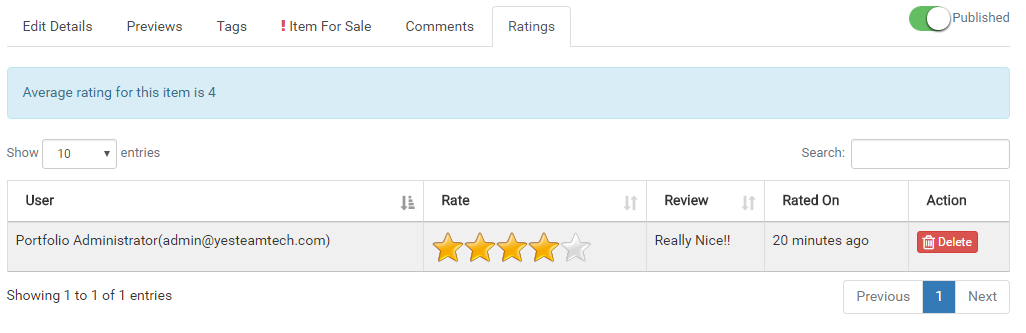
Item Ratings
You can manage Item ratings from Ratings Tab
Item for Sale
Using this link at Sidebar you can manage Items which are available for sale.
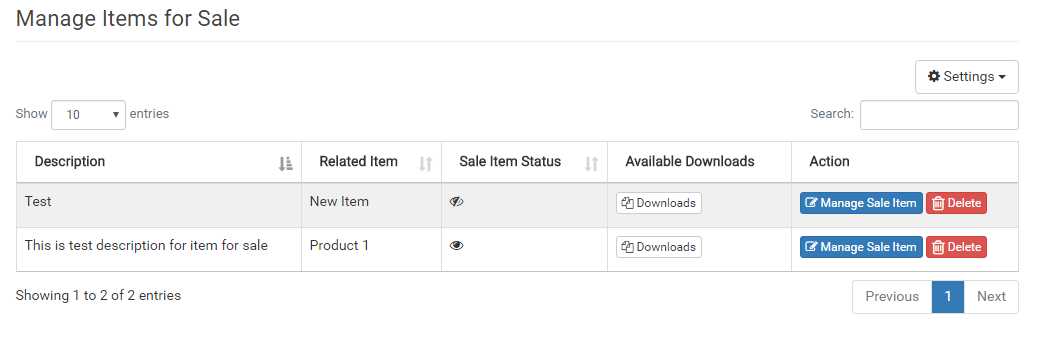
- You can go to Manage this Sale Item using Manage Sale Item
- You can see the downloads for that particular item using Downloads
- Item for sale can be deleted using Delete button
Item Comments
Consolidated list of the item comments separated in 2 tabs called Awaiting Moderation, Approved and Disapproved Comments
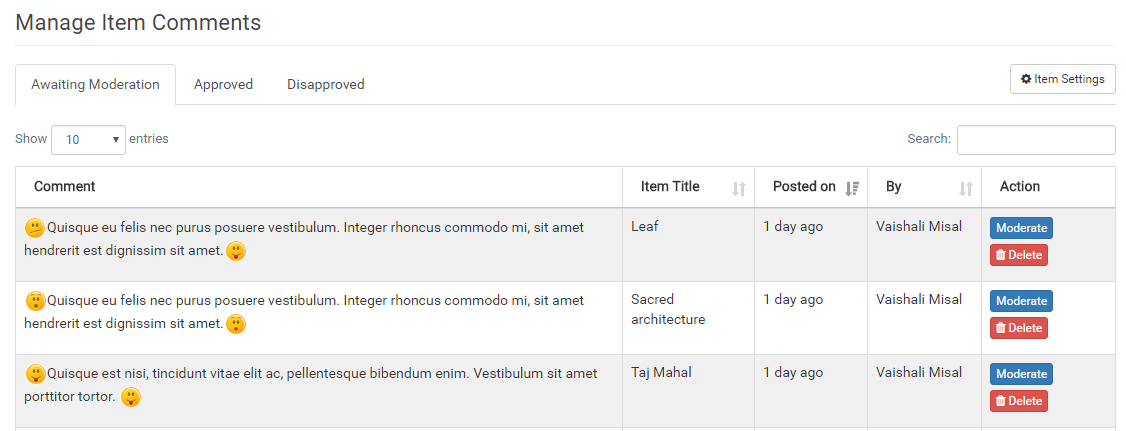
- You will be able to Moderatecomments
- You can Update comments
- You can Delete comments
Item Tags
You will find all the item tags in this section,you can manage all the tags from here.
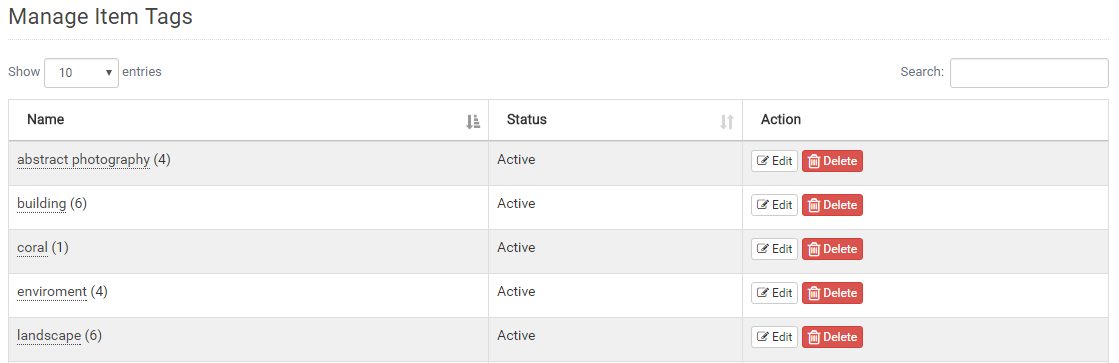
- Clicking on
 will show you the item list using this tag.
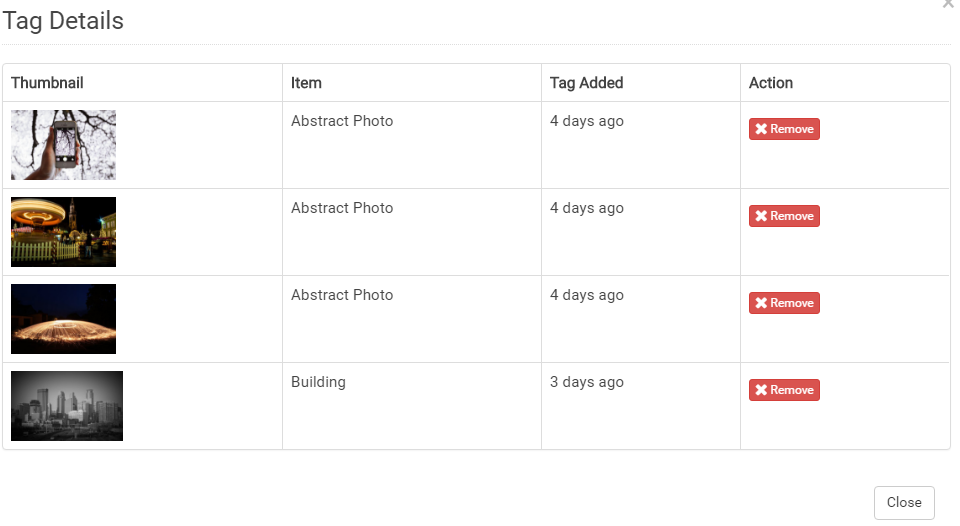
- You can tag from listed item right from list using button called Remove.
- Tag can be Edit or Deleted but Please note it will impact all the items using this tag.
Manage Sales
Using this link at sidebar you can manage sales orders. Orders are distributed in 2 TabsIncomplete, Completed and Cancelled / Failed
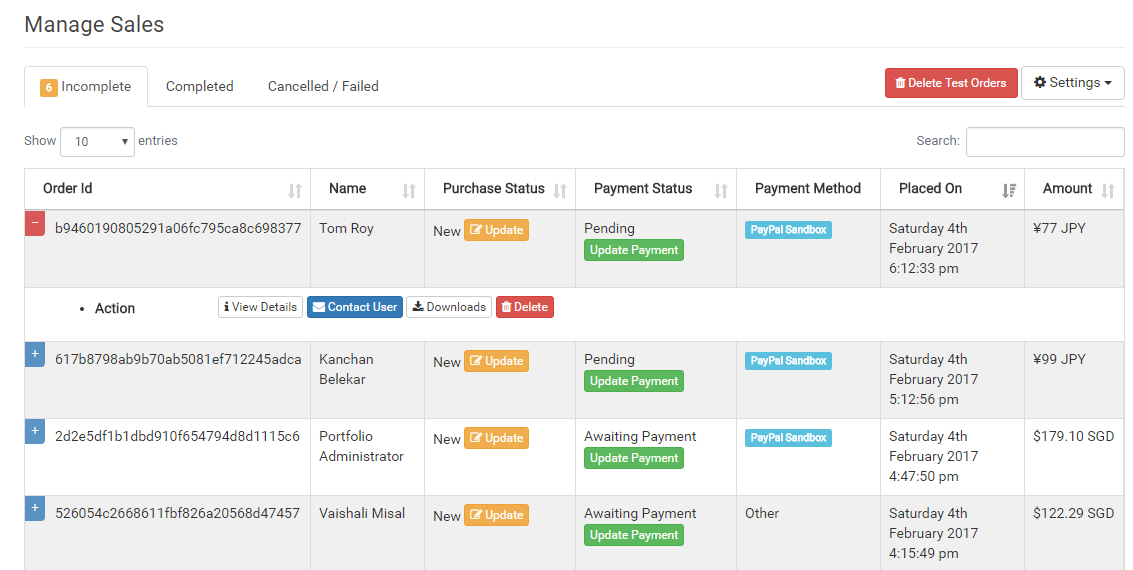
You can update Purchase Status any time as well as you can update Payment if not done, If Payment completed you can Refund it. It’s just credit and debit entries of the payment.
User will be able to download files when purchase status in Completed.
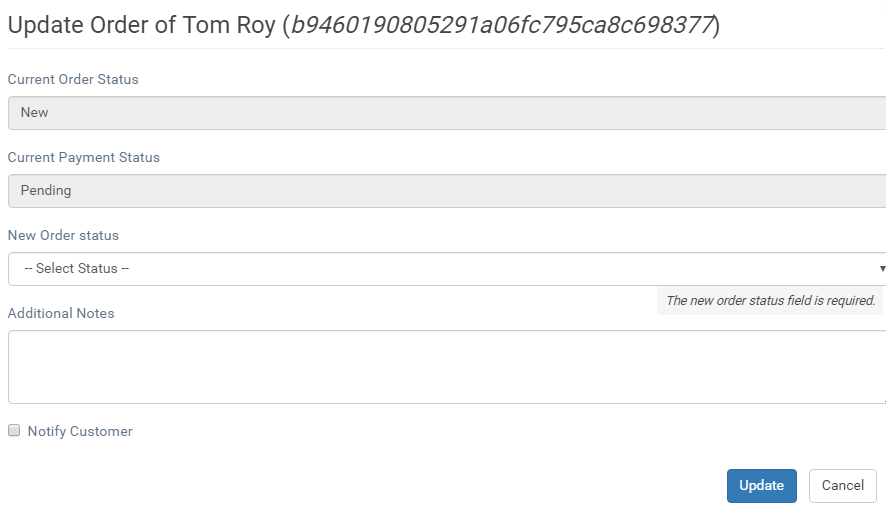
-
- It Shows You Current Order Status
- It also shows Current Payment Status for this Order
- OrderStatus – You can choose new status from available dropdown options:
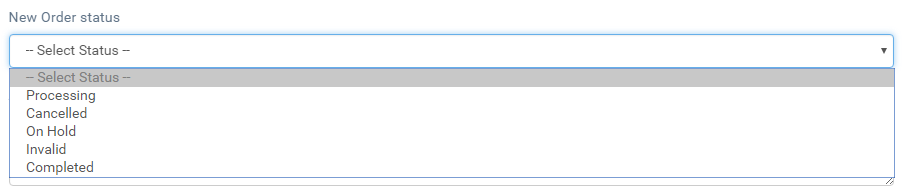
-
- Additional Notes – you can add additional notes if any
- You choose to send email notification for this order status update.
Update Payment
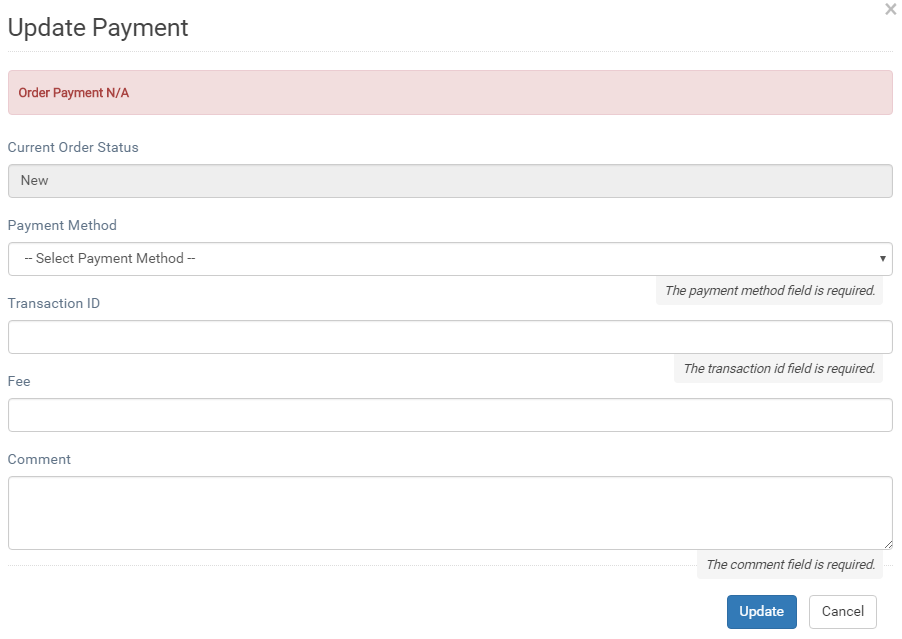
-
- It Shows You Current Order Status
- It also shows Current Payment Status for this Order
- Payment Method – You can choose method from available dropdown options:

-
- Fees – you can feefor the transaction
- You can also add additional comments for records
Using![]() button you can delete allPayPal Sandboxand Stripe Testorders & its payments.
button you can delete allPayPal Sandboxand Stripe Testorders & its payments.
Using![]() button you can see downloads available under that order as well as you can manage downloads allowedcount and Expiry if required.
button you can see downloads available under that order as well as you can manage downloads allowedcount and Expiry if required.
How Order Works
Order Submission Basically Categorized into Online payments which is currently PayPal, Stripe and Other is Offline payments which may beBank Transfer, Checketc.
Online Payment using PayPal

It’s giveCustomer a choice to make an online payment using PayPal.
When new order submitted using PayPal as payment method order gets recorded in the system as Pending payment status&Customer gets redirected to the PayPal website to make the Payment:
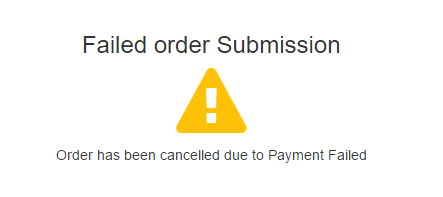
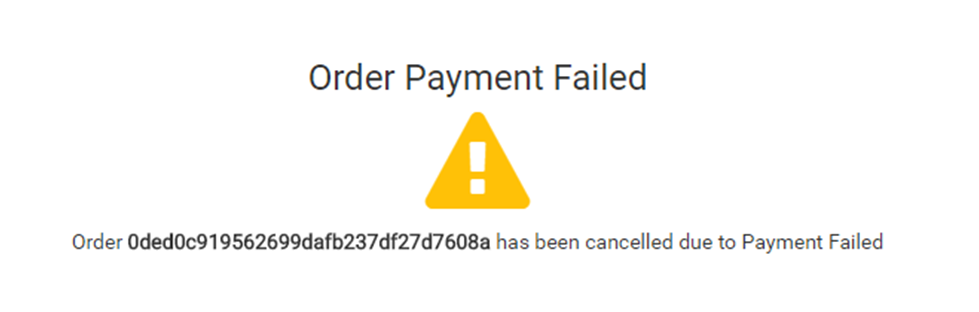
- If the use cancelled the payment & return to the website orders order status will be updated as Cancelled & Payment status will be Failed
Email Notification will notbe sent for this cancelled order.
- If the Customercompletes the payment successfully& Payment Status received from PayPal is Completed,then Order Payment Status will be updated as Completed. Customer will get redirected to store with Payment success message. And he will be able to download his purchase items.

Order Success Notifications email will be sent to Customer & Store Administrator.
3. If the Customer completes the payment successfully but if Payment Status received from PayPal isNot Completedmay be pending for certain reasons, then Order Payment Status will be updated as Pending (and when receives completion response then order payment will be updated as Completed.)Customer will get redirected to store with Payment Not Completed message.
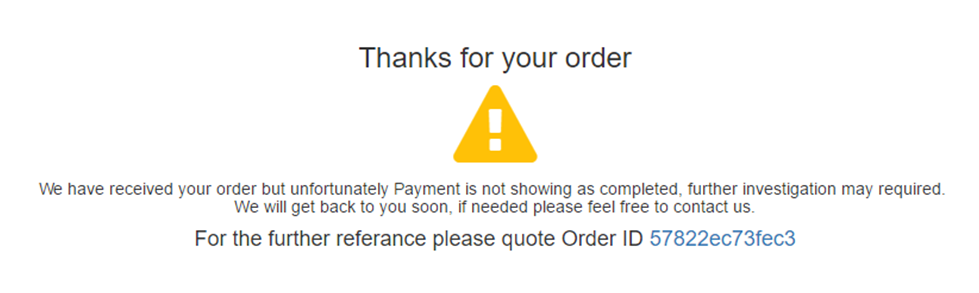
Email Notification will be sent to Customer & Store Administrator as Order is submitted but Payment Not Showing as completed& needs to be investigation.
Online Payment using Credit/Debit Cards via Stripe
It’s give Customer a choice to make an online payment using Stripe.
To get order submitted customer has to select Stripe as Payment method, & click on button will open Stripe Payment dialog asking for card details.
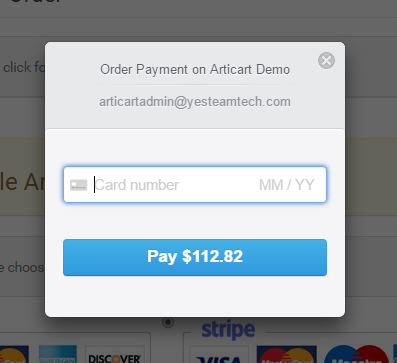
Once the payment complete. User will be taken to success page& order will be updated as Completed.
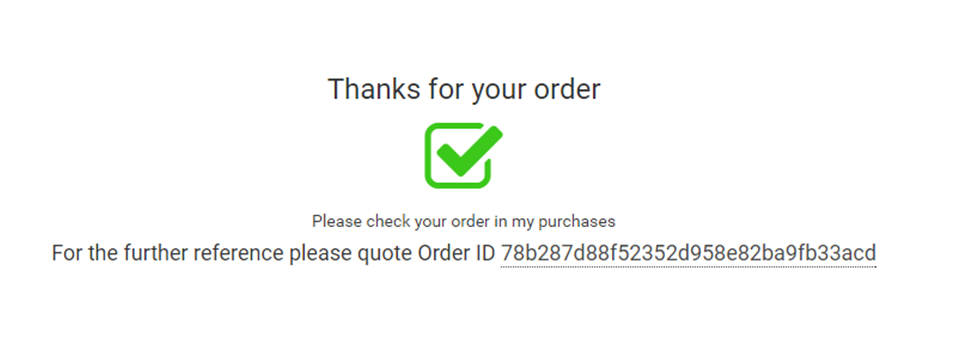
Order Success Notifications email will be sent to Customer & Store Administrator.
On Payment failed order status will be updated as Cancelled & Payment status will be Failed
Offline Payments
Offline Payment which show the available options as given below, all order just saved into database & notify Store Administrator as New order received and admin needs to update payment status manually into the system.
Email Notification will be sent to Customer as well as Store Administrator for Order Submission.
Manage Blog
You can manage blog post under this menu item at sidebar. You can add, edit and delete blog post right from here.
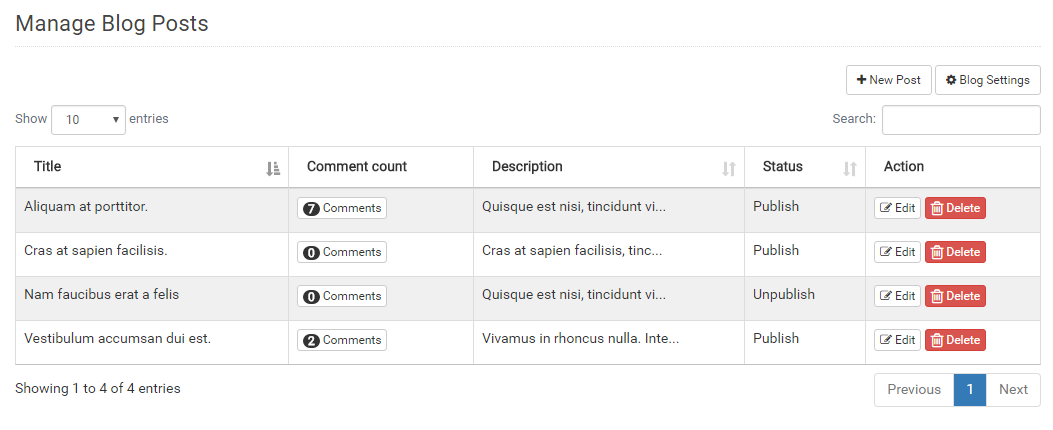
Add New Post
To add new blog post,click on New Post button will open dialog with form to add new post.
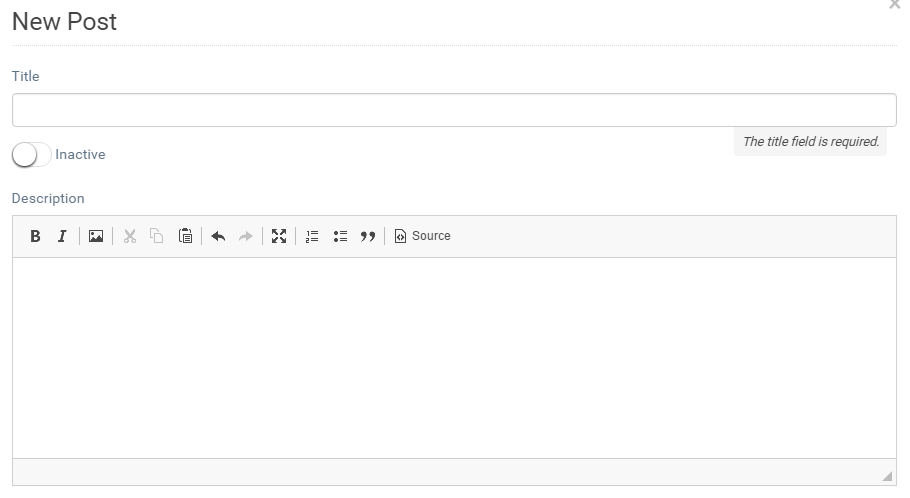
Comments Settings for this post
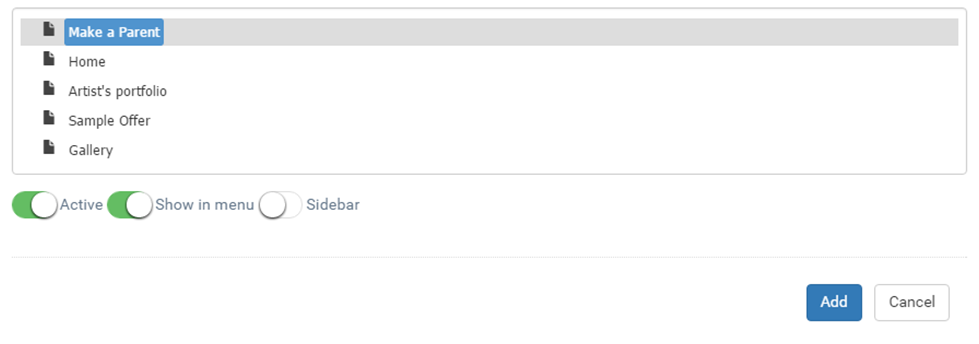
Menu and Pages
Using it you will be able to manage Main Menu and Custom Pages of the site.
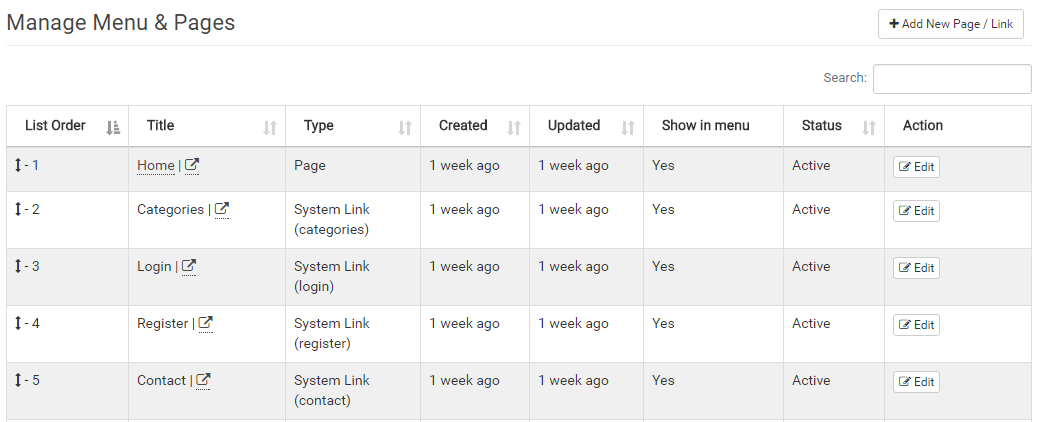
- In the list, you will find System links also these are the links used by the system like for login, register etc. You can change name of it for the menu and can decide whatever this item should show in menu or not.
- Created custom pages/link can be deleted.
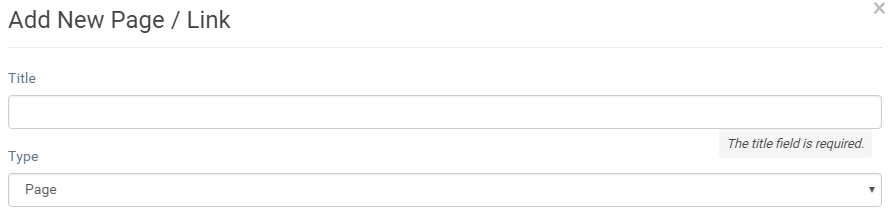
- To Add new page/ link you need add New Page or Link.
Manage Users
Users can be managed from here
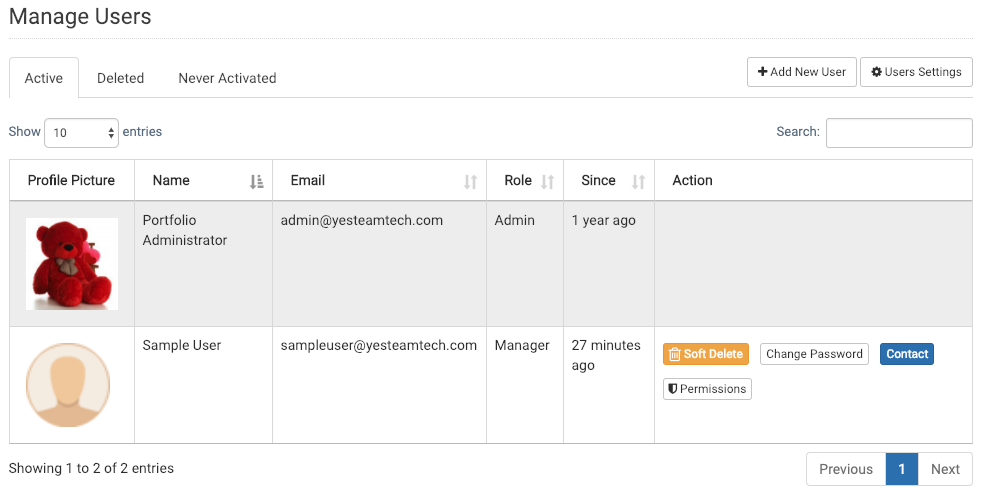
- You can create New User
- If you Soft Delete user it will be in deleted state and will available under deleted tab, you can permanently delete that user from that tab.
- Inactive users place in inactive tab.
Add New User
- You can AddNew User.
- To add new User, click on +New User button will open dialog with form to add new user.
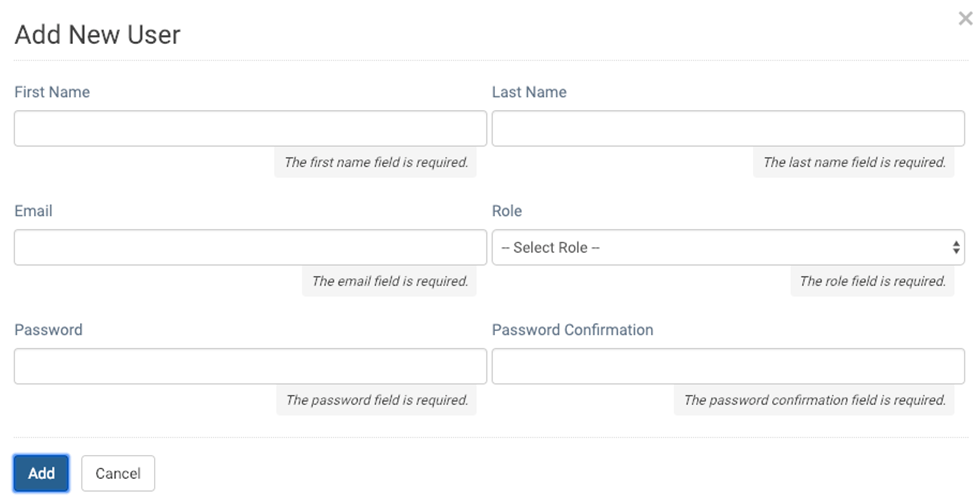
- First Name – You can add First Name of User.
- Last Name – You can add Last Name of User.
- Email – You can add Email of User.
- Role -You can select the user role from Role field.
- Password – You can add Password for User.
- Password Confirmation – You can re-enter the Password for the confirmation.
Manage User Roles
By default, system only comes with Admin & User role so you need to create your own roles using permissions available. You can manage User Roles under this menu item. You can add, delete & update User Roles permission from here.
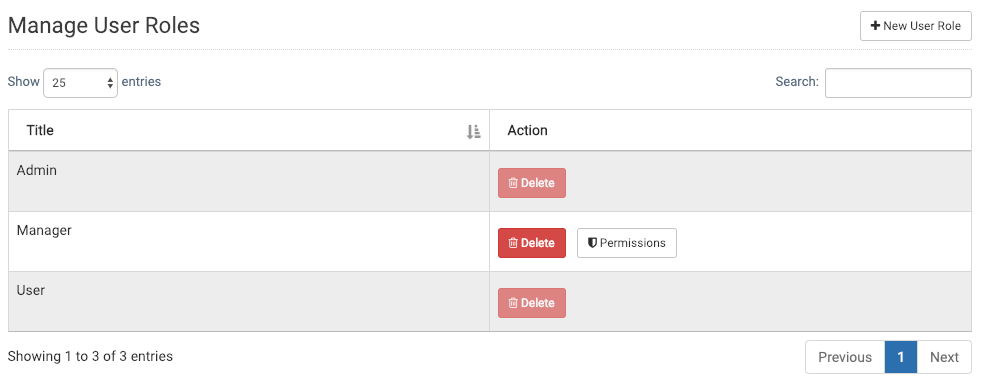
- You can Add New User Role.
- If you Delete user role then it will be deleted permanently.
- You can manage role permission by Permission.
Add New User Role
- To add new User Role, click on +New User Role button will open dialog with form to add new user role.
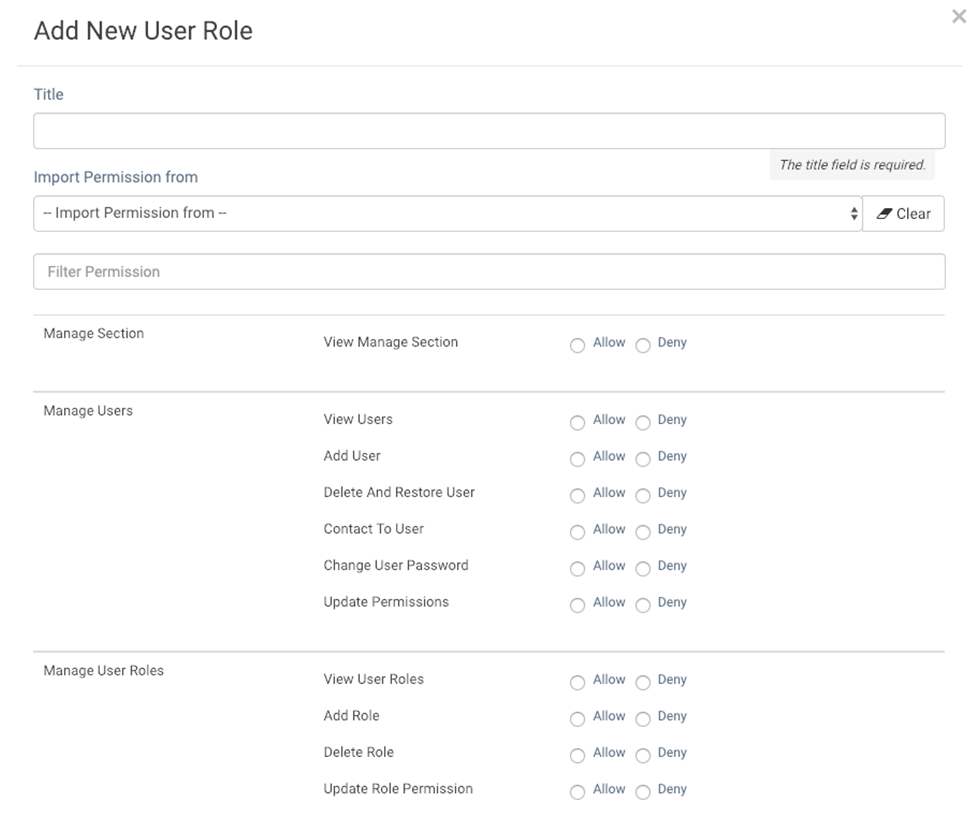
- Title – You can add Title for the new User Role.
- Import Permission from – You can import the role permission of existing user for new user role from here. (Please note: It just for your connivance to select the permission item checkboxes & won’t carry this relation further.)
- Then from the given entity of permission you can assign the permission to the new role or able to update existing imported permission.
- Filter Permission - Using Filter Permission you can filter the permissions as per your choice.
- Submit – Click on the submit button you can submit the permission for that role.
Manage Languages
You can add new language or alter the current one using PoEdit software.
-
Poedit software this is free application available for Windows, Mac OSX & Linux to edit PO files. You can download it fromhttp://www.poedit.net/
- Once you have successfully downloaded application, install it on your system.
- Once the installation successful you can add new language or edit existing one as required.
- All the locale/language files are in folder called locale
- Follow below instruction to edit current language/words etc.
- Go to folder called locale then choose which language you want make changes for suppose you want to make changes for English the go to folder called en_US(Language Culture Name: http://msdn.microsoft.com/en-us/library/ee825488(v=cs.20).aspxuse _ (underscore)instead of – (hyphen)) there is also folder called LC_MESSAGES go to it. Now you should see 2 files there.
- First is messages.mo is Binary file which the PHP will use for translation we do not need to do anything to this file.
- Second file is messages.poyou need to edit this file.
- Kindly open this file in Poedit:
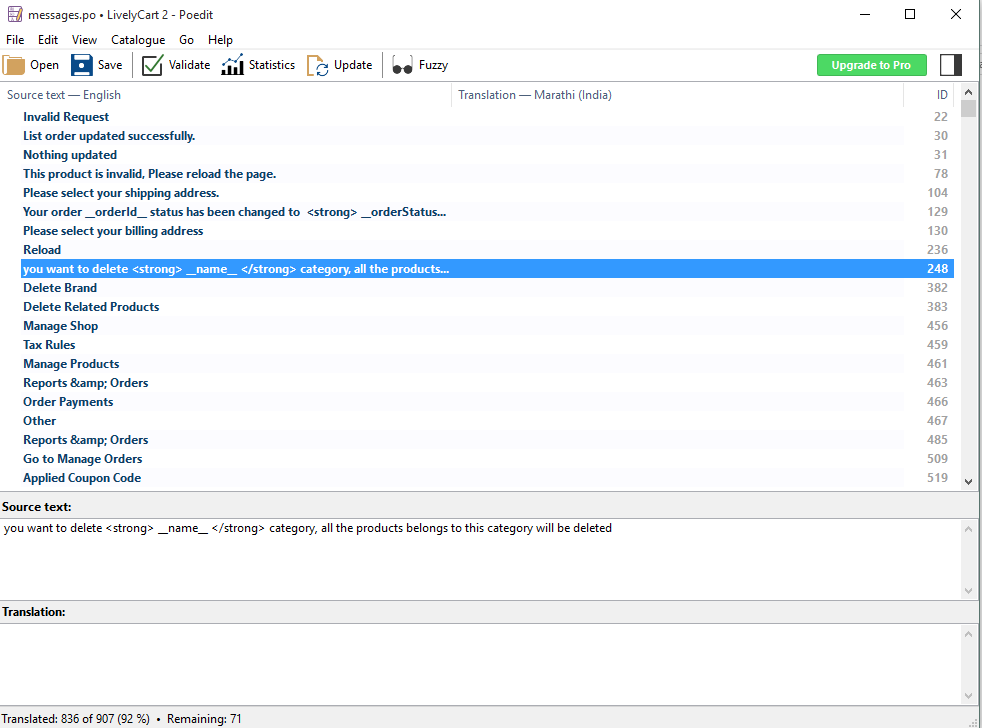
- e. The first column called source text is the original text. Second column called translation is replacement word for the same. E.g. if you want to changeDelete Brand word to your translation then what you can do here you can change it right in translation. Shows in the image below.

-
- Now Save it. It will automatically update messages.mo file & will available for use.
-
- To add New Language, follow below instruction
- Go to folder called locale and make copy of en_USfolder for your language say hi_IN(follow the folder naming convention).
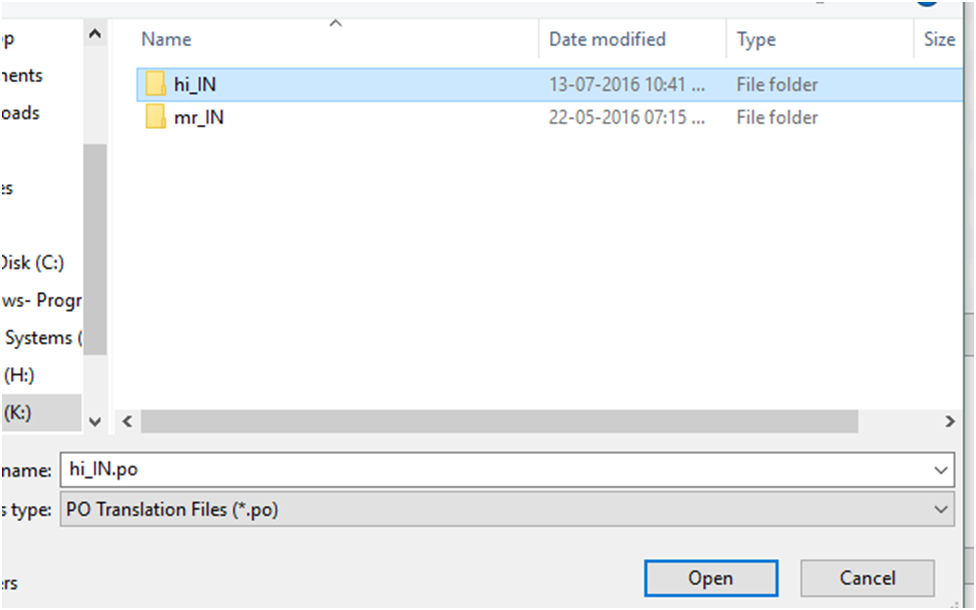
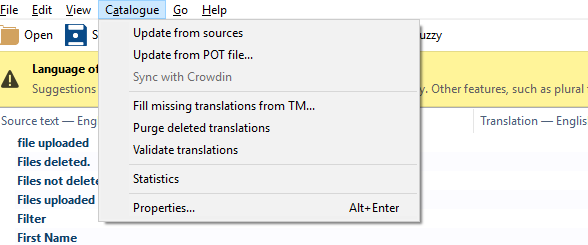
- Then open file messages.poopen it in to the PoEditor, once it opens first you need to edit properties.
- Choose Your language
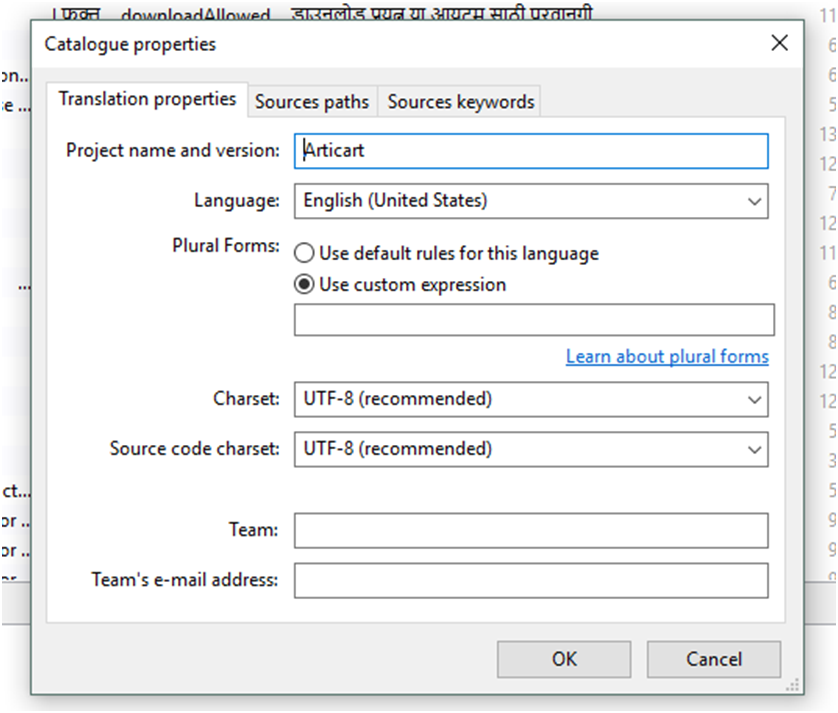
- And make Translations for source text as show above.
-
- Please notedo not changeword like __word__, :word, %wod% etc. These are the special words will automatically replace with dynamic words. Say for store name etc. Fit these to complete your sentence. E.g., Welcome to __storeName__ will turn to Welcome to Your XYZ Store like so.
- Save the file.
- Now open Store configuration file (config/locale.php ) in any text editor & add/ edit values to available array. Like I have added for French 'fr_FR' => 'français'.
-
- It’s done for now you may set this as default language from .env file as shownabove.
Emails
Here is the list of emails sent by system for the particular events.
- User registration activation – Email contacting the activation link will be sent using this email. To activate account one needs to follow the link.
- Forgot Password – User can ask for reset password using the forgot password functionality, which sends an email to user containing link for password reset.
- Email Change – Email gets verified while requesting change, an email sends to the new email address containing verification link foractivation of new email.
- Order – Order related emails are sent to Store Administrator as well as Customer, while updating order Admin have option to send customer email or not.
- Contact Store – This form sends an email at business email address.
- Contact Customer – This form sends an email to Customer of that order.
Thank You
We have tried our best to explain the functionality as possible as via this document, Our System also help you while interacting with it.
We home this guide will help you lot.
Once again thank you so much for purchasing this product. I would be glad to help you if you have any questions relating to this product. No Guarantees, but We will do our best to assist.
We are the team of Designer & Developers, here are some of the Great tools and technologies we use day2day for the development:
HTML5, CSS3, jQuery, PHP, Laravel, AngularJS etc.
We also build iOS & Android Application.
If you need any Customization Work / Support on this Product or having any Project for us.
Please feel free to email us at [email protected]